
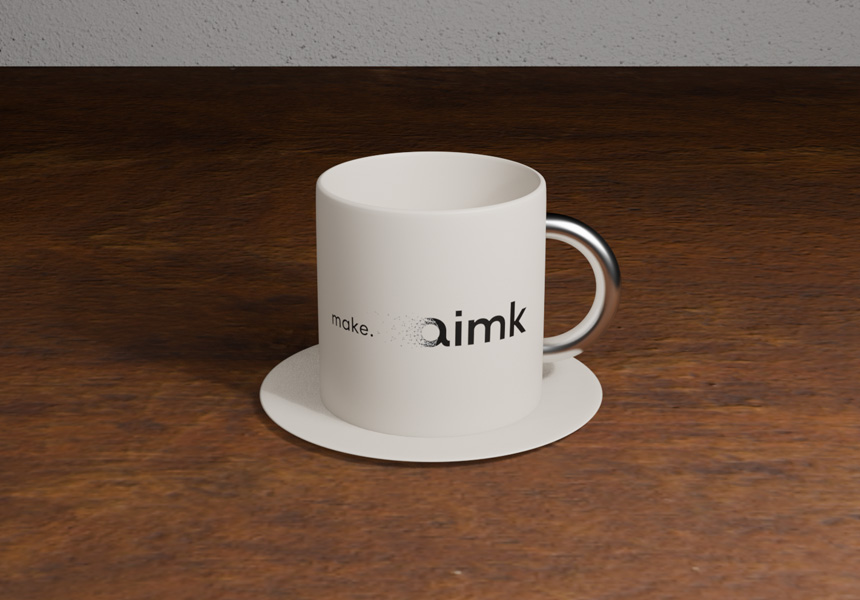
In the previous article, Blender UV Unwrapping Basics: Seams and Smart UV Project, we put a logo on a coffee cup. This time we'll build a background behind that cup and cover lighting — deciding where the light comes from and how it falls.
Up to now an HDRI has been lighting the whole scene. The trouble is that an HDRI lights everything evenly, which leaves you no say in where the light lands. So this time we'll turn it off, go completely dark, and place the lights one at a time.
* This article was verified with Blender 5.2 LTS, using EEVEE, the default render engine.
Check the size of your model
Before getting into lighting, check how big your model is. Light falls off with distance, so a model at real-world size lets you judge where to put a light, and how bright to make it, the way you would in real life.
Start with the cup. Each square on the floor of the 3D Viewport is 1 m. Select the cup and press N to open the sidebar, where Dimensions shows you its actual size.
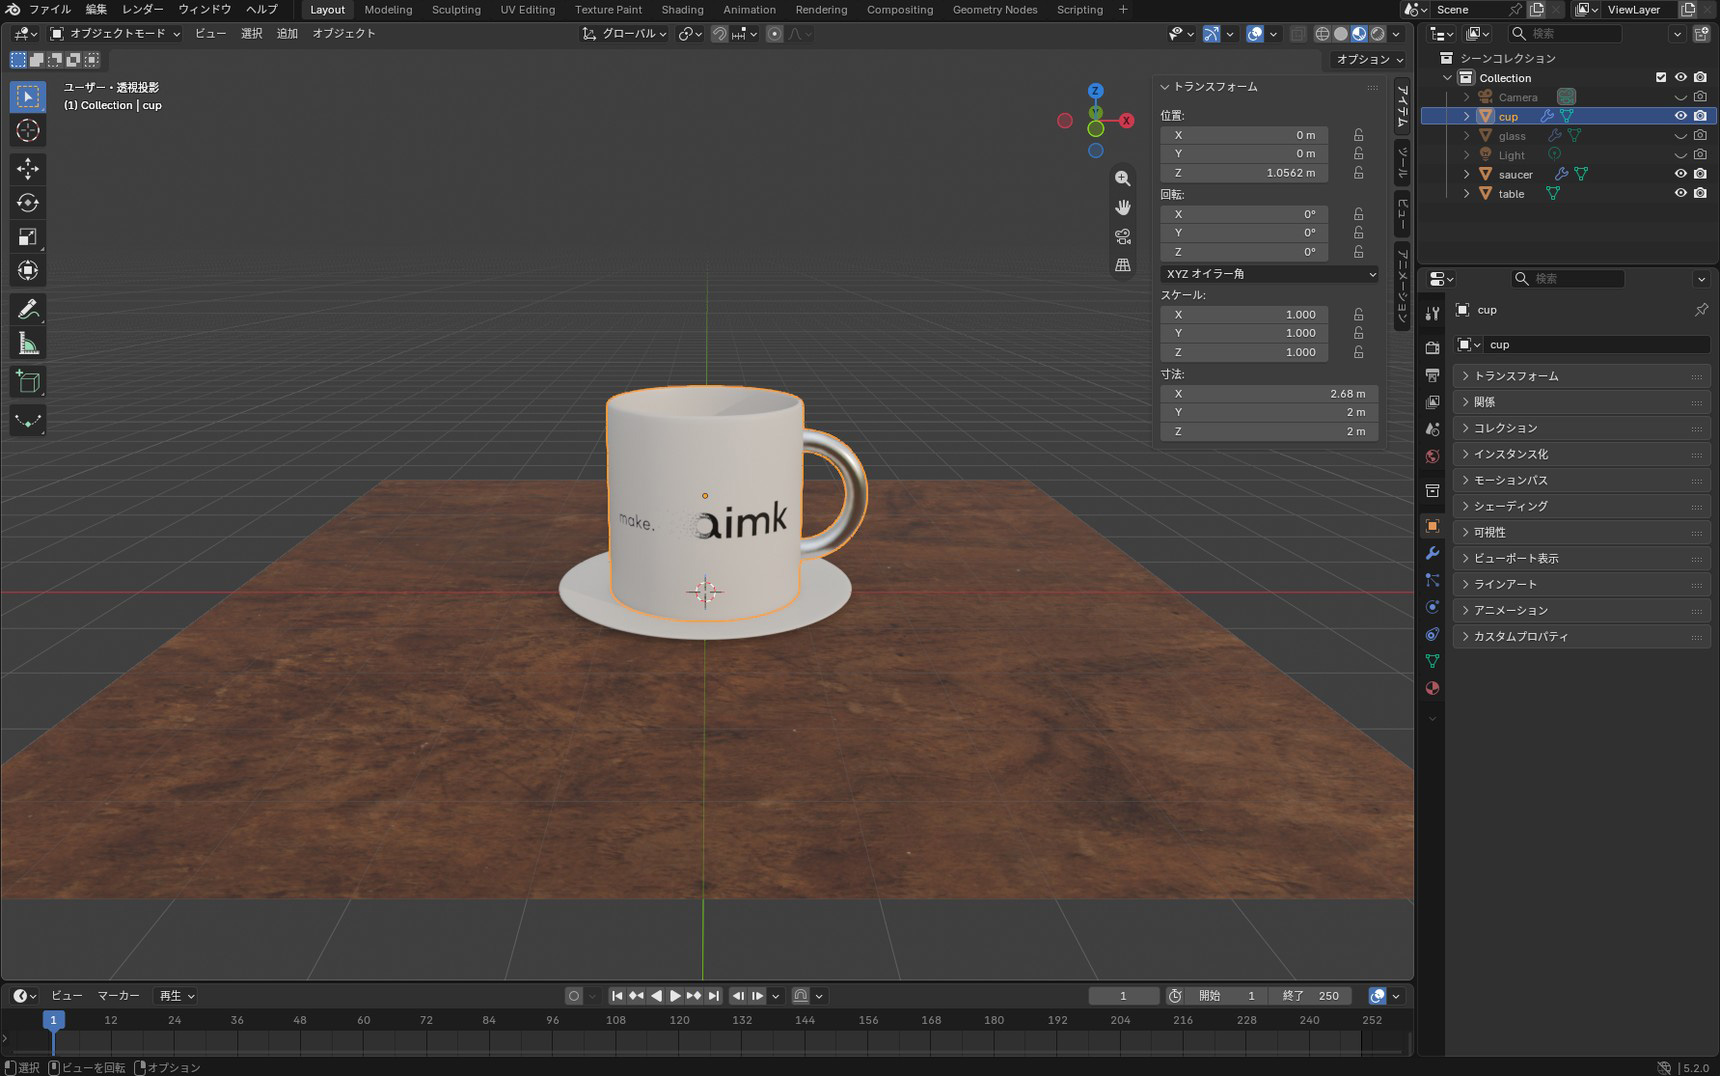
The cup is about 2 m across. In "Blender Modeling Basics: Move, Rotate, Scale, Extrude, and Modifiers" we started from a default-sized cylinder, and that size has carried through ever since. Next to a real coffee cup, it's roughly 25 times too big.
You could render it as it is, but it's worth fixing before you start lighting.
Scale it to real-world size
Select the cup and the saucer together, press S, and type 0.04. For the table, press S and type 0.12.
After scaling each of them, run Ctrl + A → "Scale".
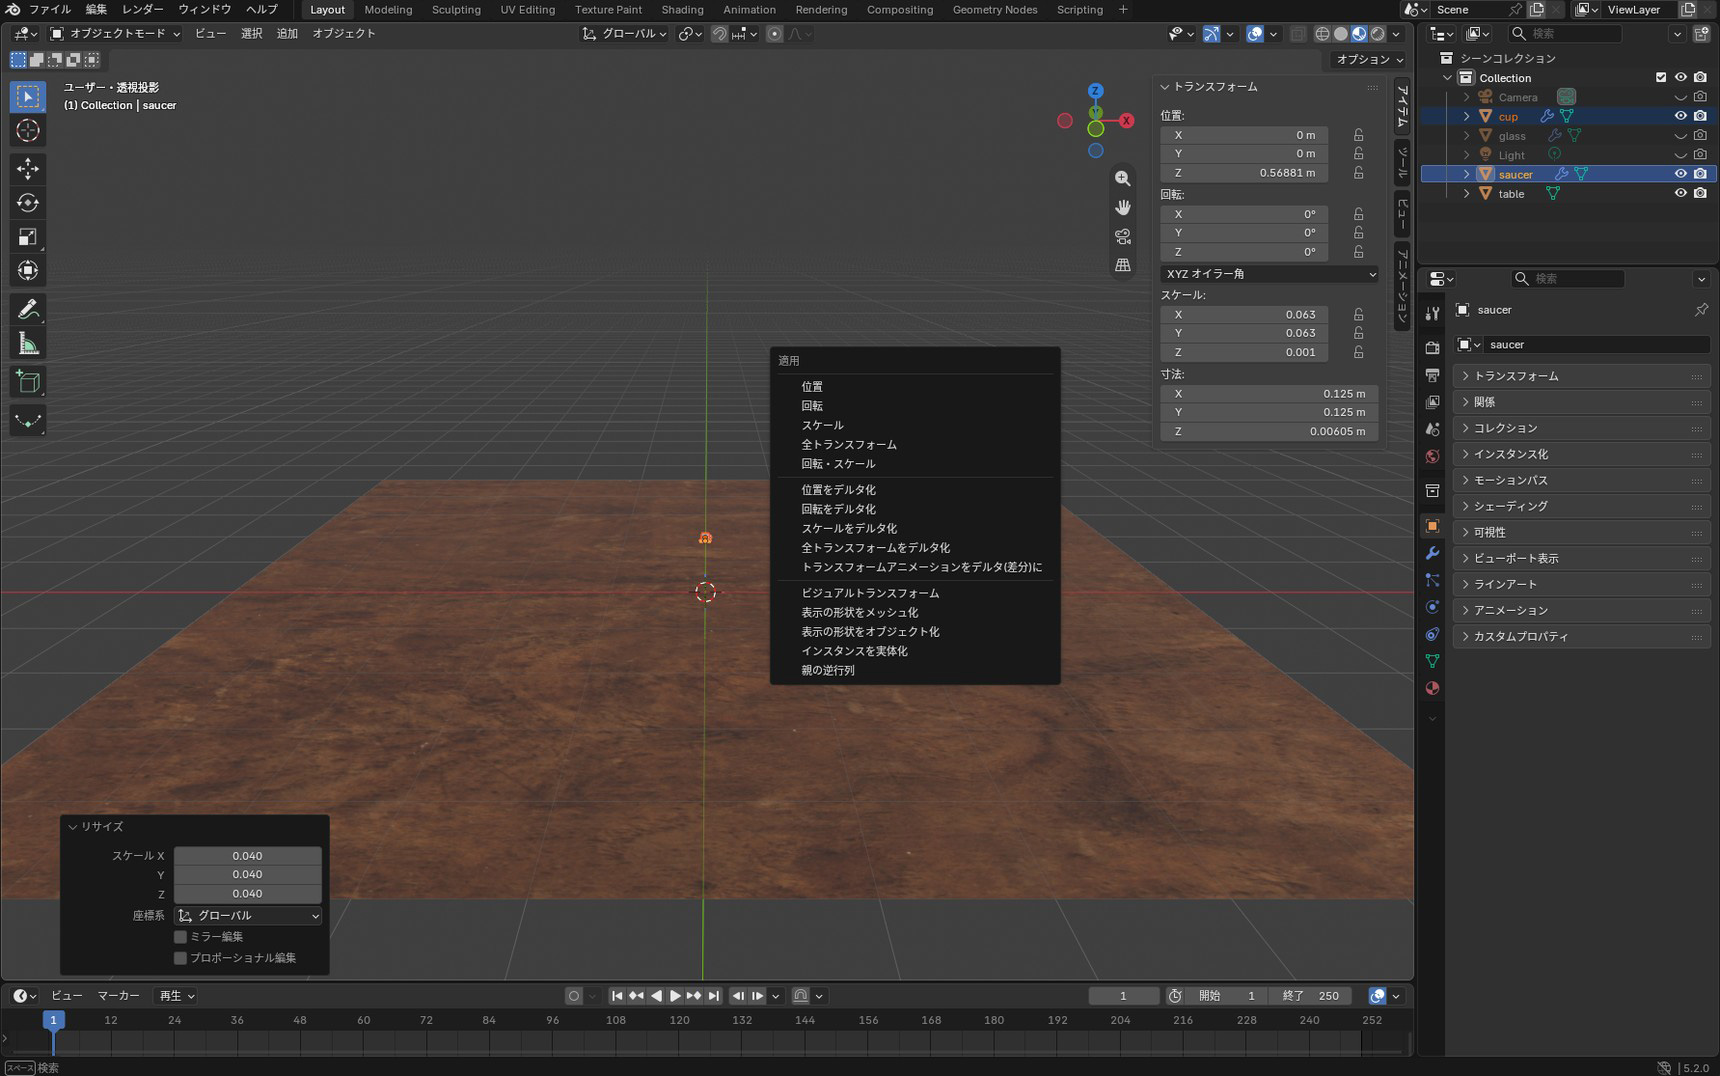
The cup and saucer are now floating above the table.
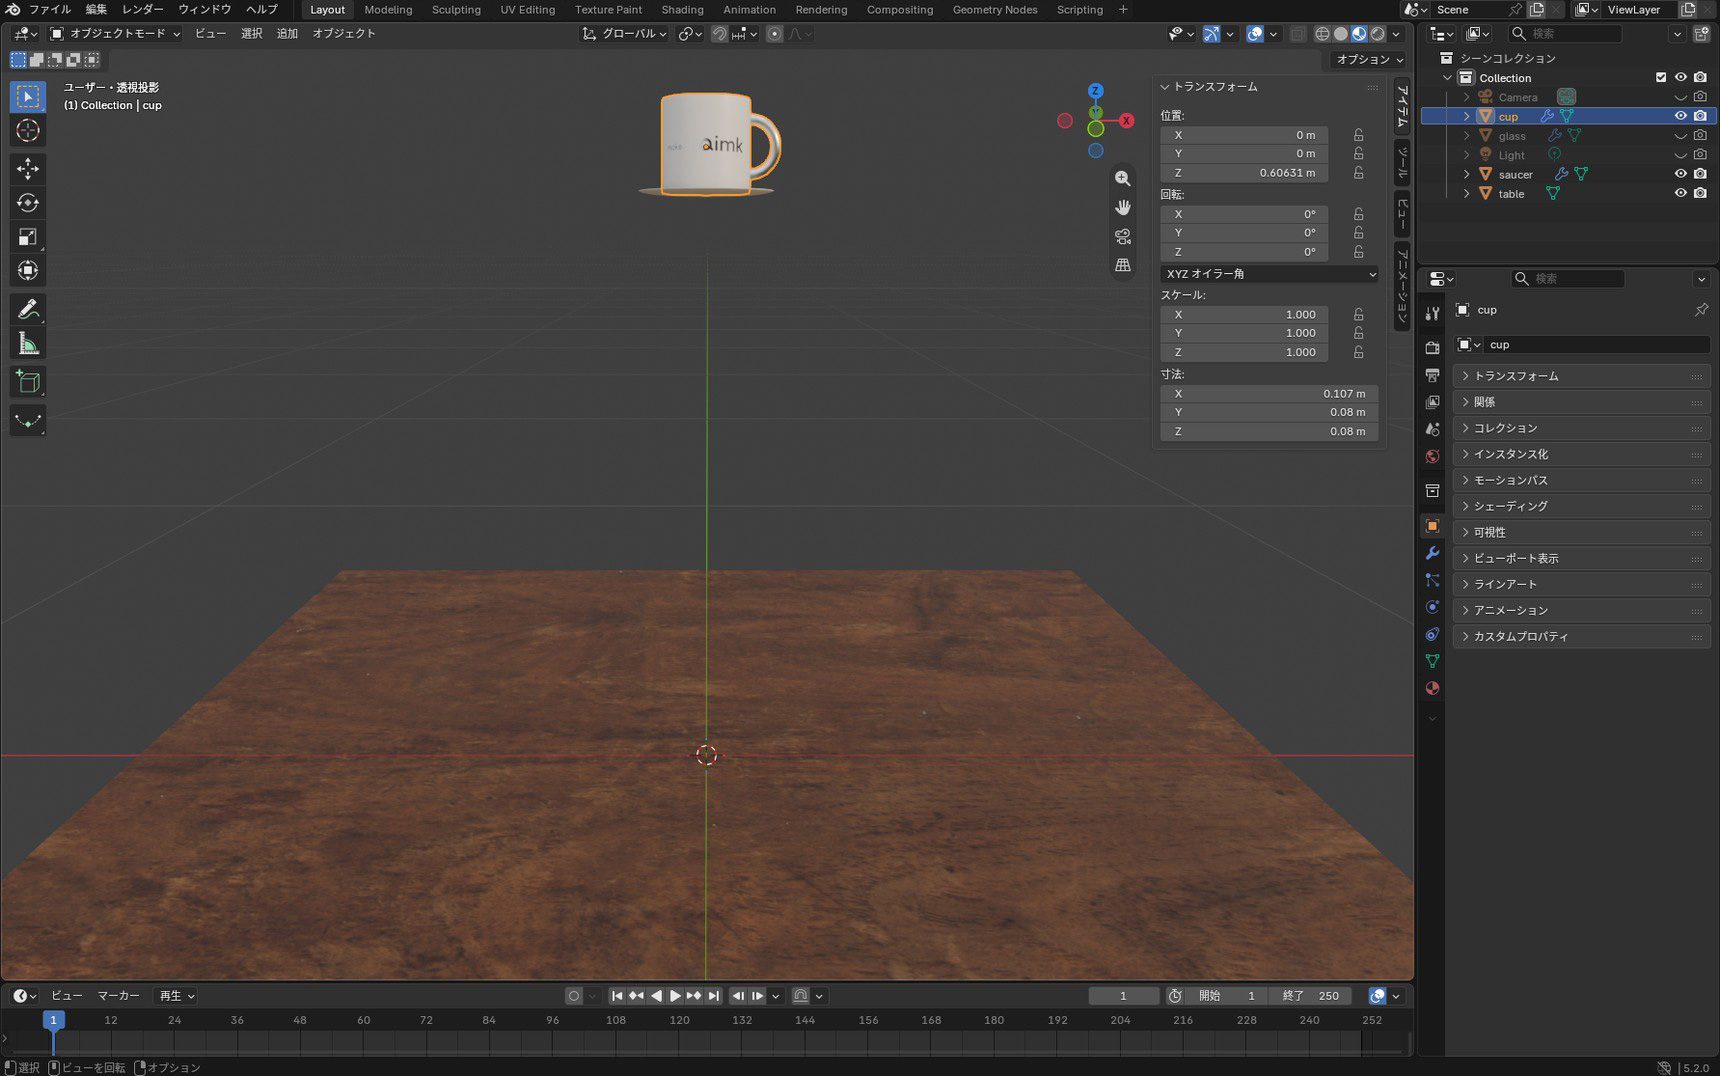
Press G → Z and lower them until they sit on the table.
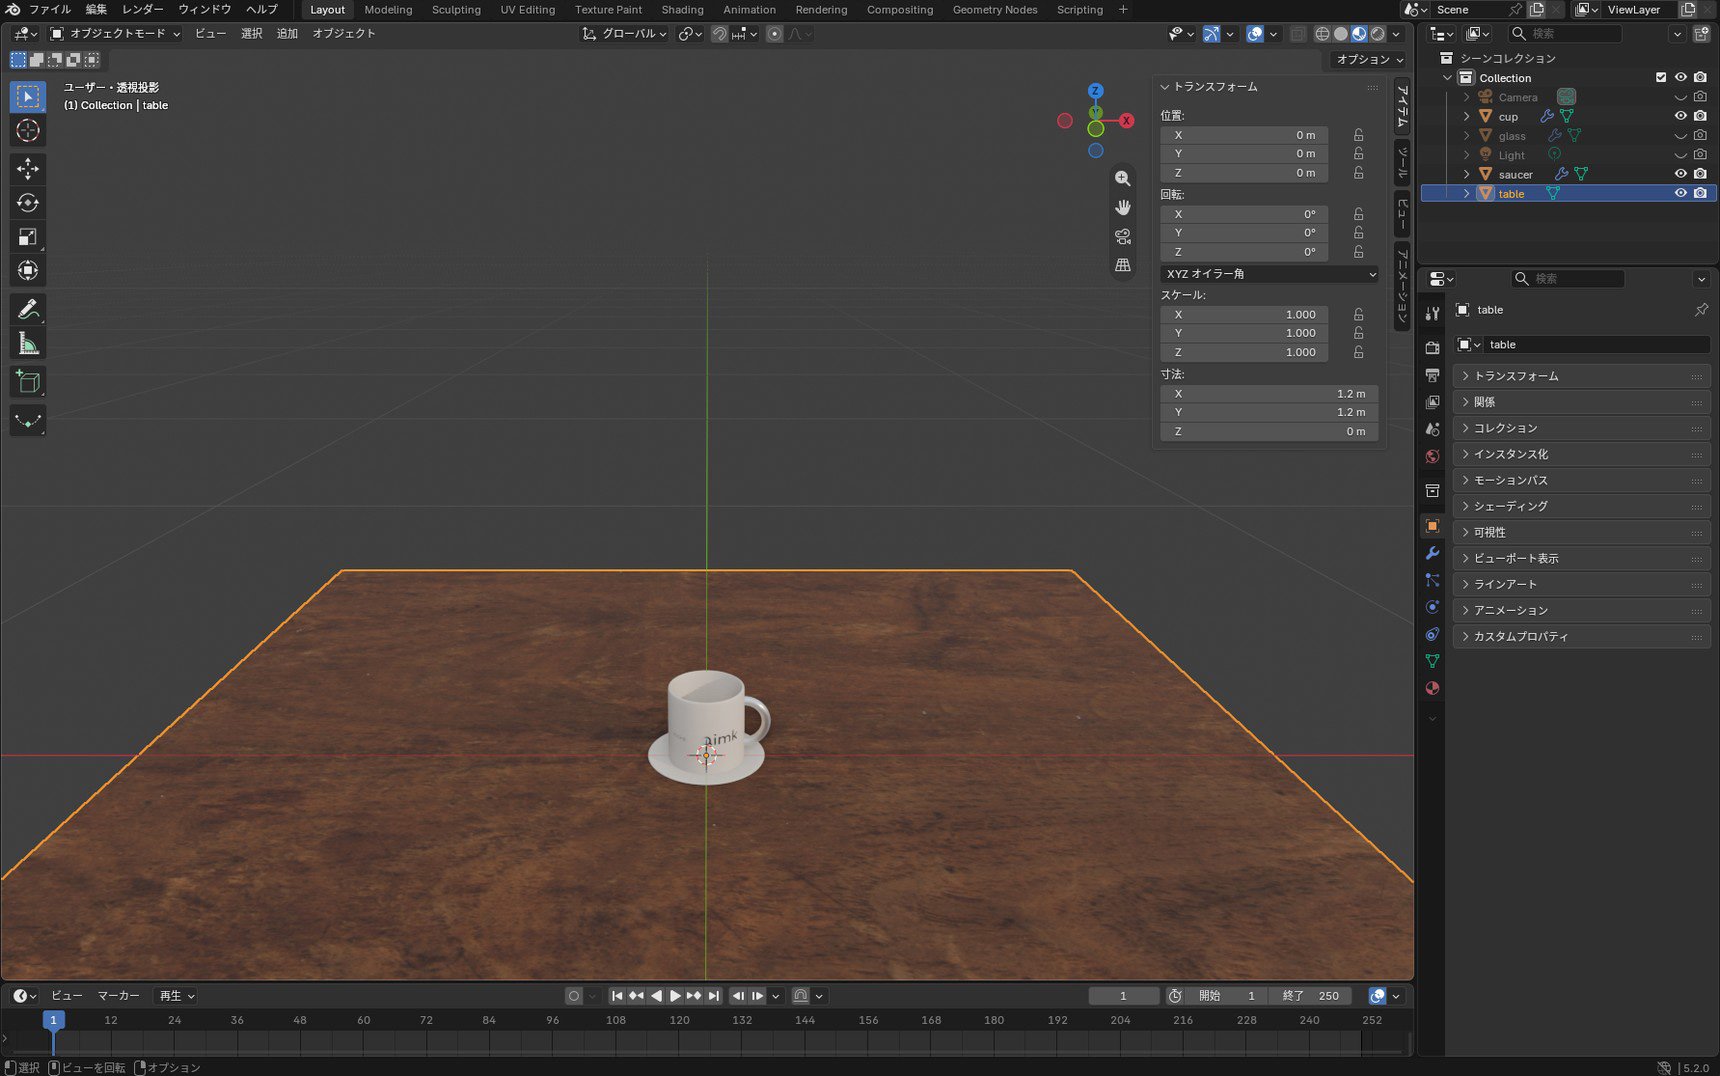
Turn the HDRI off and go dark
So you can see which light is lighting what as you go, start by taking the scene to black.
Of the four round icons at the top right of the 3D Viewport, switch to "Rendered", the one on the far right. Rendered view shows the lights you've placed in the scene, so you can adjust them while watching how the light actually falls.
The HDRI lighting your scene right now is set on the World. Open the "World" tab in Properties and set "Strength" to 0.
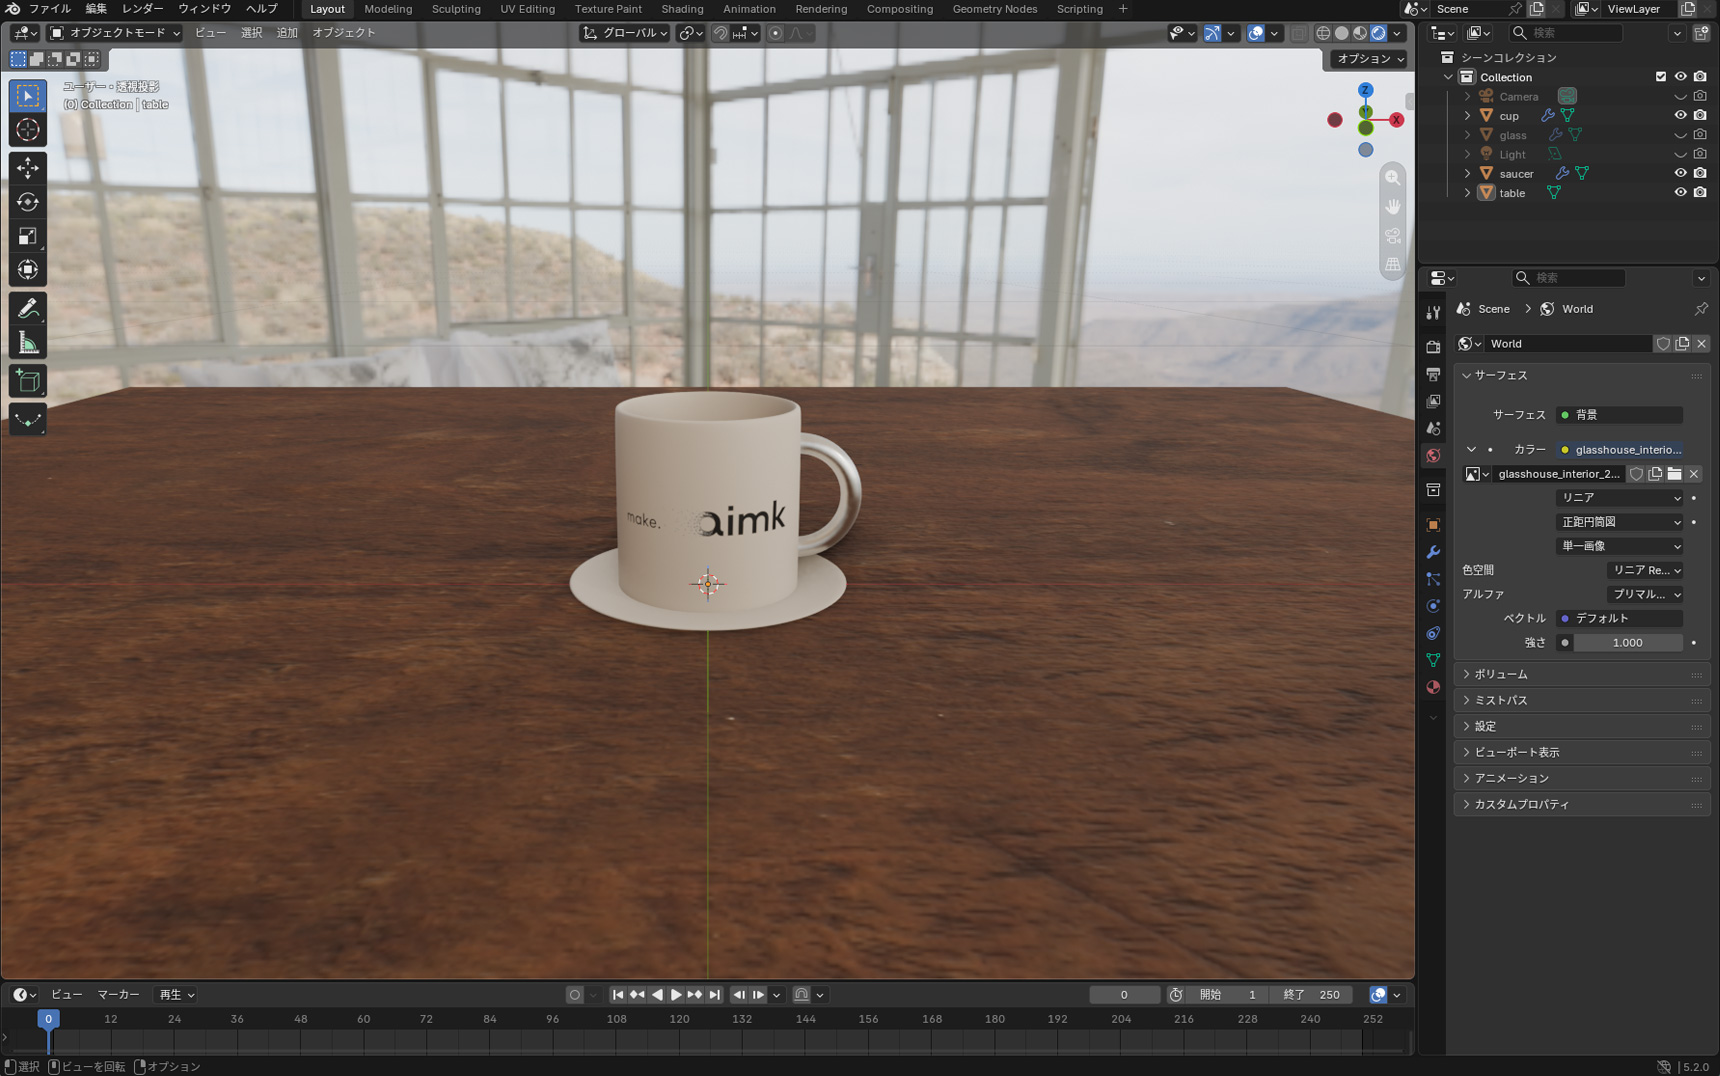
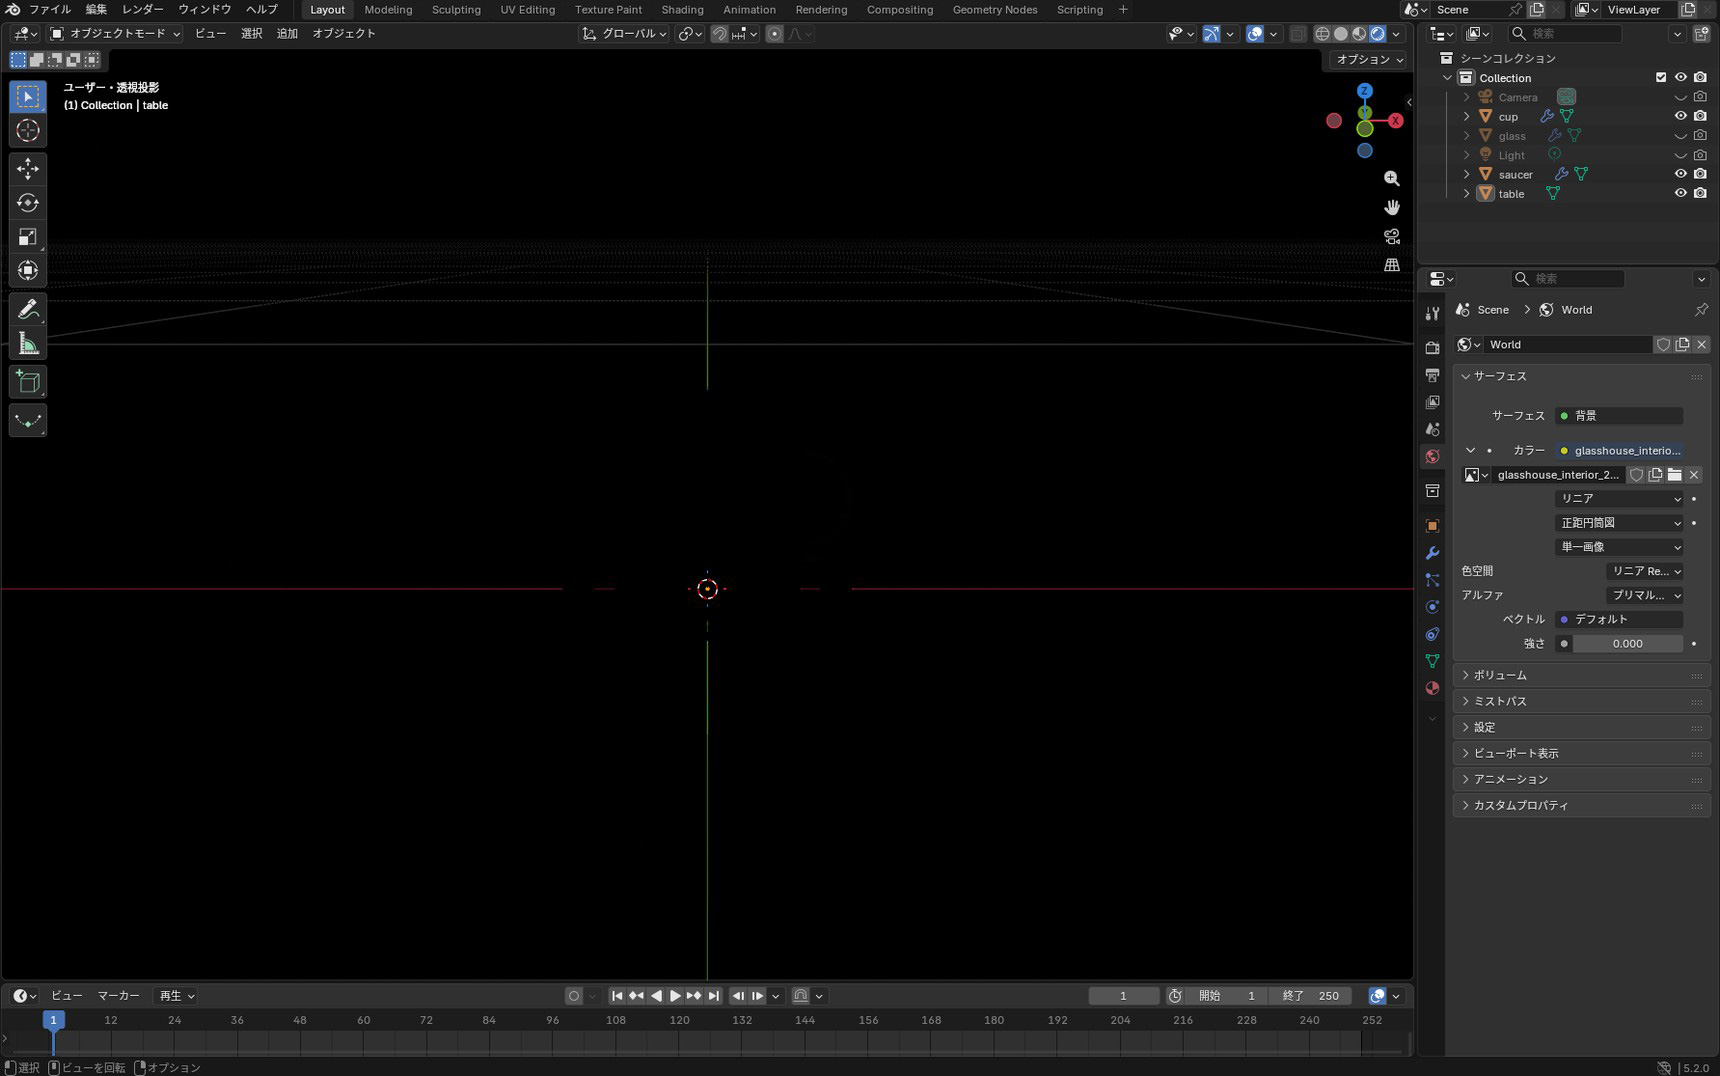
The screen has gone completely dark. This is where we start adding light. Set Strength back to 1.0 at any point and the HDRI comes back.
Stand a wall behind the cup
The HDRI was doubling as the background, so turning it off leaves nothing but darkness behind the cup. Light the cup from there and it reads as floating alone in the dark. Standing a single plane behind it makes the cup look like it's sitting in a room.
Add the wall
If it's too dark to move objects around, switch back to "Material Preview", the second icon from the right. It ignores the scene lights and shows everything brightly, which makes positioning easier.
Add a plane with Shift + A → "Mesh" → "Plane" and give it these values.
- Dimensions: X
1.2 m/ Y0.8 m - Position: X
0/ Y0.6/ Z0.4 - Rotation: X
90°
The 1.2 m width matches the table. Setting Z to 0.4 puts it at exactly half of the 0.8 m height, which lines the bottom edge of the wall up with the tabletop. The X rotation of 90° stands the plane upright from flat.
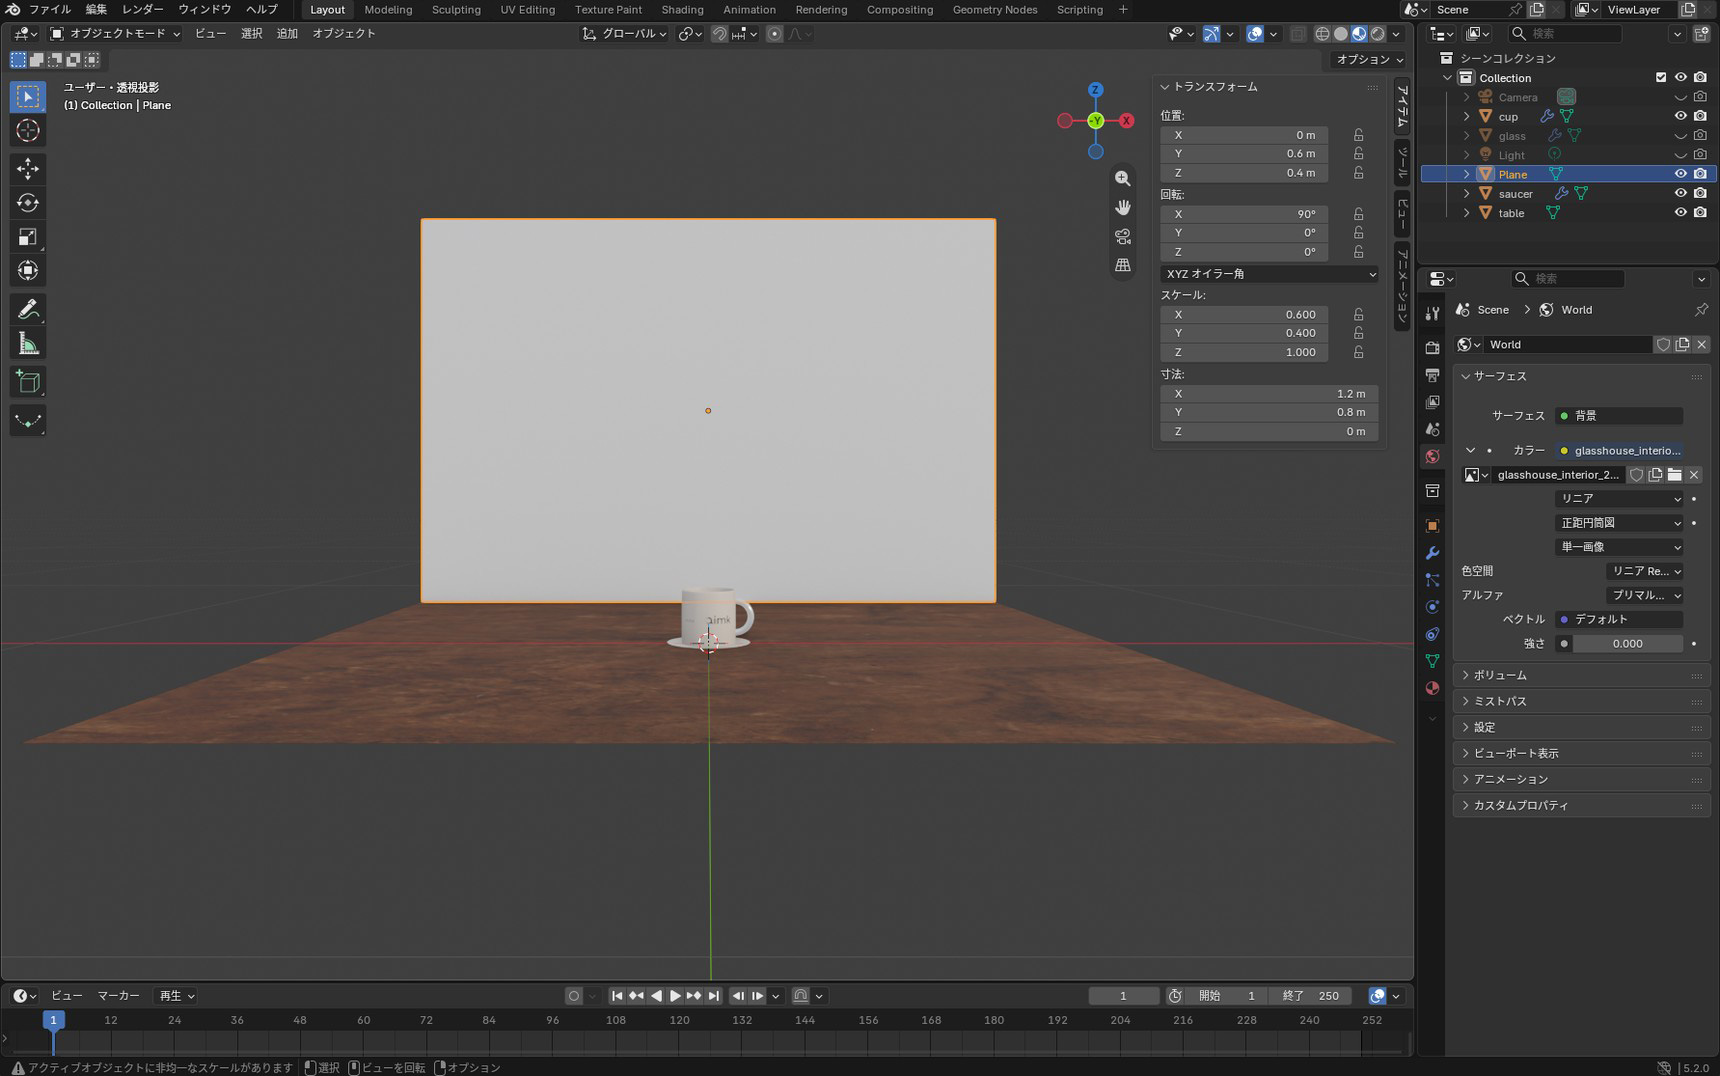
The Y position is 0.6, a positive number. Y is the depth axis, drawn in green in the 3D Viewport. Negative is towards you and positive is away, so a negative value would put the wall in front of the cup and hide it.
Apply the scale
Once you change the size of the plane, the status bar at the bottom of the screen reads "Object has non-uniform scale". That's because the X and Y directions were scaled by different amounts.
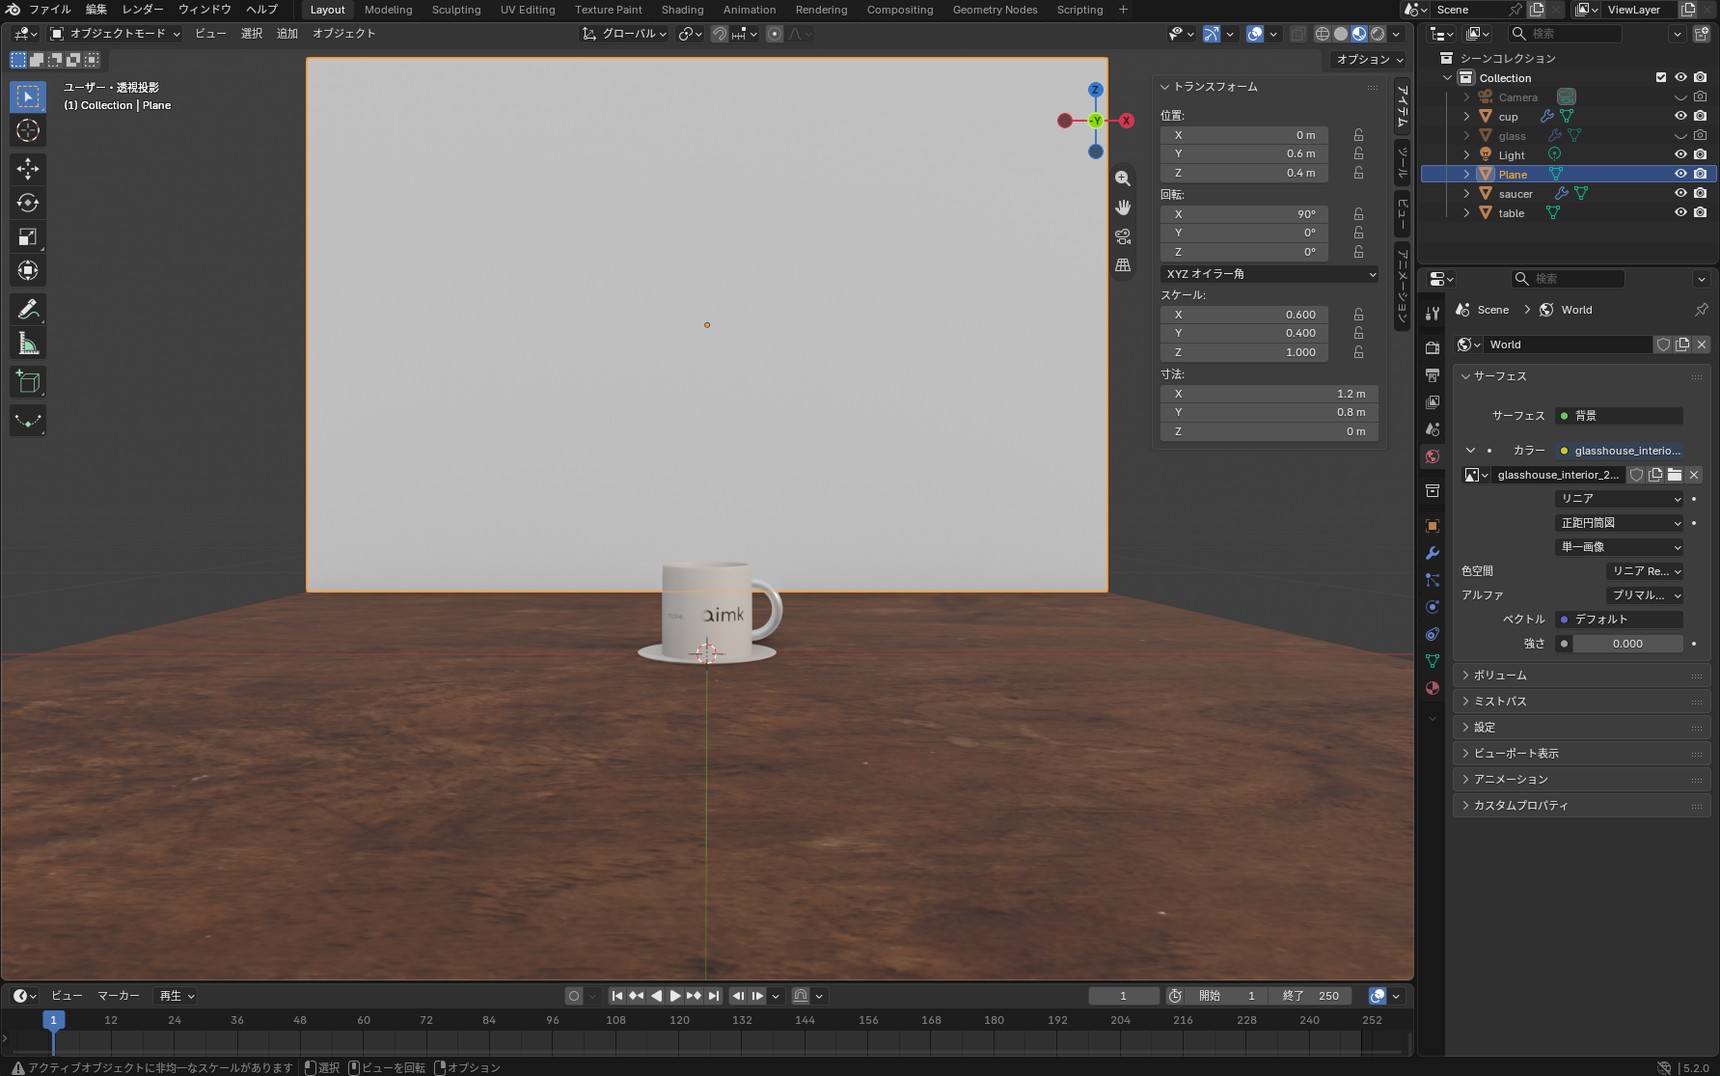
Run Ctrl + A → "Scale" and the message clears.
Decide the colour of the wall
Add a material to the wall with these values.
- Base Color: grey
- Metallic:
0 - Roughness:
0.9
The table stays as it is. We're not building a ceiling or side walls. Box the scene in and you lose track of whether the light on the cup is coming from the light you placed or bouncing back off a wall.
A plain wall is fine if you're only trying lighting out, though a texture will improve the result. Keep the background modest in colour and pattern so it supports the cup rather than competing with it.
Place the first light
Start with a single light and give the cup its light and shade. Once that first light has settled the basic look, add a second one to lift the areas that fell dark.
Use the light already in the scene
Blender's default scene comes with one light, called Light, in the Outliner. Rather than adding a new one, we'll use it.
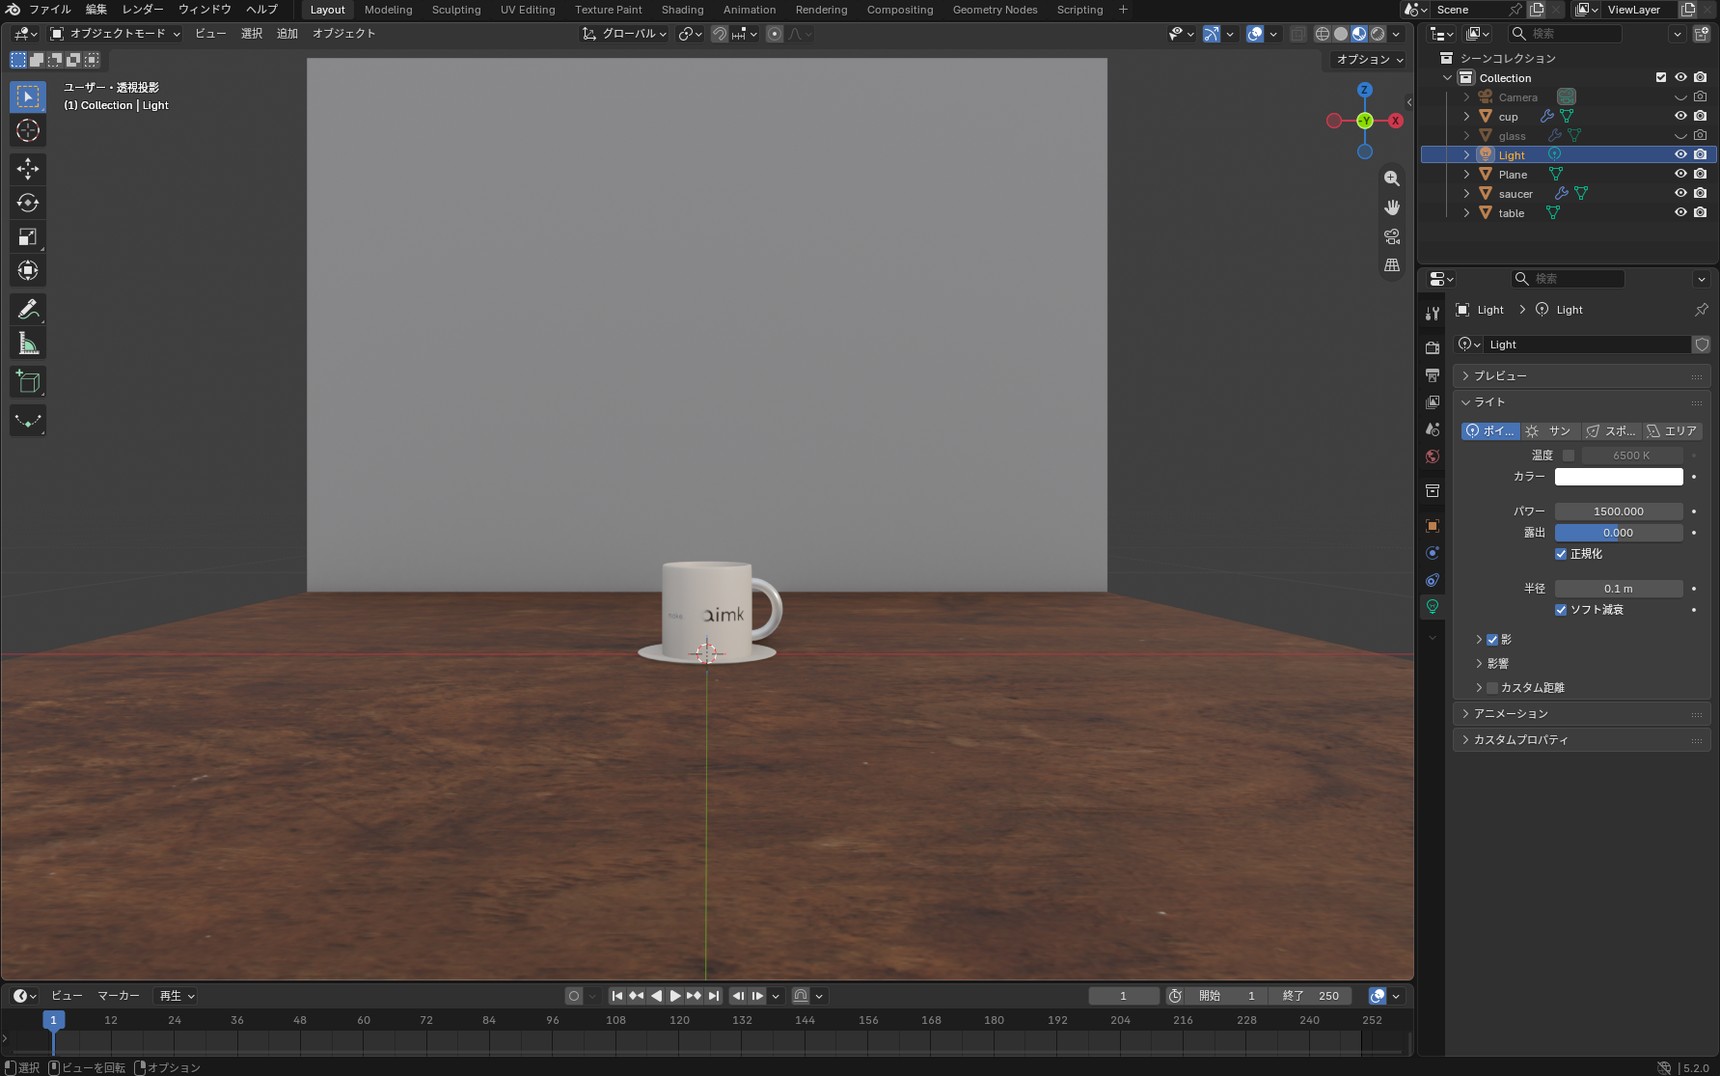
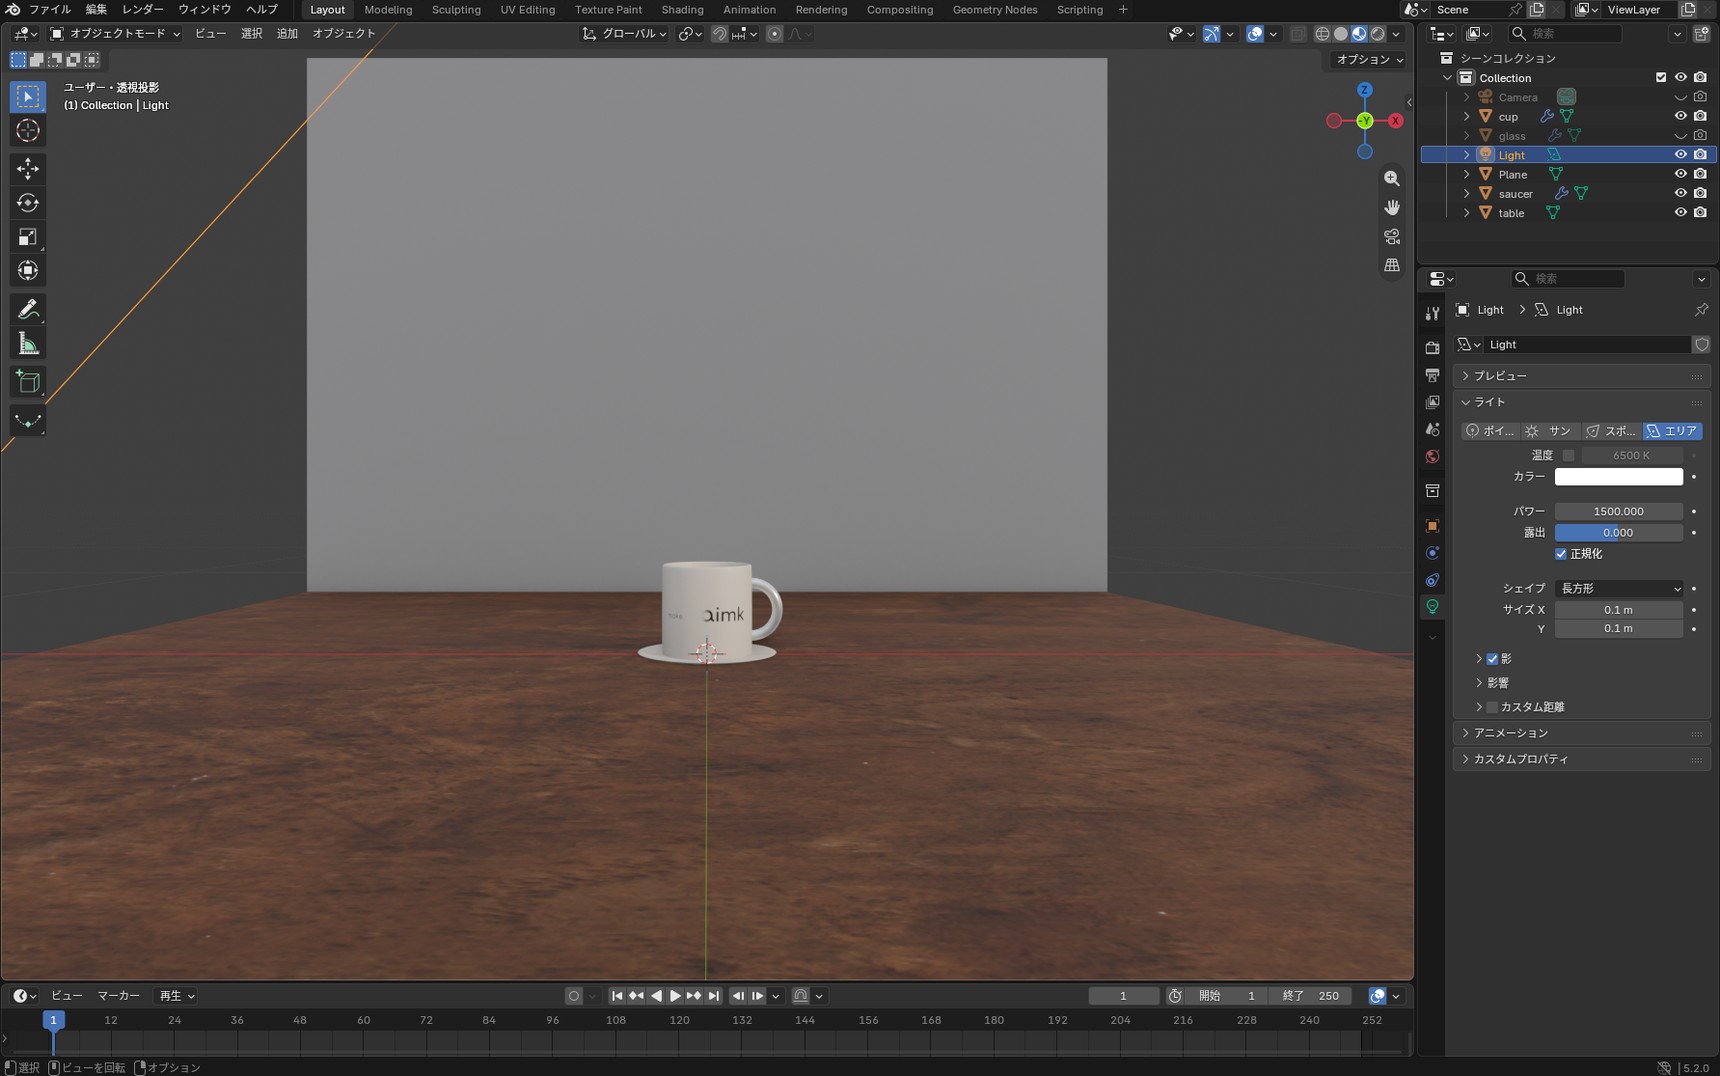
Select Light and open Light Properties. The tab at the top is set to "Point", so switch it to "Area".
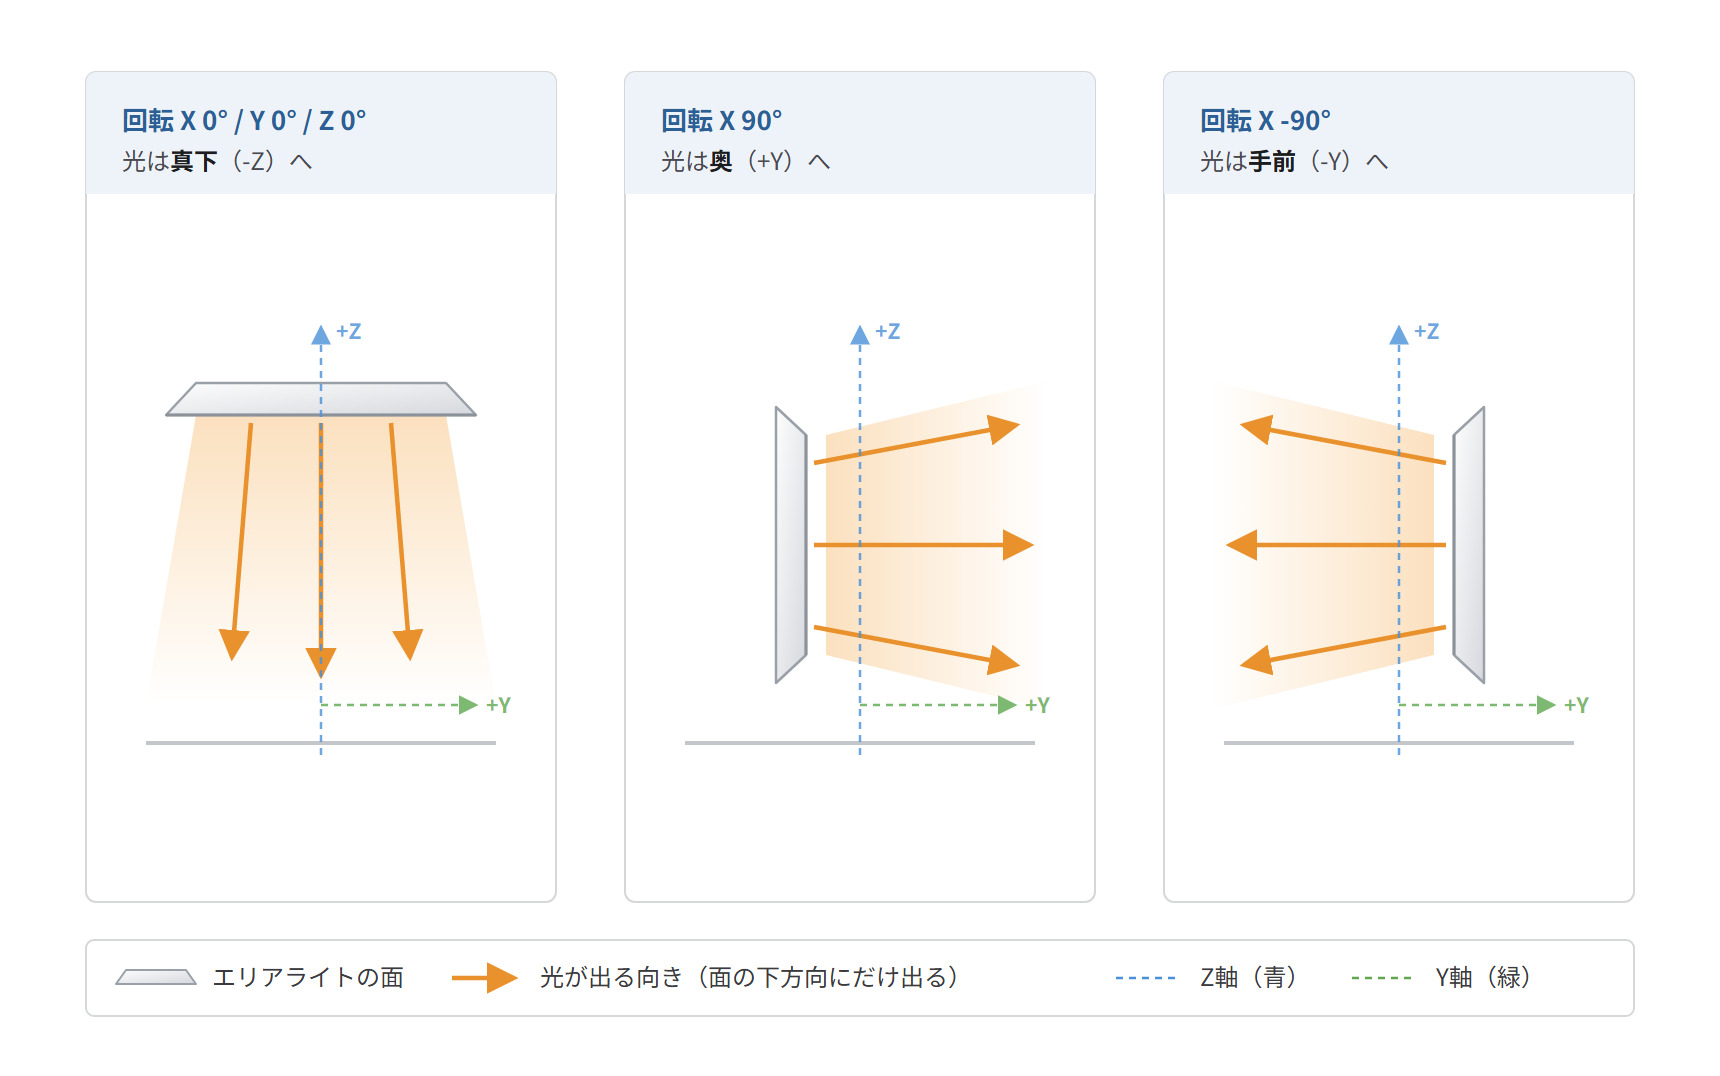
An Area light has a direction
An Area light emits from one side of its face only. The light leaves perpendicular to that face, so with every rotation at 0° it lights straight down.
An X rotation of 90° turns the light away from you, and -90° turns it towards you. Values in between angle it. When you've placed a light and nothing lit up, this is the first thing to check.
Light the cup from the front right
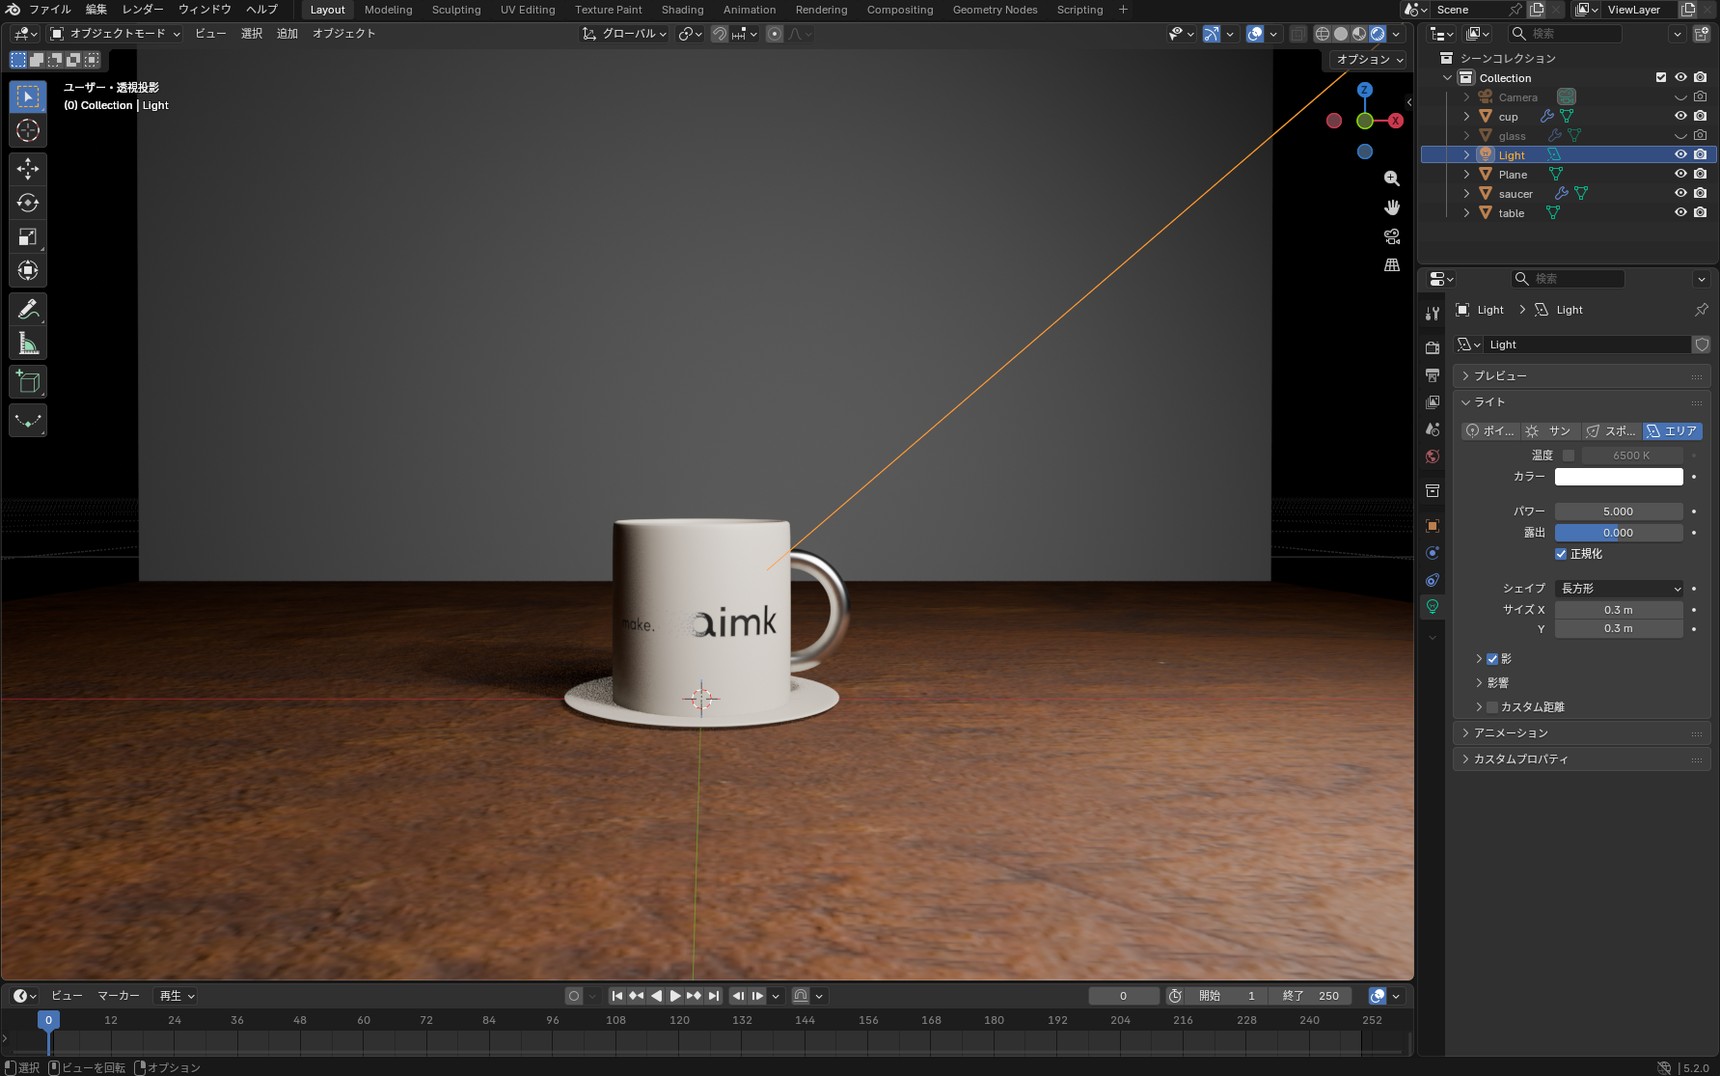
Give Light these values.
- Shape: Rectangle
- Size: X 0.3 m / Y 0.3 m
- Power: 5
- Position: X 0.25 / Y -0.25 / Z 0.28
- Rotation: X 55° / Y 0° / Z 45°
Leave "Exposure" at 0 and "Normalize" checked. Both are the defaults.
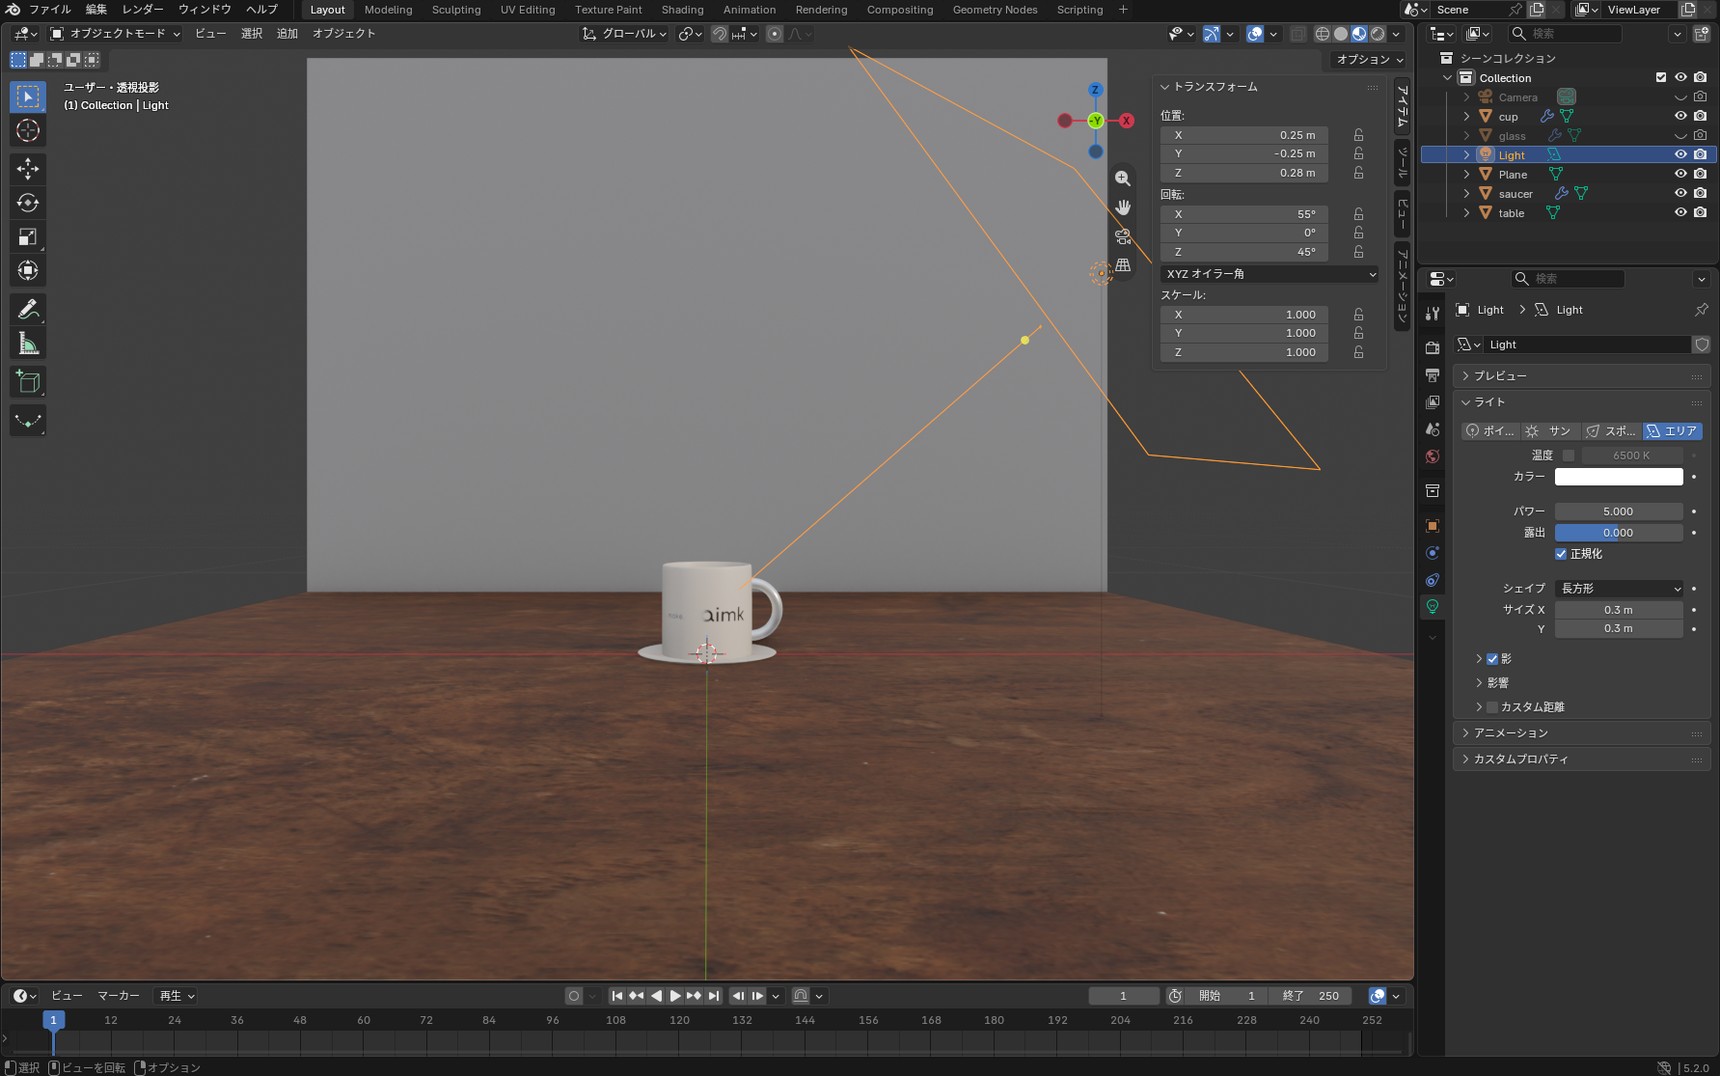
Switch the display back to "Rendered" to see what the light is doing. It reaches the cup from the front right, slightly above.
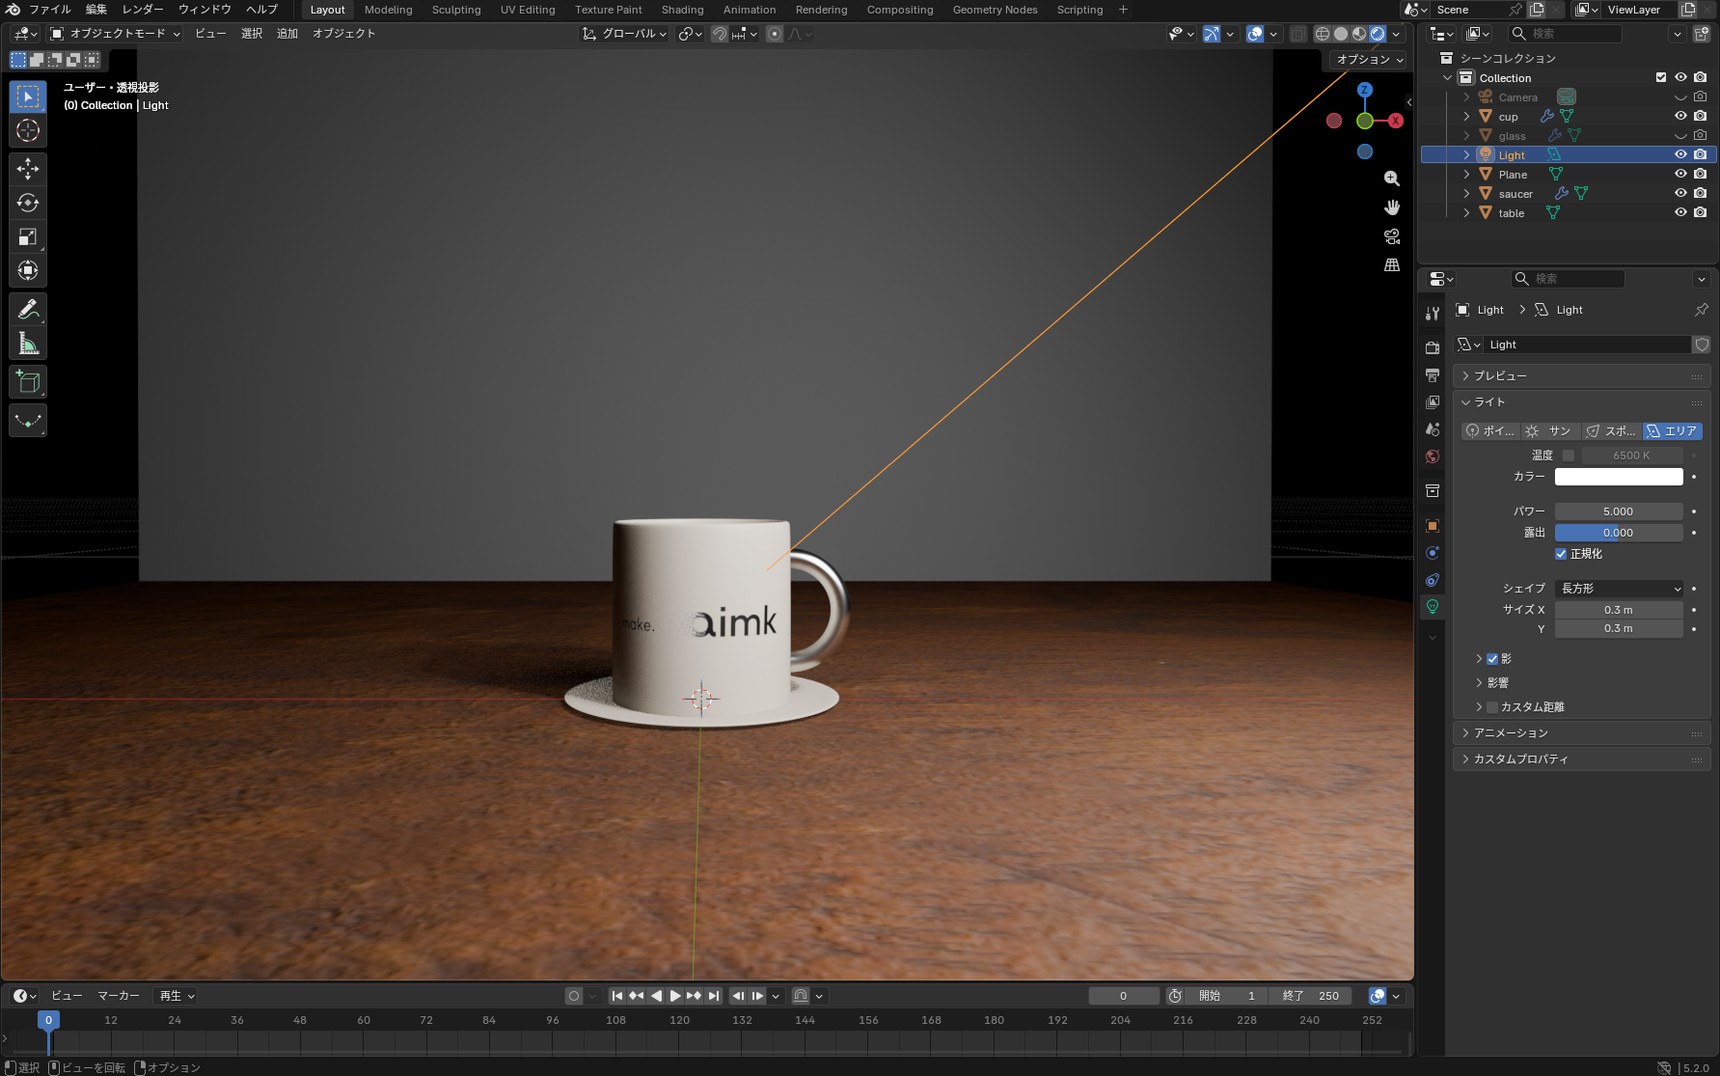
The cup is visible now. The right side is bright and the left is dark. That difference between light and shade is what gives it depth.
The power you need depends on scale and distance
The 5 we put into Power is a small number next to the "100 W to 1000 W" you'll find when you look up Blender lights. The thing is, the power you need changes with the size of your scene and the distance to the
light. Rather than going by the number alone, adjust it while watching the result.
Double the distance, quarter the brightness
Light weakens as it travels. Double the distance and it drops to a quarter; triple it and you're at a ninth. It falls with the square of the distance. Scaling the cup to real-world size changed the power it needed by exactly this much.
| Size of the cup | Distance to the light | Power needed |
|---|---|---|
| 2 m across (before scaling) | Baseline | 1500 |
| 8 cm across (real-world size) | 1/25 | 5 |
Cut the distance to a twenty-fifth and the light you need drops by a factor of several hundred. Which is to say that 100 W and 1000 W are numbers written for a much larger scene. For something as small as a real-world coffee cup, Power lands in single digits.
Wondering why there's no "W" anywhere in Blender's interface? See the column "Why the Power field has no unit"
Where you put the light changes the result
Using the first light's settings as your baseline, change its position, rotation, and size and compare. Keep the viewpoint still and move only the light.
Light it from the front
- Position: X 0 / Y -0.35 / Z 0.28
- Rotation: X 55° / Y 0° / Z 0°
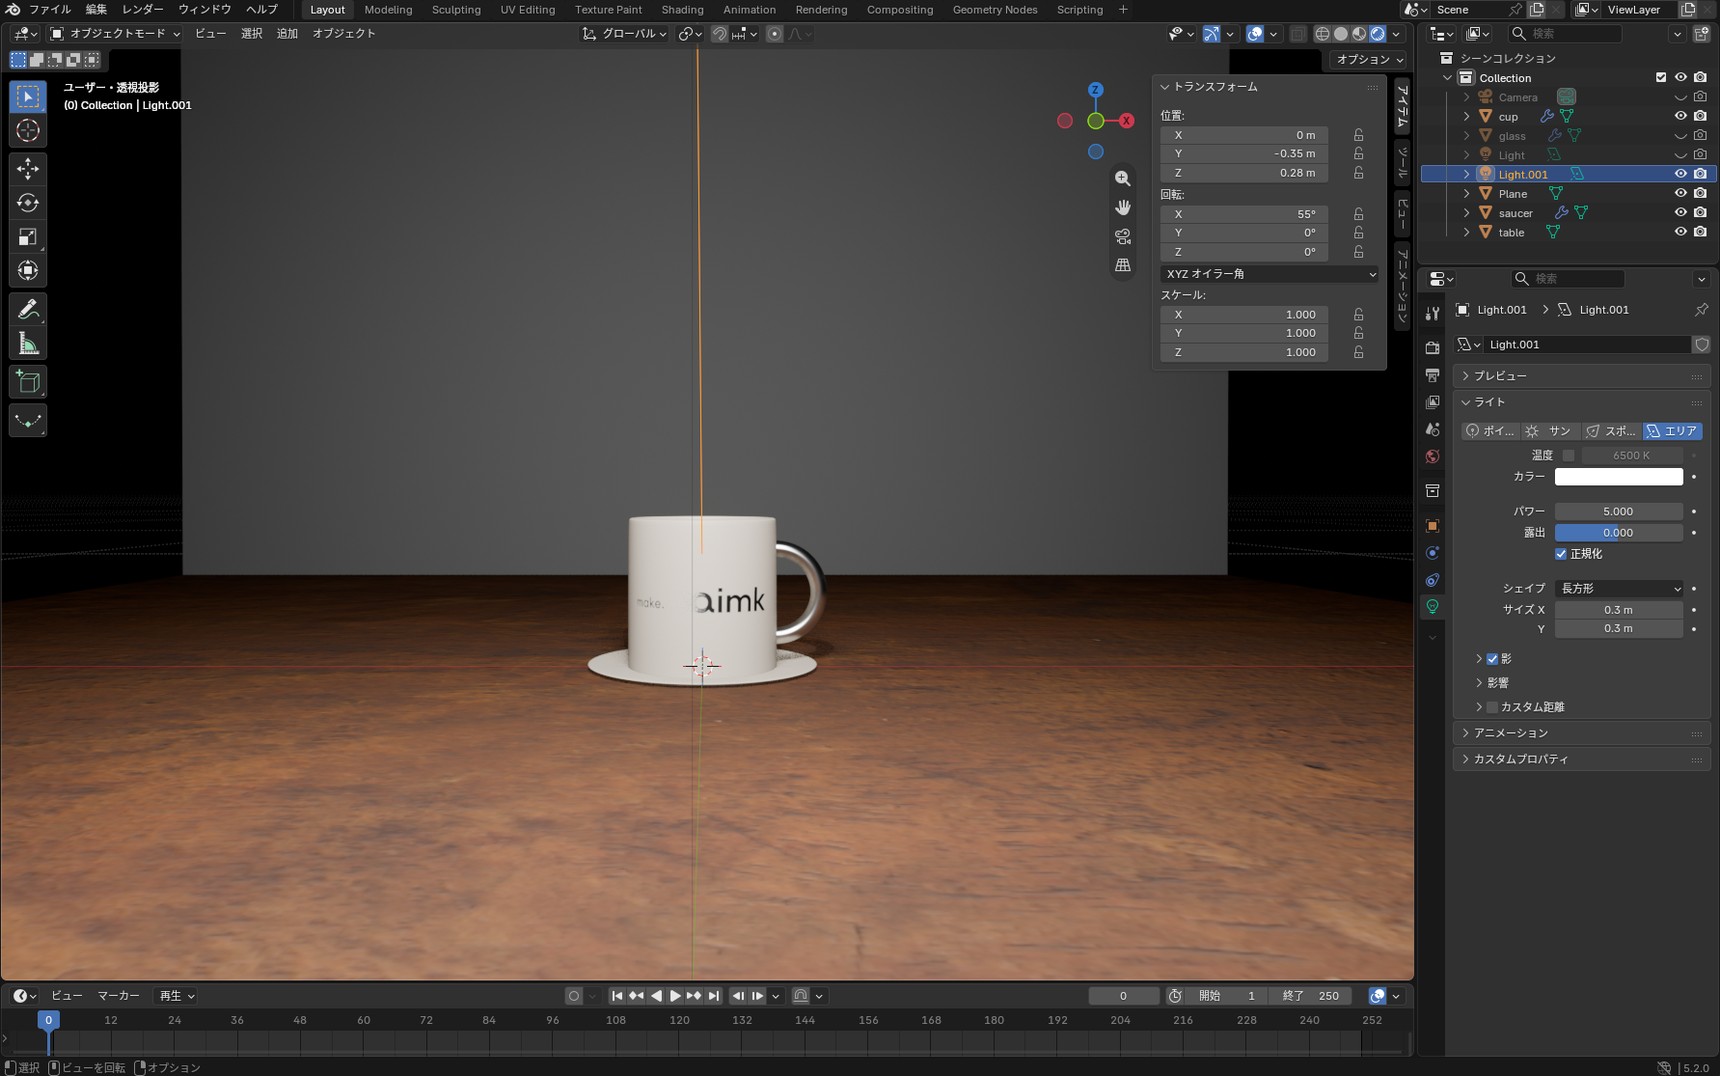
Both sides of the cup are equally bright and the roundness has gone. The shadow is hidden directly behind it. Without a difference between light and shade, even something round reads as flat.
Light it from the side
- Position: X 0.35 / Y 0 / Z 0.28
- Rotation: X 55° / Y 0° / Z 90°
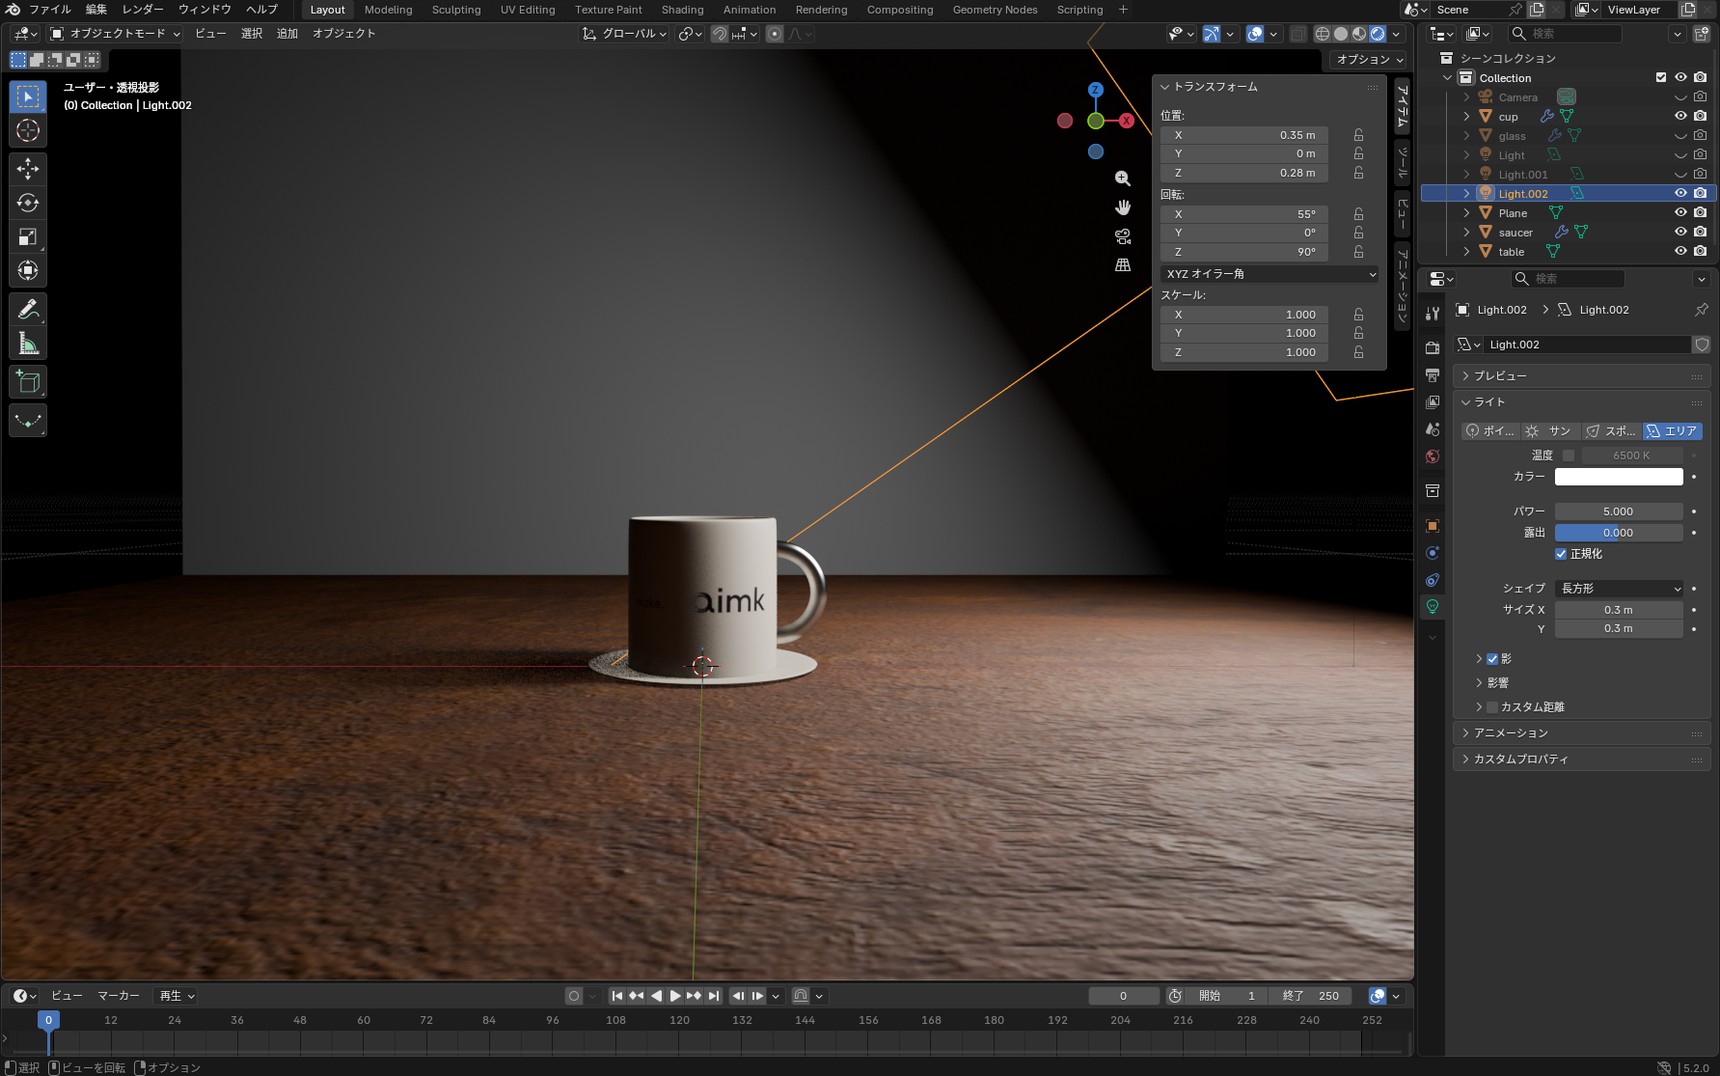
The left of the cup has gone dark and only the right is lit. The line between light and shade runs vertically, and clearly.
The grain of the table shows up more than it did at the baseline. When light strikes a surface at a shallow angle, small bumps cast shadows of their own. Light from the side is what you use when you want to show texture.
Light it from above
- Position: X 0 / Y 0 / Z 0.4
- Rotation: X 0° / Y 0° / Z 0°
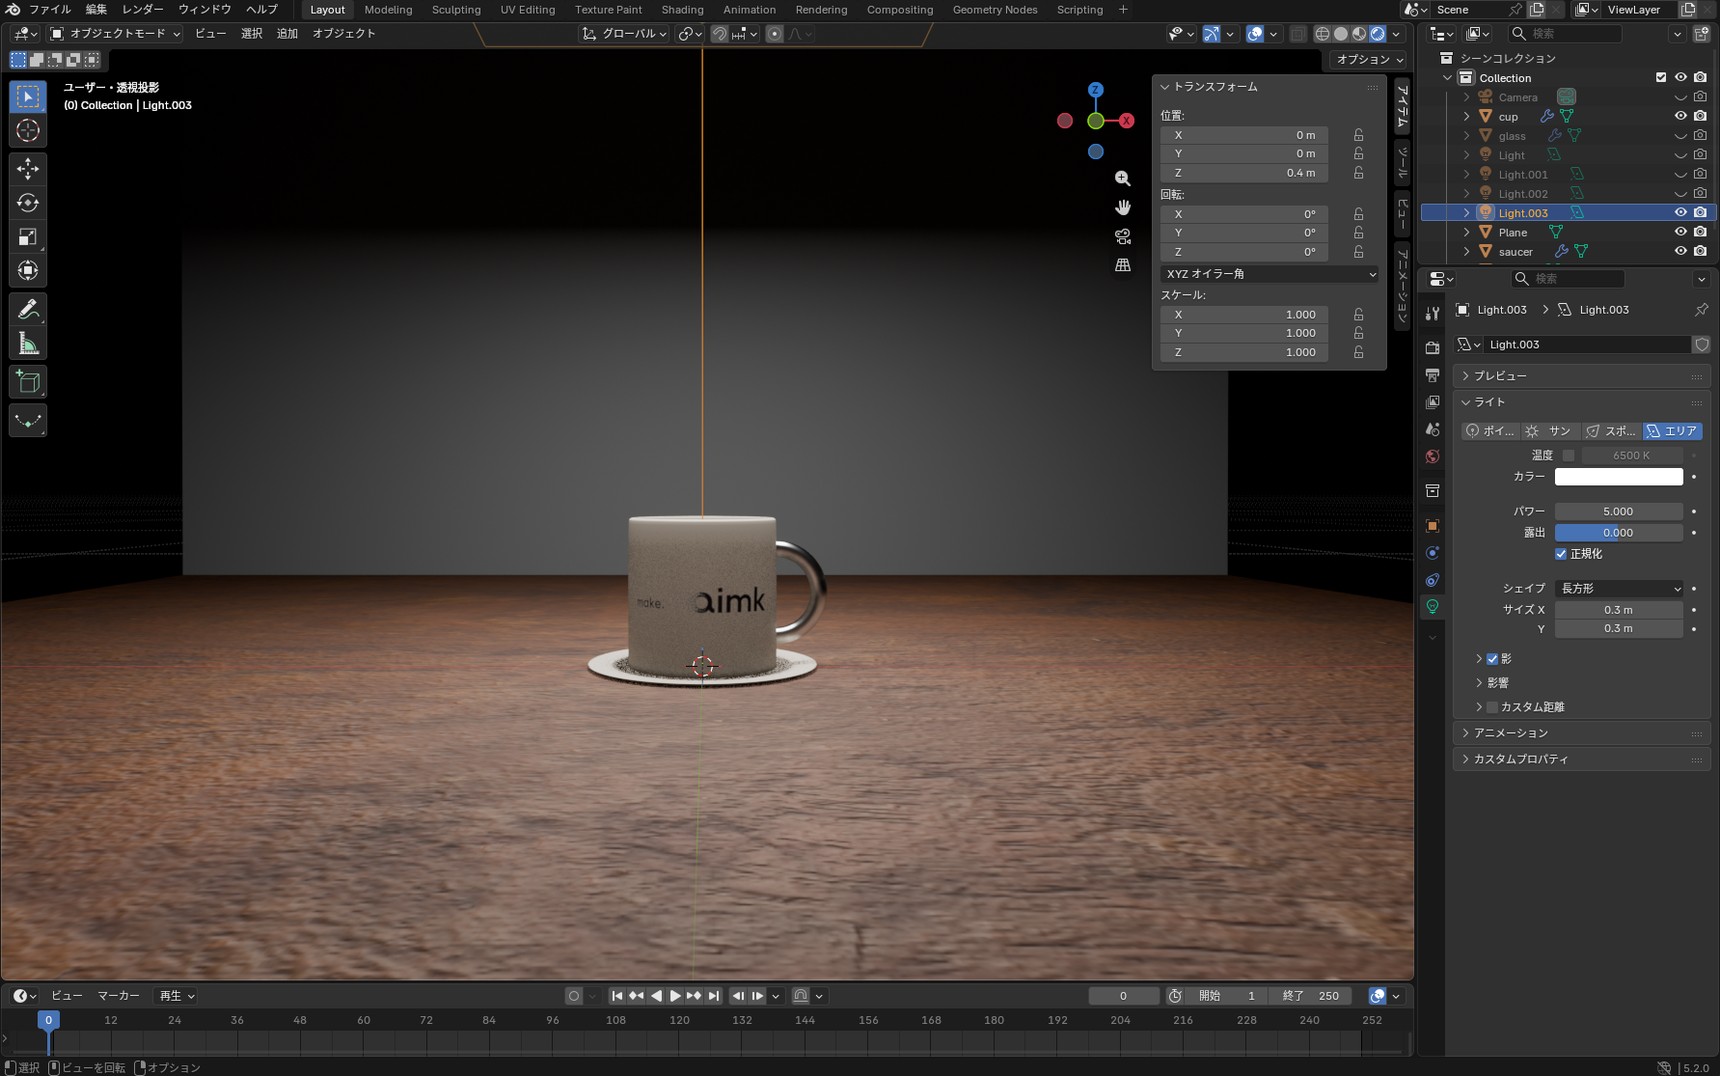
Only the top of the cup is bright, and the sides sink into shadow. The shadow falls directly beneath the cup, out of sight from the front.
The left-to-right contrast we had at 45° is gone. The closer the light gets to directly overhead, the harder depth is to read.
Make the light bigger
Leave position and rotation as they are and change Size alone to 0.8 m.
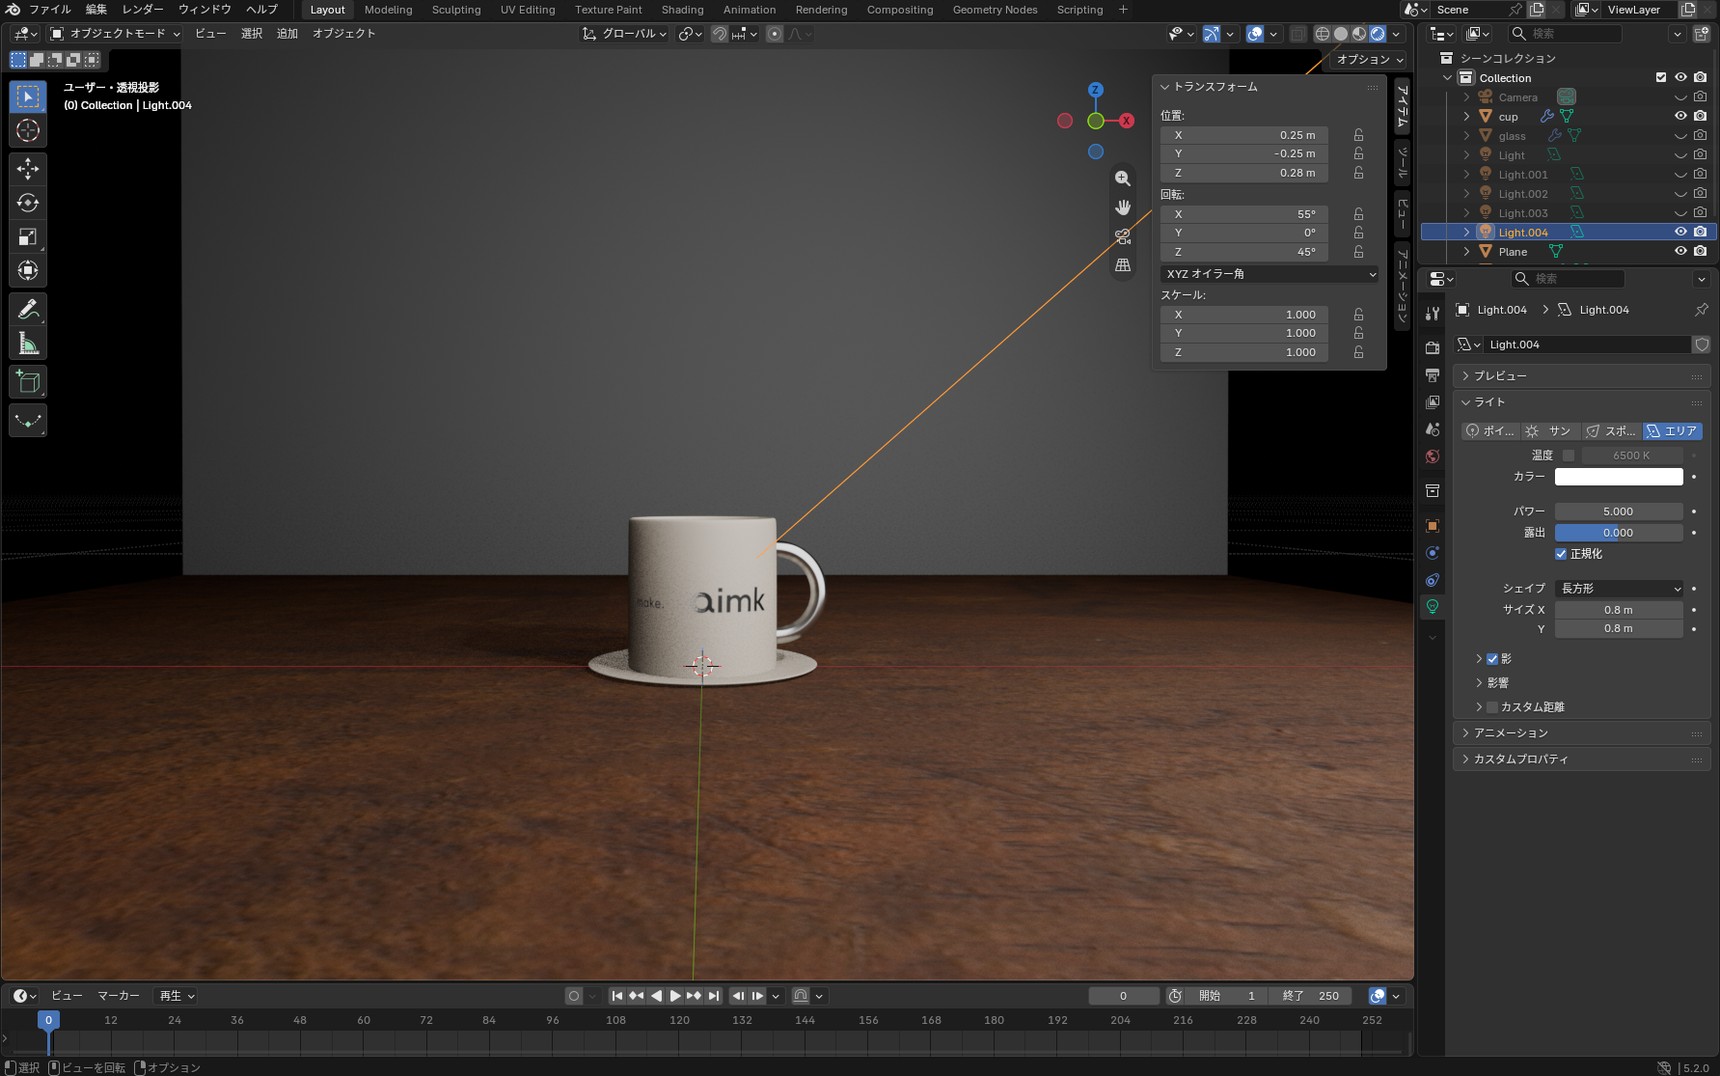
The shadow has softened.
The larger the emitting surface, the blurrier the edge of the shadow. It's the same reason shadows lose their edges on an overcast day: the light arrives from a wider area.
Four things that decide where a light goes
That's four setups. Where you put a light comes down to these four things.
- Position and angle: the closer to head-on, the flatter it looks; the closer to the side, the stronger the shading
- Height: light from above and to the side gives you shading, while directly overhead makes depth harder to read
- Distance: the closer it is, the greater the difference between light and shade
- Size: the bigger it is, the softer the edge of the shadow
When you're not sure, start at 45° and slightly above. From there, move the light a little at a time until it looks the way you want.
Add the second light
With one light, the left of the cup stays dark. Turning the HDRI off left nothing to light that side.
The second light goes in to lift it.
Place the second light
Add one with Shift + A → "Light" → "Area" and give it these values.
- Shape: Rectangle
- Size: X 0.5 m / Y 0.5 m
- Power: 1
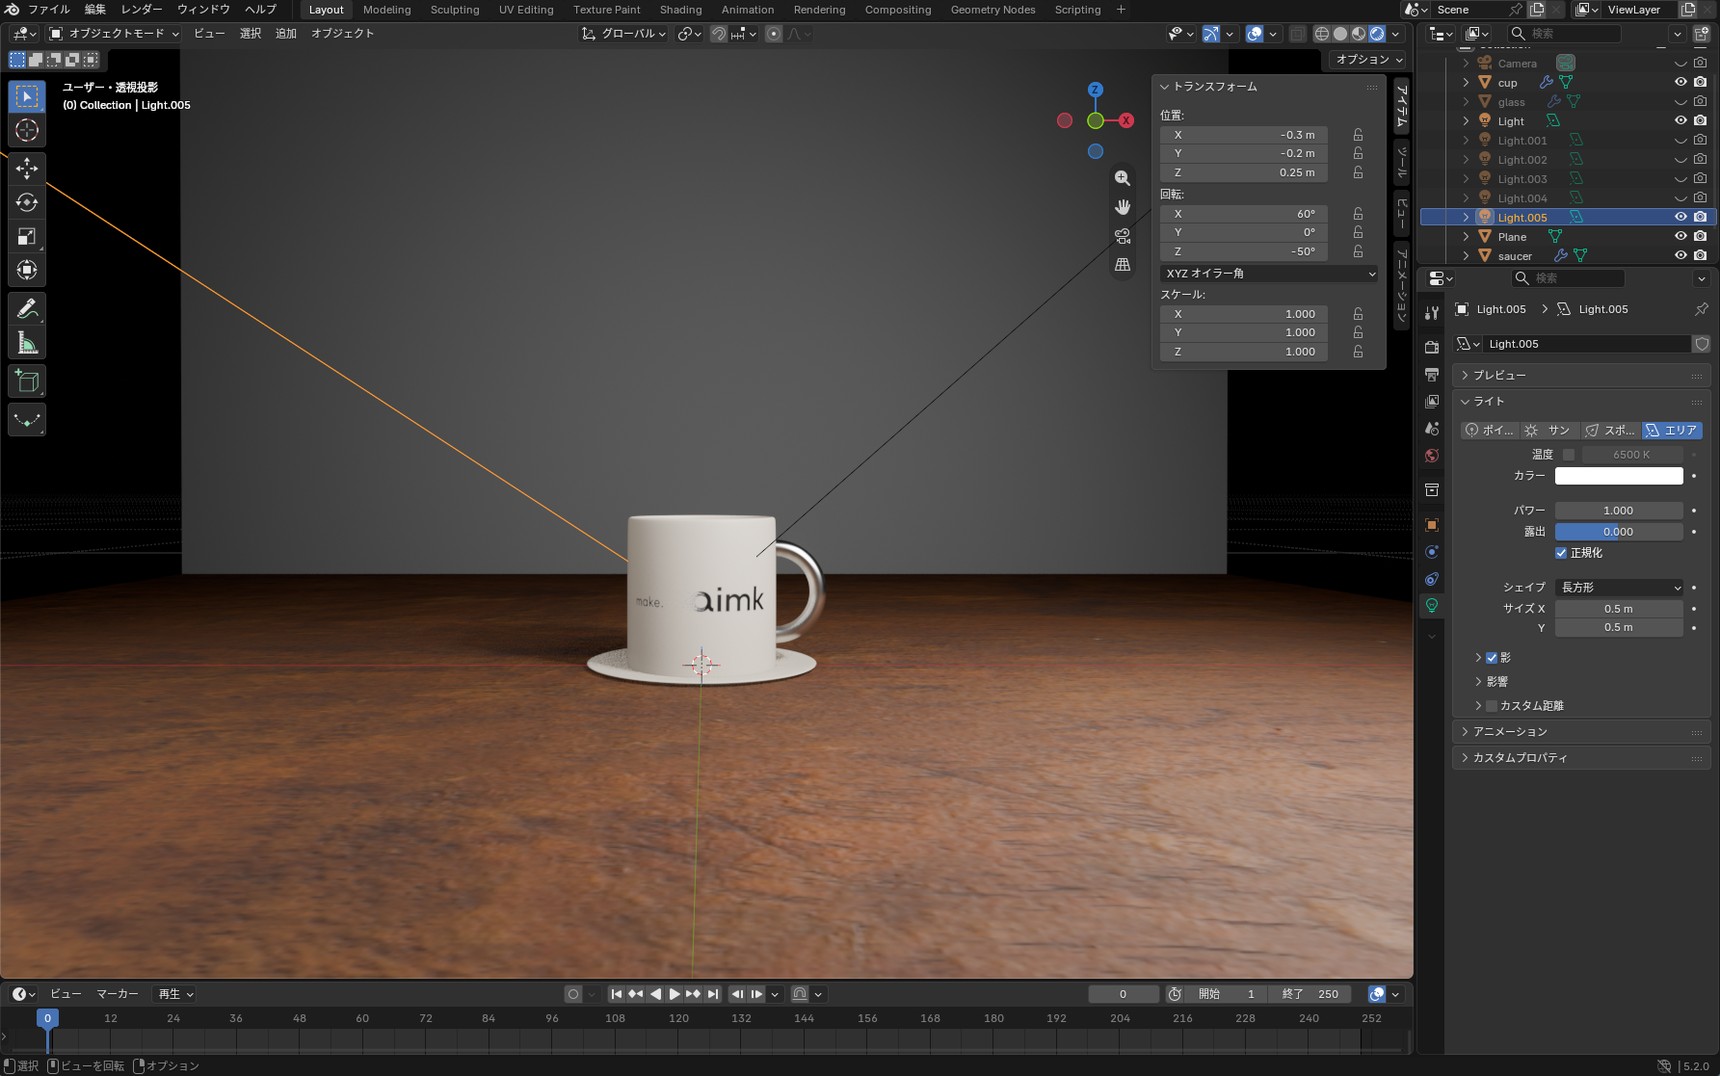
- Position: X -0.3 / Y -0.2 / Z 0.25
- Rotation: X 60° / Y 0° / Z -50°
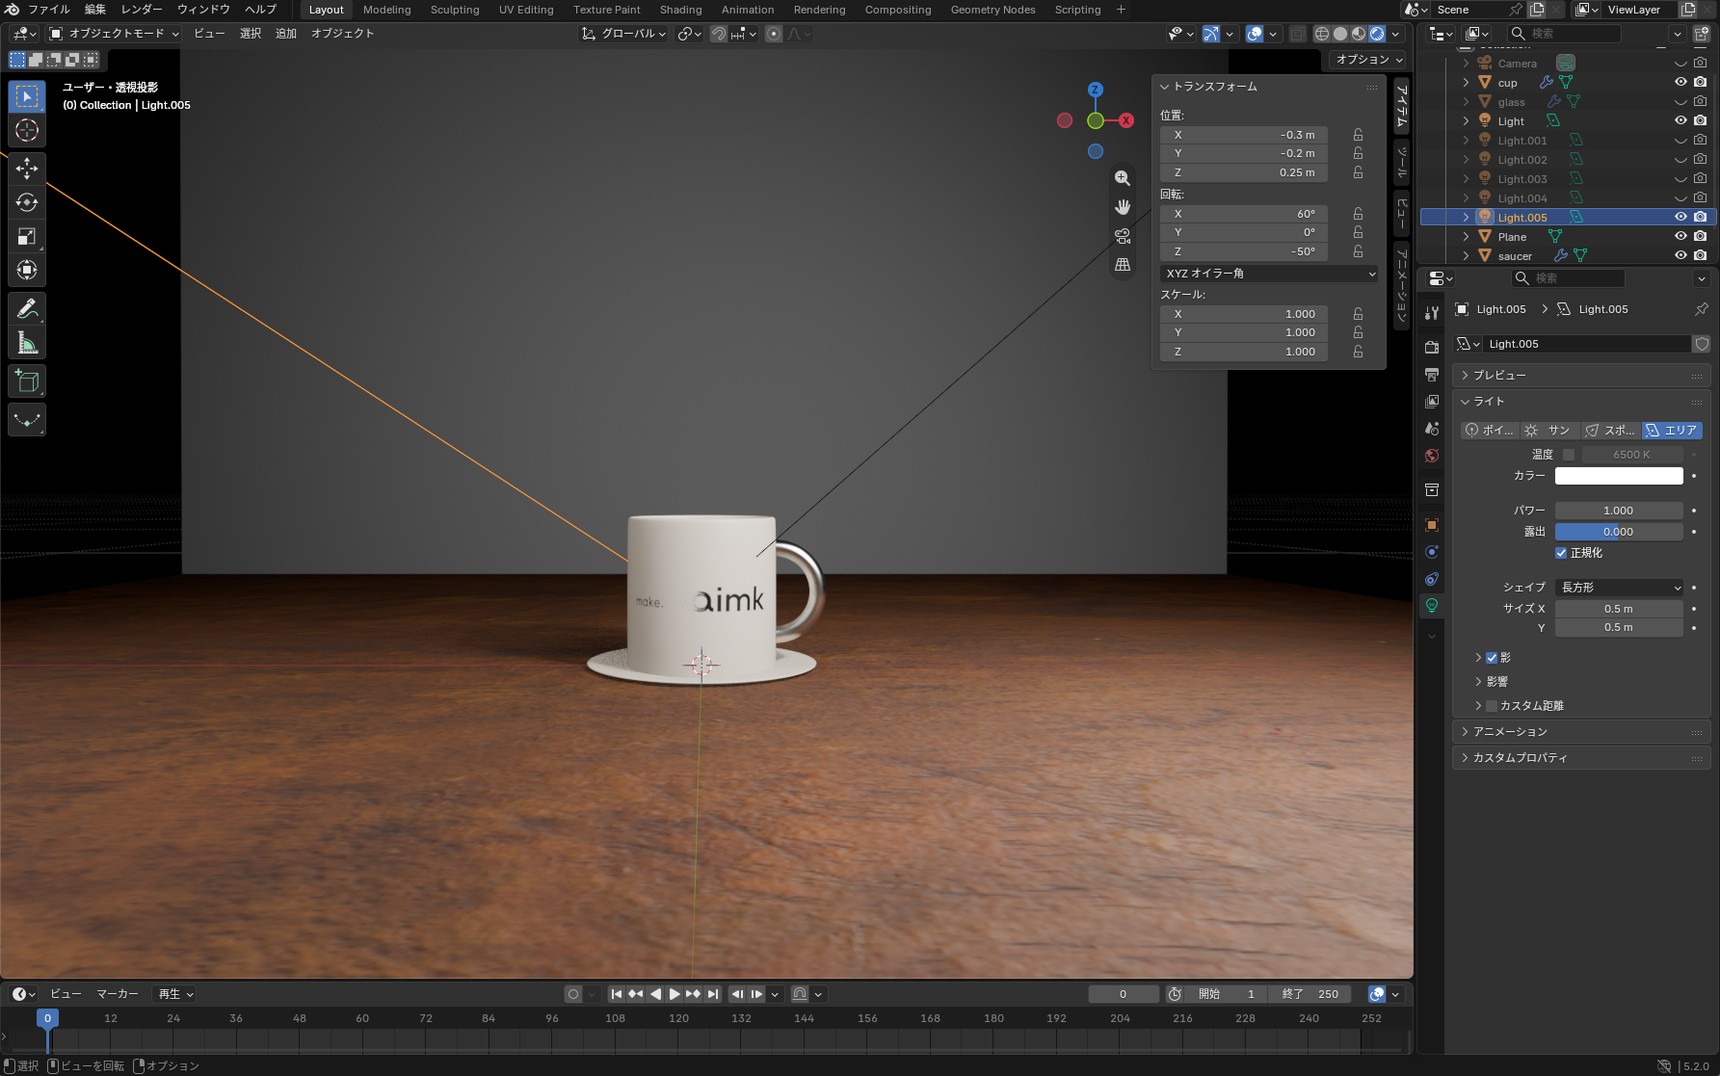
The left side is brighter now. Contrast with the right side is still there, so the sense of depth holds.
Size is set to 0.5 m, larger than the first light, to soften the edge of the shadow. The second light isn't there to light the whole cup — it's there to fill in what fell dark.
Set the power to 20% of the first light
A Power of 1 is 20% of the first light's 5. Start the second light at that 20%.
Push it too far and things flatten out. At 2 — 40% — the two sides even out, and you end up with the same result as lighting from the front. Lighting evenly from both sides amounts to the same thing as lighting
head-on.
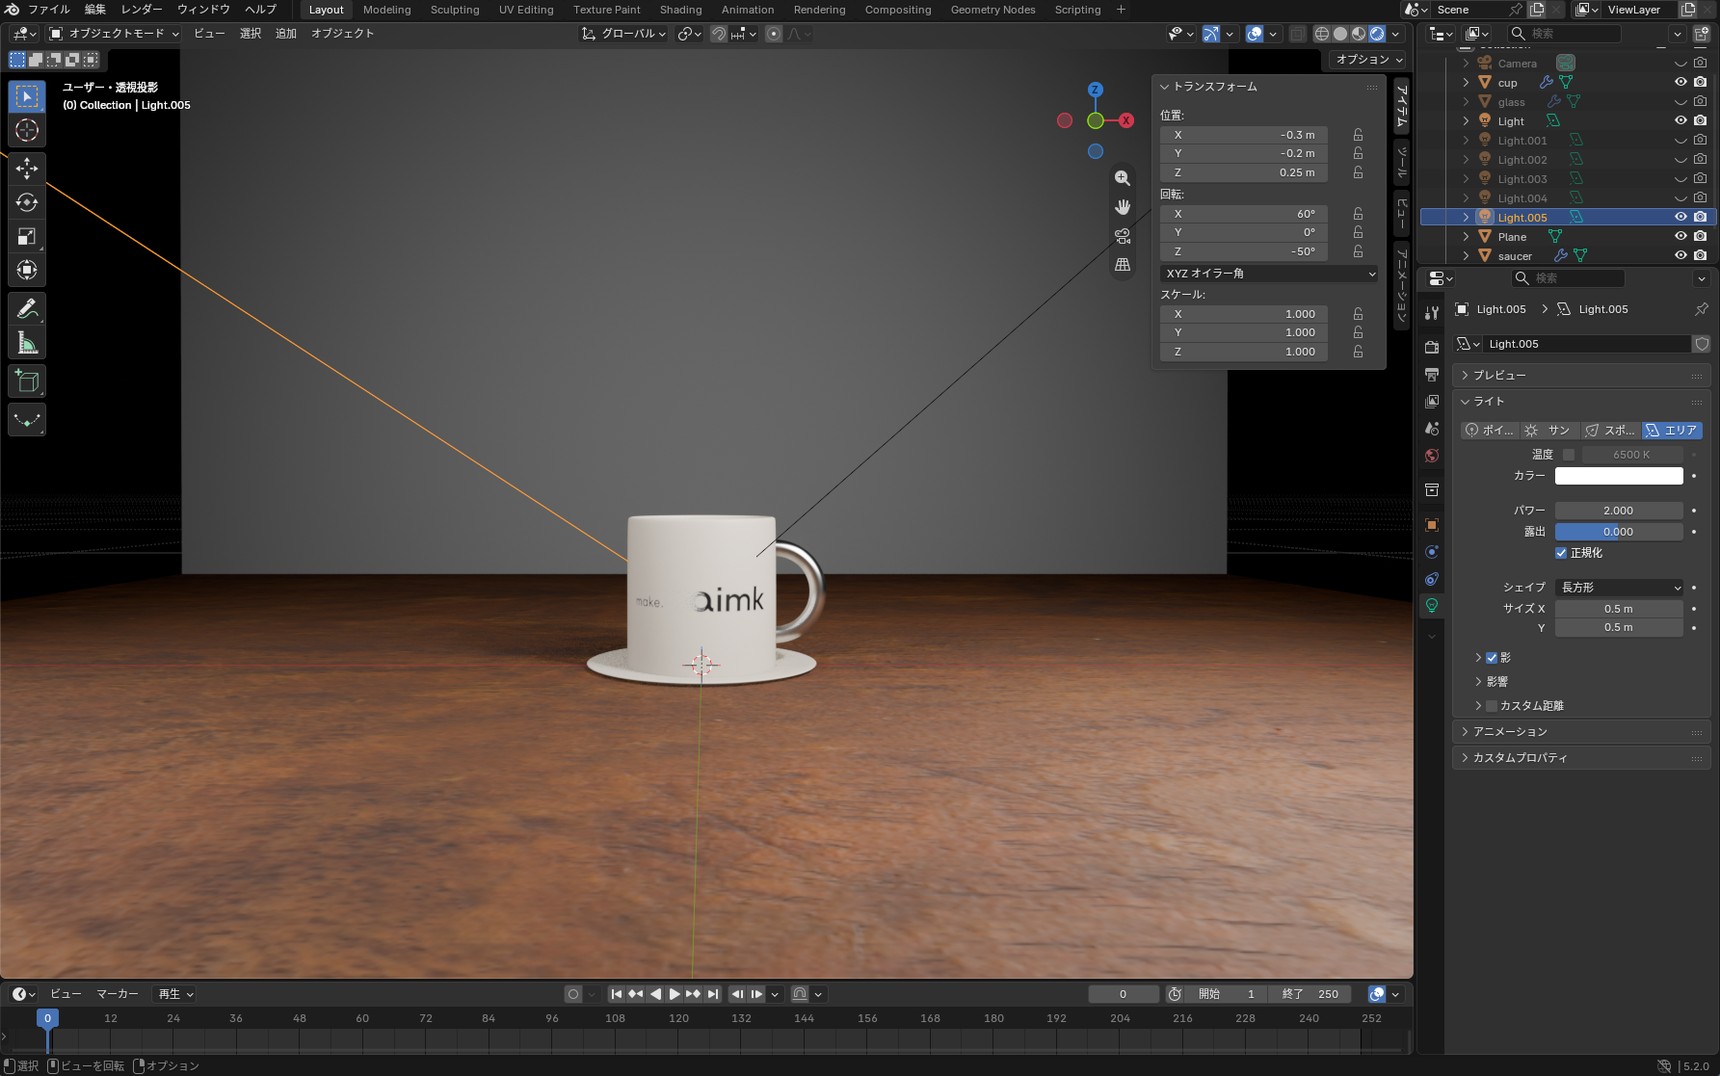
If you're unsure whether to leave the left side dark, leave the power where it is. Take the dark areas away and the depth goes with them.
Work out which light is doing what
As lights accumulate, it gets hard to tell which one is responsible for the light and shade you're looking at. To check, use the eye icons in the Outliner to hide the others for a moment.
Turning the HDRI off and leaving out the ceiling and side walls come from the same reasoning. Once light mixes, you can't tell what is lighting what.
The third light as an option
There's a third light you could add, called a rim light. It comes from behind the cup and picks out the outline.
It earns its place with something dark against a dark background, or when you want to show off glass, a drink, or steam. Here the cup already separates from the wall clearly enough, so we'll leave it at two.
Where to put them
| Lights | Purpose | Placement | Power |
|---|---|---|---|
| One | Light the subject | 45° and slightly above | Baseline (5 for a real-world-size cup) |
| Two | Lift the darker areas | Opposite the first, larger in size | 20% of the first |
| Three | Pick out the outline | Behind the subject | For dark objects, glass, or steam |
Power is given as a ratio because the value you need changes with the size of your scene and the distance involved. Settle the first light first, then start the second at 20% of it.
Checklist for when it isn't working
When the light isn't landing where you want it, work down these five.
-
Is the light facing the right wayAn Area light emits from one side of its face only. With every rotation at
0°it lights straight down. When you've placed a light and nothing lit up, check the X rotation - Is the light reaching the subjectA brighter screen doesn't mean the light is reaching the cup. If only the table is lit, check which way the light is facing. Judge brightness on the subject, not on the screen as a whole
- Has "Normalize" been switched offWith it off, the same value comes out noticeably darker. It's on by default, so switch it back if it's been changed
- Are there lights you're not usingA light you added to try something out will mix in where you don't want it. Use the eye icons in the Outliner to hide the ones you're not using
- Does the value suit the size of the modelA real-world-size cup lands in single digits. If nothing lights up until you reach 100 or 1000, check whether the model is too big
What comes next
Starting from black, we added the lights one at a time and built up how the coffee cup looks. Once you know where to put a light, the same model can be shown in any number of ways.
If that feels like a lot to hold on to, these five points are enough to place a light.
- When you're placing lights yourself, set World Strength to
0and start from black - A wall behind the subject makes the cup look like it's sitting in a room
- Put the first light at 45° and slightly above
- The second light lifts the darker areas, at 20% of the first light's power
- How strong a light needs to be depends on the size of your scene and the distance to it
Next comes rendering. We've been working in Rendered view up to now; from here it's about writing the result out as an image file. That's also where the difference between EEVEE and Cycles comes in, along with framing the camera.
Next article: Blender Rendering Basics: Reducing Noise and Shortening Render TimeFAQ
Q. I placed a light, but nothing lit up.
A. The light may be facing away from the coffee cup. An Area light emits from one side of its face only, and with every rotation at 0° it points straight down. The first light in this article uses an X rotation of 55°, angling it down at the coffee cup from above.
Q. What should I set Power to?
A. There's no fixed value. What you need depends on the size of your scene and the distance to the light. For a real-world-size coffee cup about 30 cm away, start around 5. The 100 W to 1000 W figures you'll find when you look this up assume a much larger scene.
Q. Is the Power value the same as the wattage of a household bulb?
A. It's a different value. Blender 5.2 no longer shows a unit in the Power field. It doesn't mean the same thing as the power draw of a household bulb, so memorising the numbers as a guide won't help.There's more in the column "Why the Power field has no unit".
Q. Is there something wrong with using an HDRI?
A. Not at all. This article turns it off so you can practise placing lights yourself. Set World Strength back to 1.0 and you're where you started. An HDRI suits outdoor scenes, and any scene that needs reflections of the surroundings.
Q. Will the wall bounce light around and lift the darker areas?
A. With EEVEE's standard settings, barely at all. The wall is there to stop the background from disappearing into darkness. Lifting the darker areas is the second light's job.
Q. Shouldn't I be using three-point lighting?
A. For something sitting on a desk, two lights are enough. Three-point lighting comes from portrait and film work, where the third light stops the outline of someone's hair from merging into the background. When the subject and the background separate on their own, as the coffee cup in this article does, two lights is where it ends.
Q. Doesn't a bigger light make the scene darker?
A. With Normalize on, the total amount of light is preserved. That said, the light now leaves a wider surface, so what reaches the subject is more spread out and the look settles down a little. Turn Normalize off and it does get noticeably darker. It's on by default.
Q. The coffee cup looks small in the camera view.
A. That's because we scaled it to real-world size in this article. The camera hasn't moved since the modelling article, so it's still positioned for the version that was 25 times larger. Adjusting the camera is covered in the next article, on rendering.
Columns
When to use the other three light types
Light Properties has four tabs across the top. This article used only "Area". The other three suit different situations.
| Type | How it emits | Where it fits |
|---|---|---|
| Point | From a single point, in all directions | Bulbs, candles |
| Sun | Parallel rays from one direction | Outdoors, sunlight |
| Spot | Narrowed into a cone | Stage lighting, limiting what you show |
| Area | From the whole face, in one direction | Windows, studio lighting |
This article uses Area because the size of the light makes shadow softness easy to adjust. Increase Size and the edge of the shadow softens.
Point and Sun can adjust shadow softness too, but with Area it's easier to picture the relationship between the size of the source and the change in the shadow.
There's one more difference worth knowing. Moving a Sun light doesn't change how the light falls. It's a light that arrives as parallel rays from far away, like the sun, so what matters is its rotation. Bringing a Sun closer won't make anything brighter, and this is why.
Why the Power field has no unit
Up to Blender 4.4, the Power field showed a "W". When you read that "a point light wants 100 W to 1000 W", that's the notation being referred to.
That "W" doesn't mean what it means on a household bulb, though. The "60 W" on a bulb is power draw, whereas Blender's figure is the energy radiated as light. It's why the manual puts a 1000-lumen bulb at roughly 2.9 W.
In Blender 4.5 the "W" was dropped from Power to avoid the confusion, and the field now shows the number alone.
The power you need varies with the size of your scene, the distance to the light, and more. So rather than taking a number straight from someone else's article, adjust it while watching how your own scene looks.
What happens when you turn "Normalize" off
"Normalize" in Light Properties is on by default, and the values in this article assume it stays that way.
With it on, changing the size of a light barely changes the overall brightness. It's why going from 0.3 m to 0.8 m left the brightness roughly where it was.
Turn it off and that compensation goes, leaving the amount of light to follow the area of the light. For a square Area light, 1.0 m serves as a reference point: below that it gets darker, above it brighter. The lights in this article are 0.3 m and 0.5 m, so turning Normalize off makes them darker.
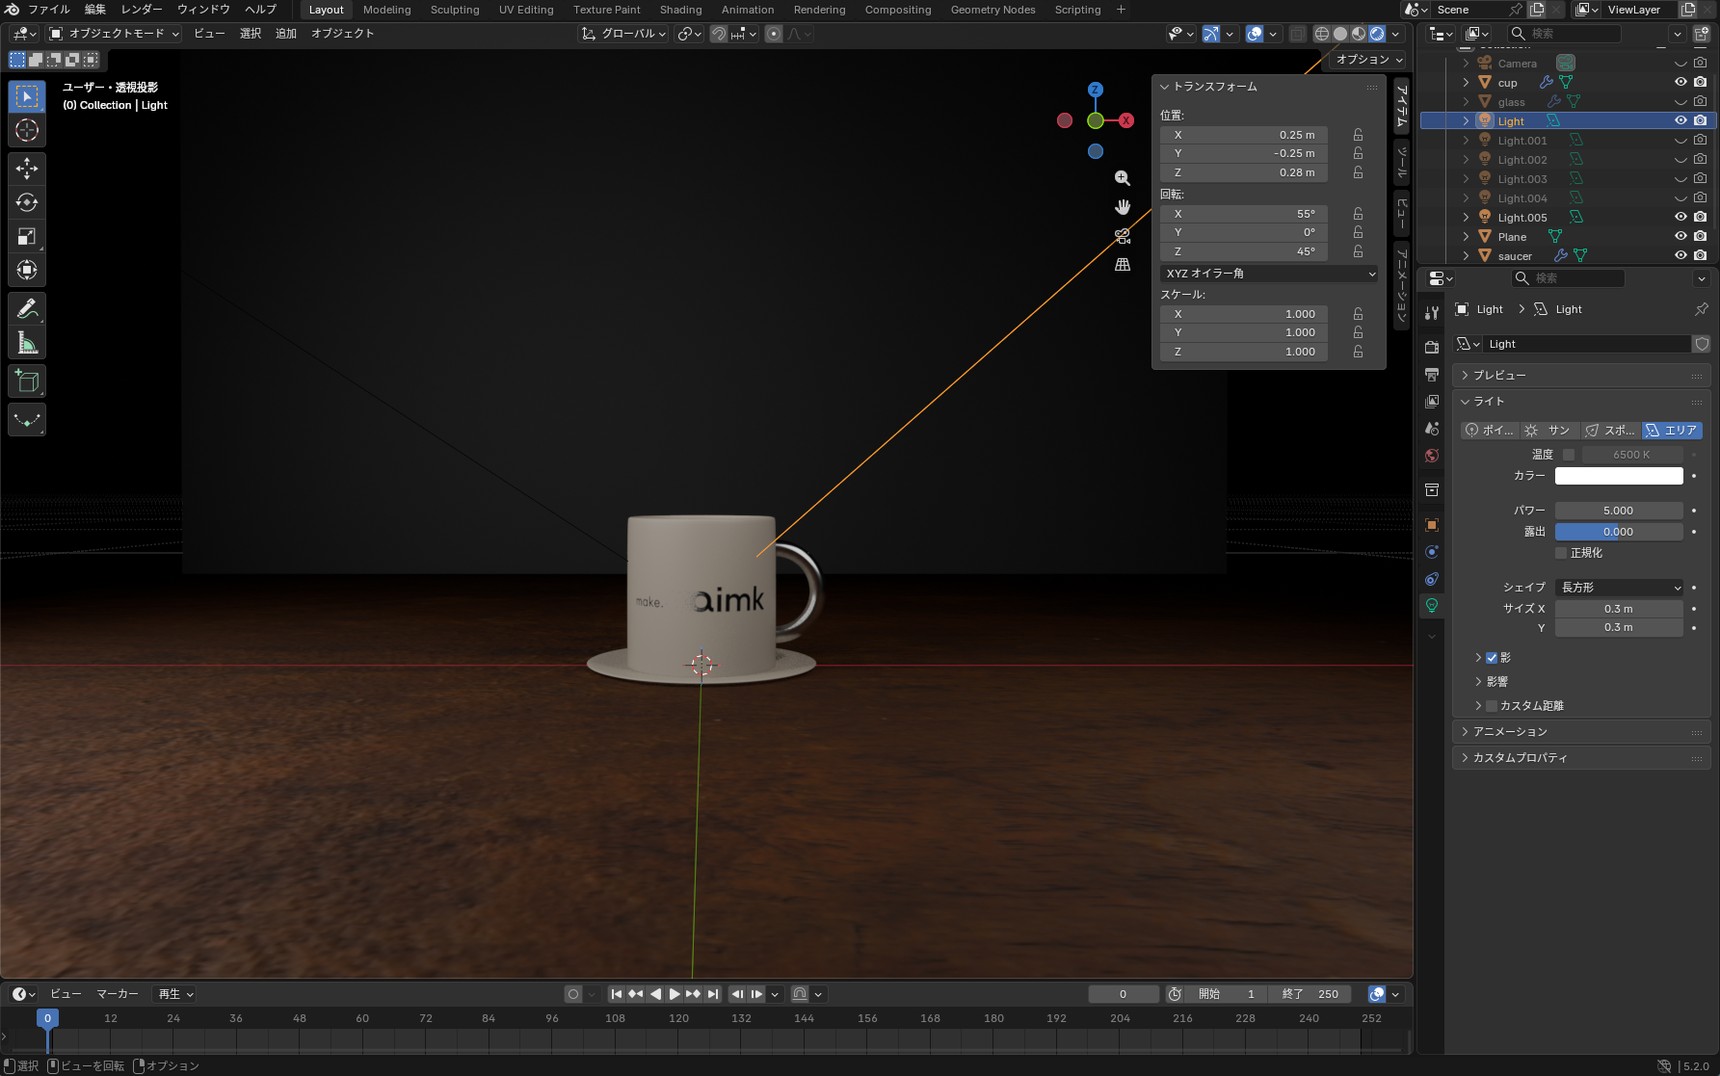
With Normalize off, the size of a light feeds into its brightness directly. The catch is that brightness shifts every time you change Size, which gives you one more thing to adjust.
Because this article wants size and brightness kept separate, we'll leave "Normalize" on.
Changing the brightness of the whole scene at once
You can also adjust the brightness of the whole scene without touching the individual lights. Open "Color Management" in Render Properties and adjust the "Exposure" value. Light Properties has an "Exposure" of its own, but it's a separate setting. The one under Color Management applies to the entire scene.
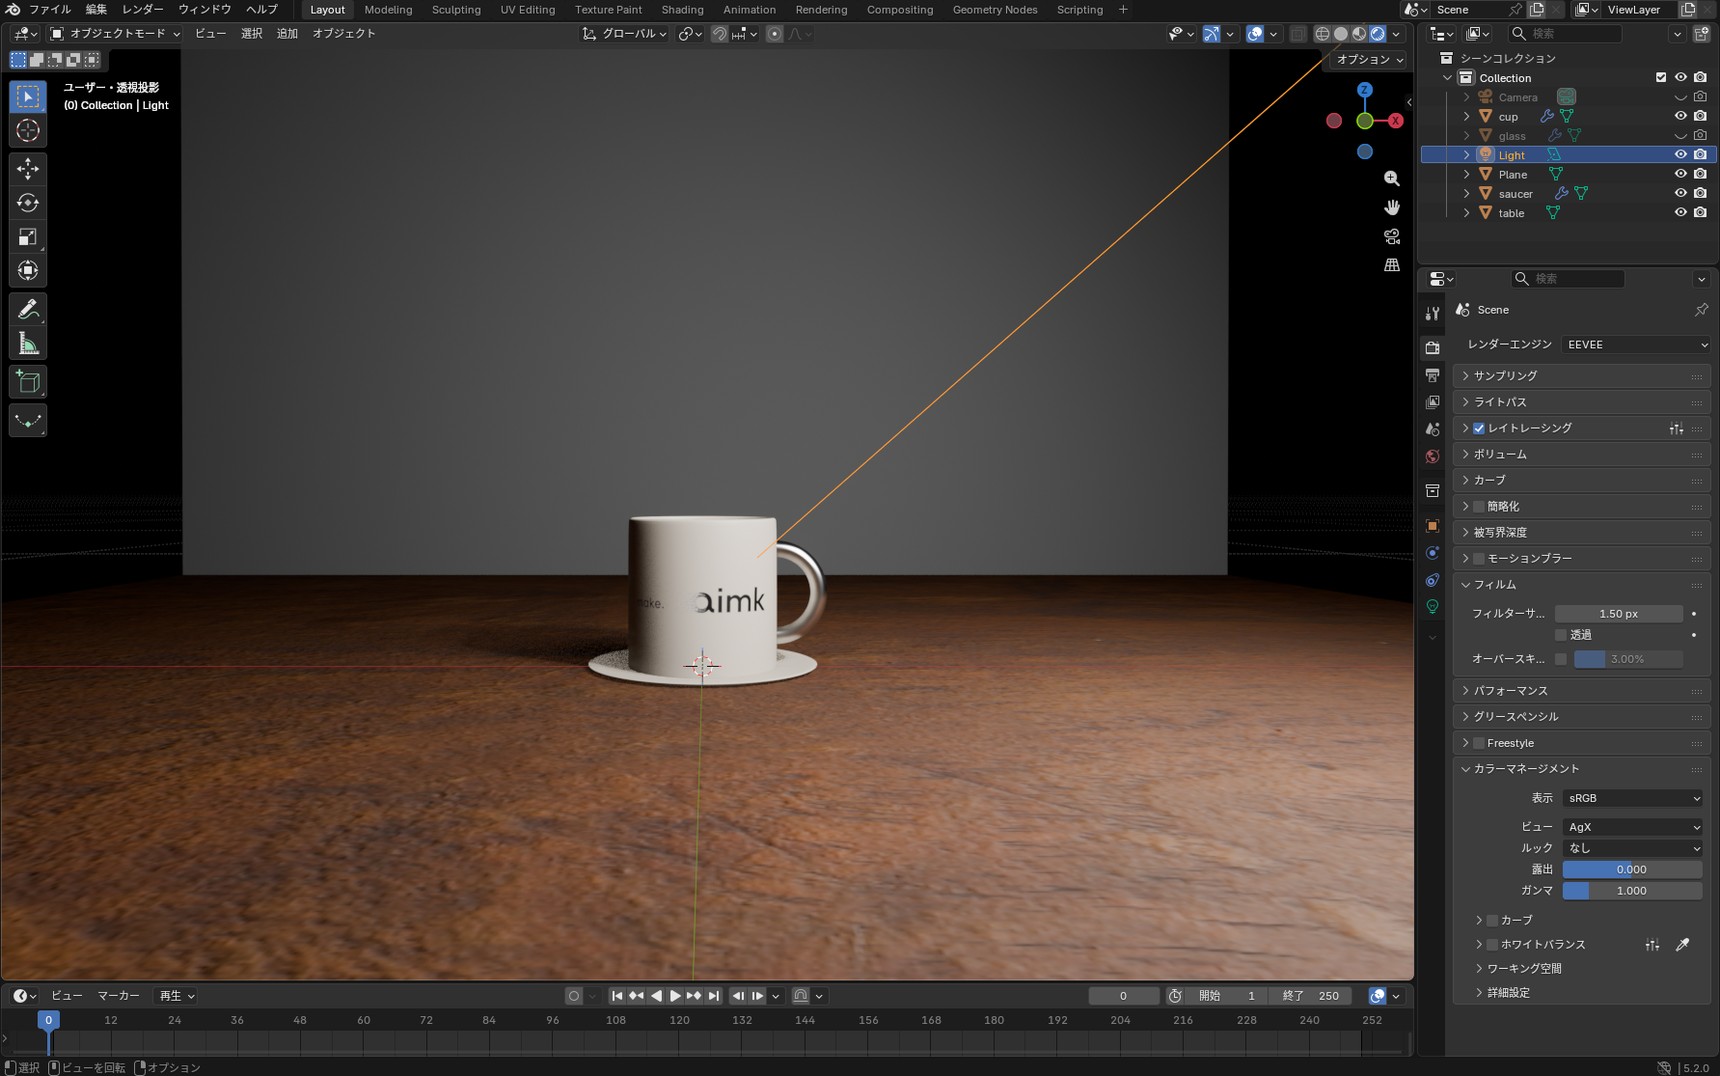
It works like exposure in photography: +1 doubles the brightness and -1 halves it. It's useful when the lights are where you want them but the result still reads as too dark, or too bright,
overall.