
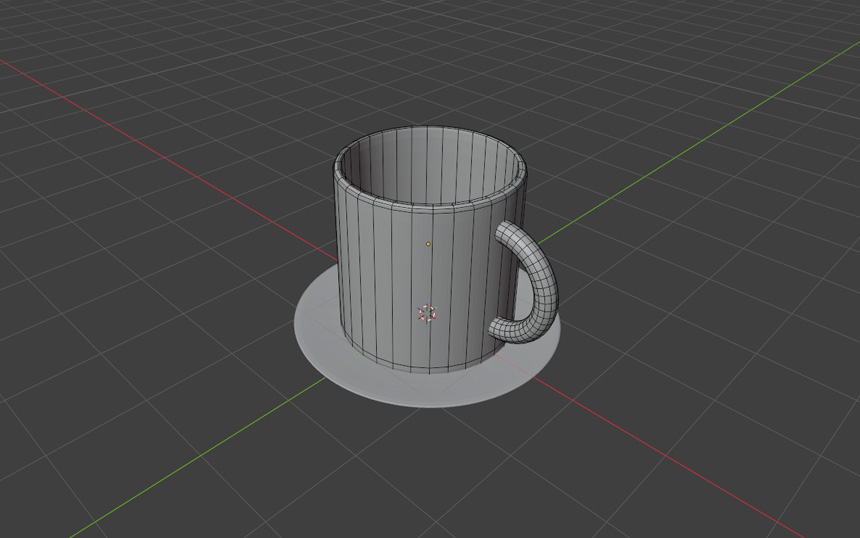
Once you're set up with "How to Install Blender and Change the Interface Language", the next step is to actually make a 3D model. In this article, you'll go over Blender's basic operations, then model a coffee cup.
Making a 3D model takes more than moving objects around. You also need to edit vertices and faces to change the shape. We'll start with moving the view and the difference between modes, then try each operation one at a time, up to changing the shape.
* This article was verified with Blender 5.2 LTS.
Get comfortable with viewport navigation
Before you start modeling, let's learn how to navigate the 3D viewport.
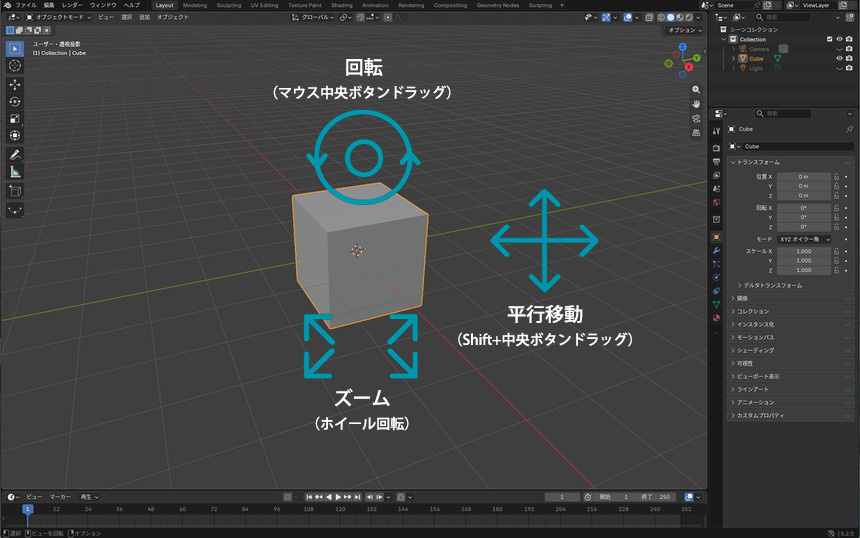
- Rotate the view: drag while holding the mouse's middle button (scroll wheel)
- Pan the view: drag while holding Shift+middle button
- Zoom in and out: roll the scroll wheel
As you move the view around, the screen can end up looking like a jumbled mess. When that happens, press Numpad 1. The view switches to the front.
- Numpad 1: view from the front
- Numpad 3: view from the right side
- Numpad 7: view from directly above
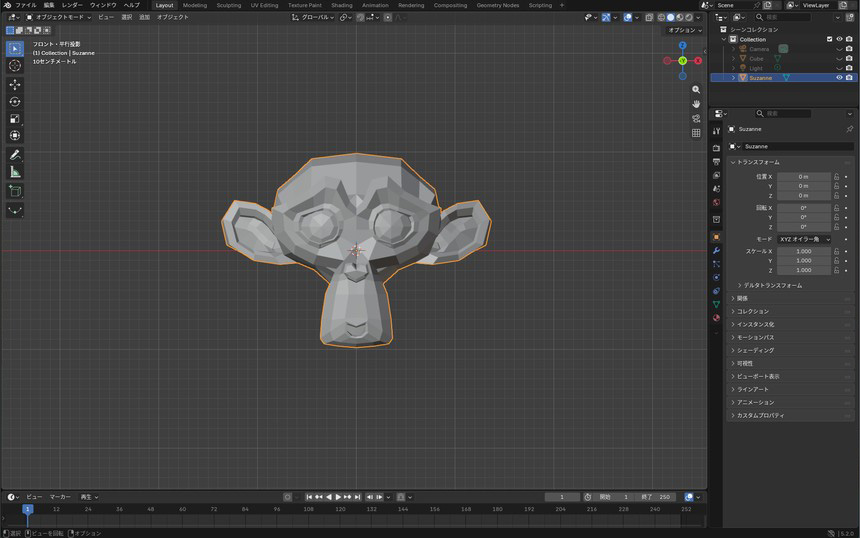
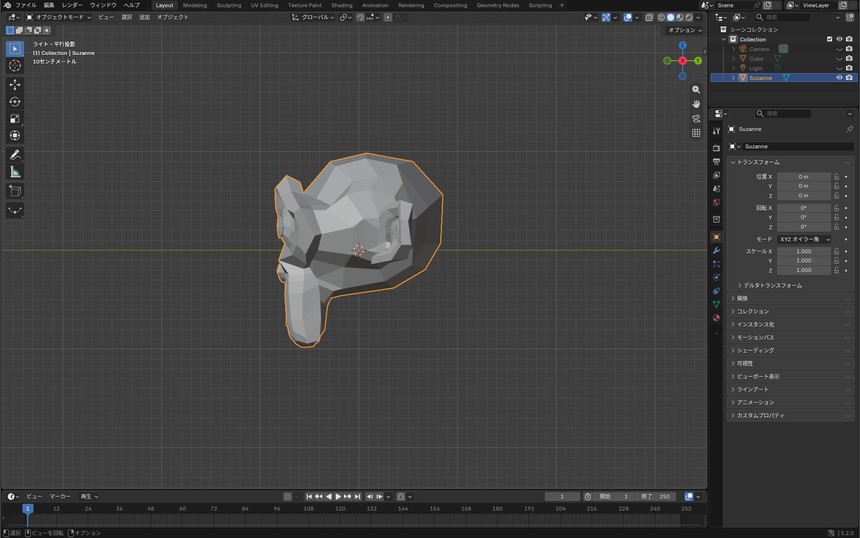
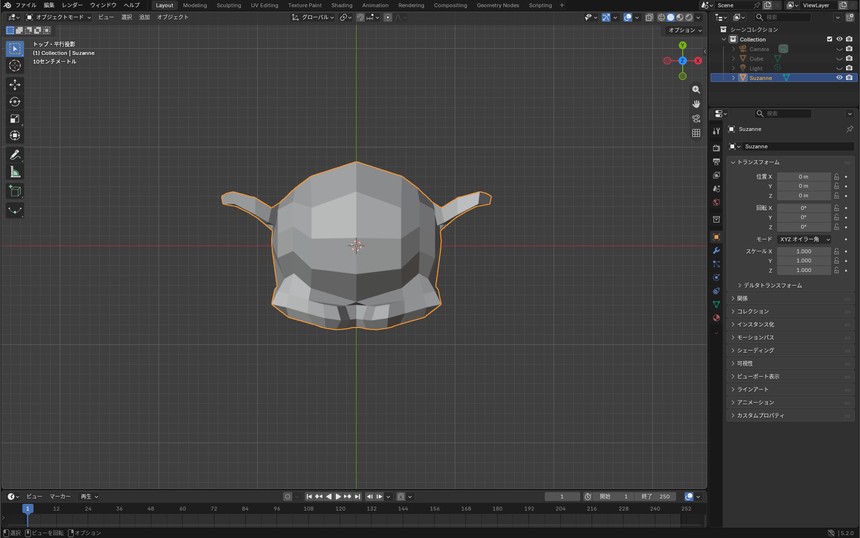
Whatever happens to the view, pressing Numpad 1 brings you back to the front view. Feel free to spin the view around as much as you like.
If the view won't behave the way you expect, see the supplementary column "Troubleshooting: a quick-reference guide"
Object Mode and Edit Mode
Blender has many modes, but for modeling you'll mainly use these two.
- Object Mode: select and move an object, such as a cube or cylinder, as a single whole
- Edit Mode: edit the vertices, edges, and faces that make up an object, one at a time, to change its actual shape
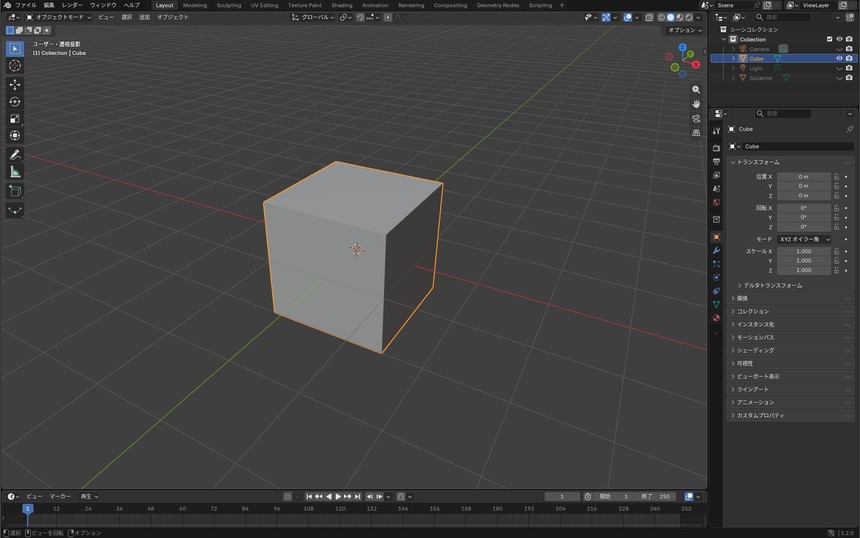
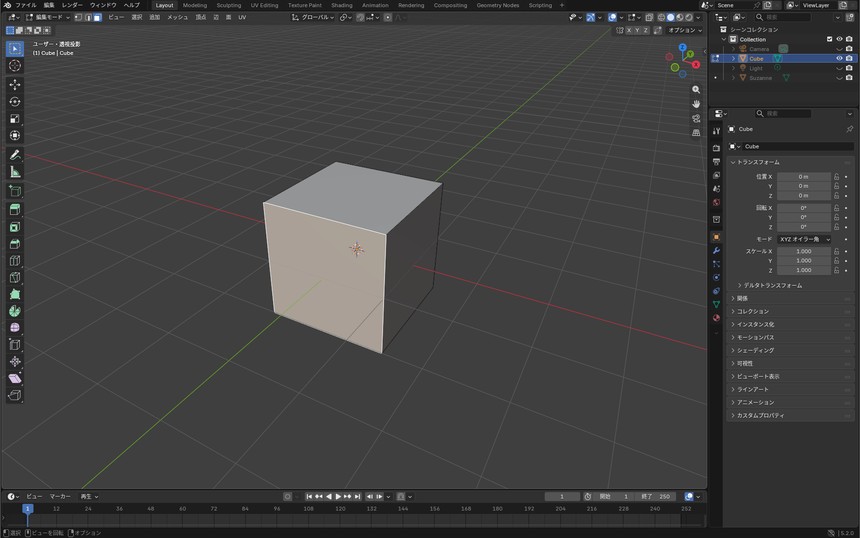
You switch between the two with Tab on your keyboard.
If you're trying to move a vertex or edge but the whole object moves instead, the usual cause is that you're not actually in Edit Mode. Press Tab and check that you've switched into Edit Mode.
Move, Rotate, and Scale
The basic operations for changing an object's position, orientation, and size use the following three keys.
- G (Grab): Move
- R (Rotate): Rotate
- S (Scale): Scale
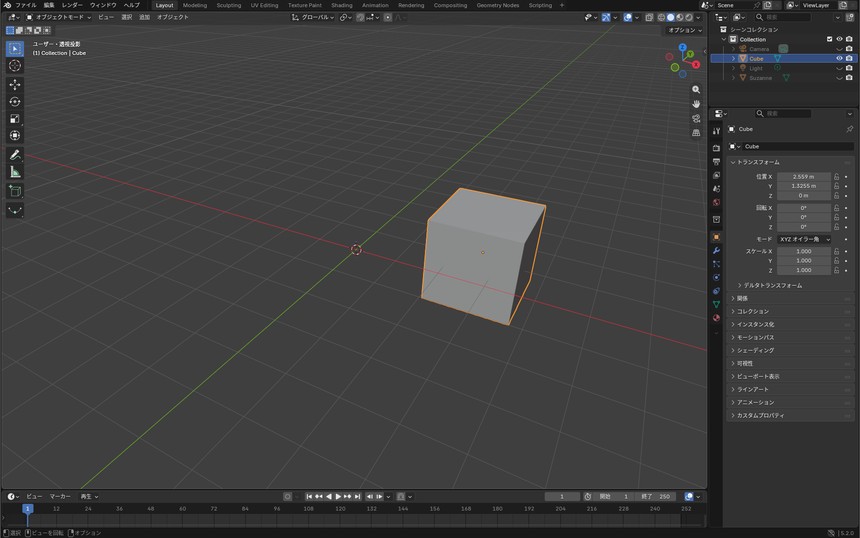
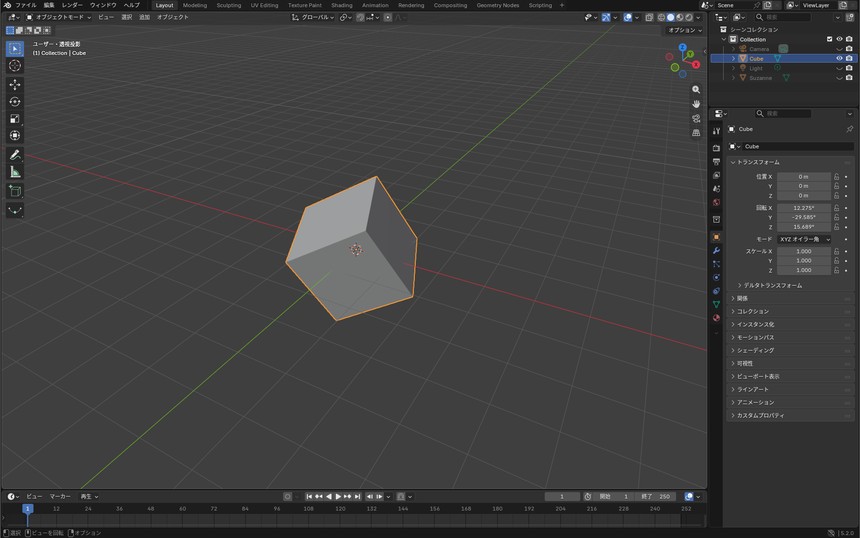
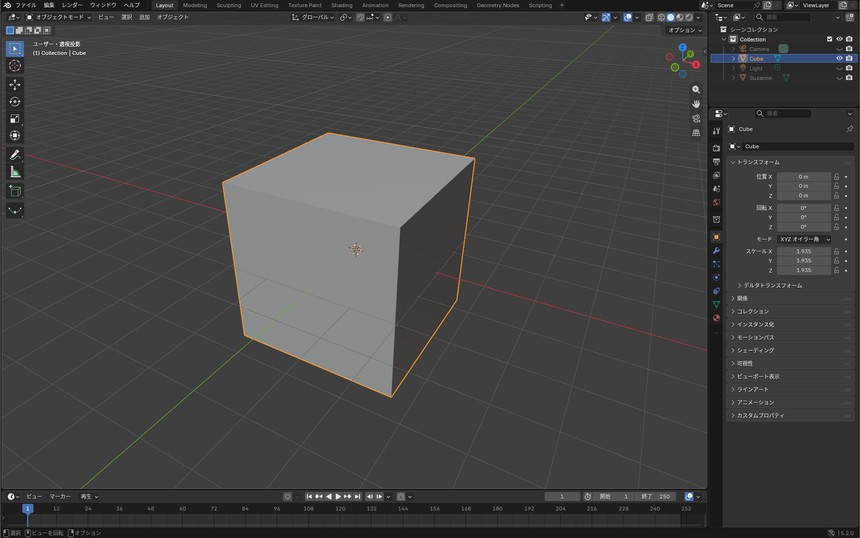
Used on their own, these can move things in a direction you didn't intend. If you press X, Y, or Z right after the key, though, the action is constrained to just that axis.
- G→Z: move only up and down (vertically)
- S→X: scale only sideways
- R→Z: rotate only around the vertical axis, as seen from above
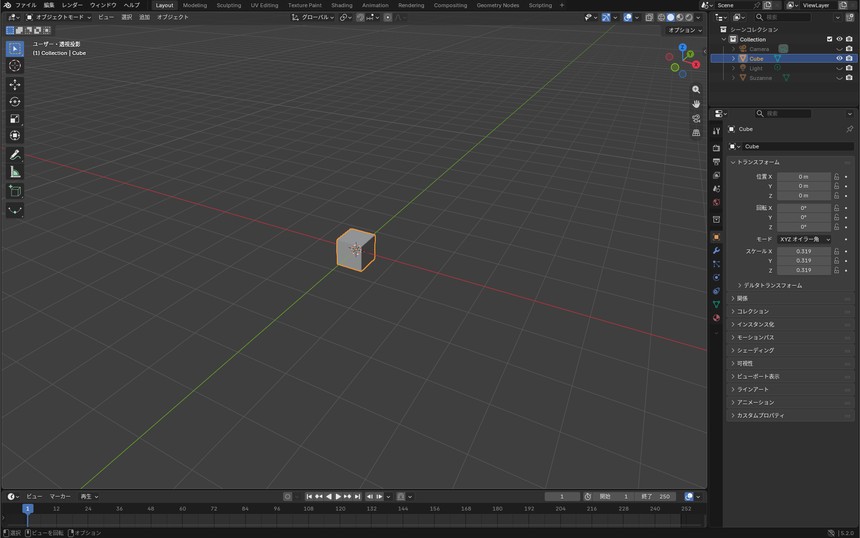
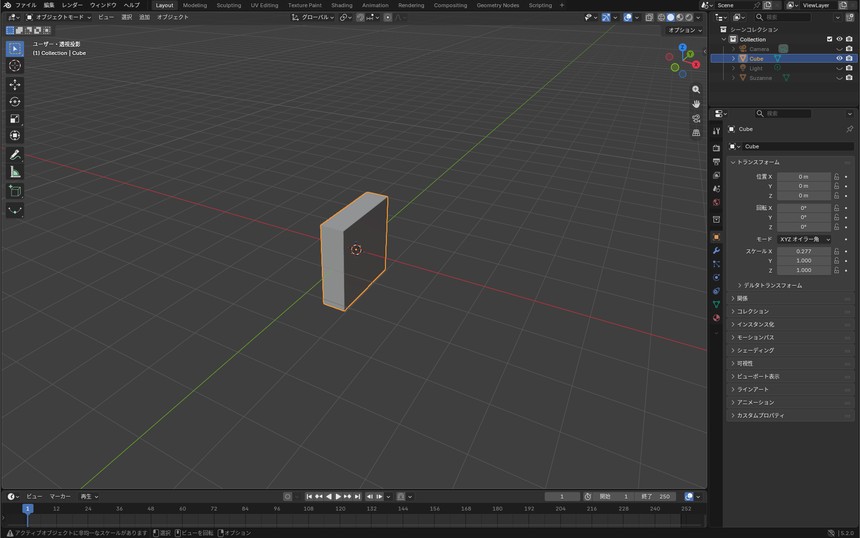
If "I only wanted to shrink it sideways, but the whole thing got smaller" sounds familiar, you likely skipped the axis key. Try to keep in mind, whatever you're doing, "press G, R, or S, then follow it with an axis."
These same G, R, and S shortcuts work identically whether you're moving a whole object or, later in Edit Mode, moving individual vertices, edges, and faces.
Select vertices, edges, or faces to change the shape
Once you're in Edit Mode, you can switch what you're selecting, vertices, edges, or faces, using the number keys along the top of your keyboard (not the numpad) or the three icons to the right of "Edit Mode" at the top left of the viewport.
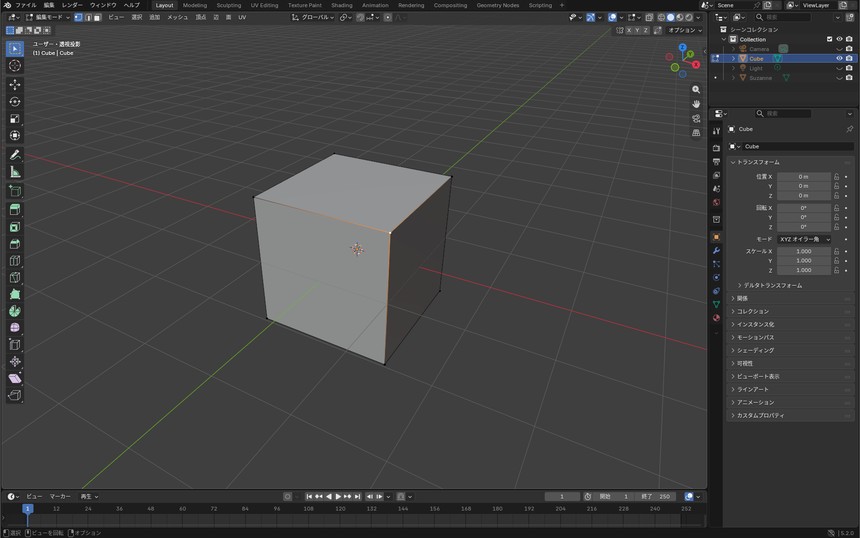
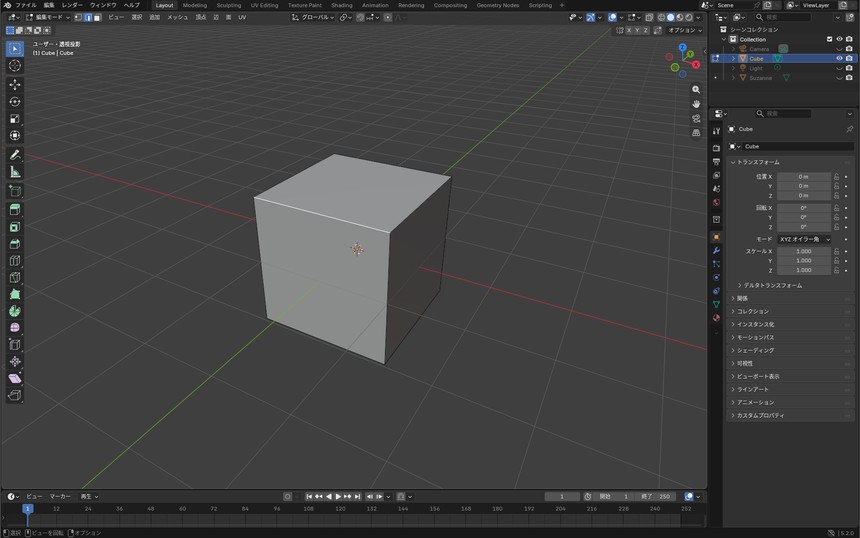
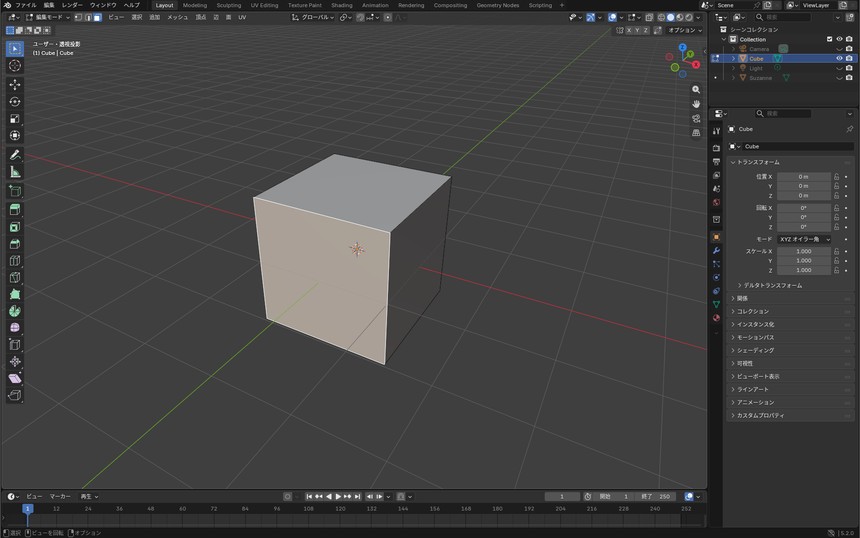
Three operations do most of the work of changing a shape.
-
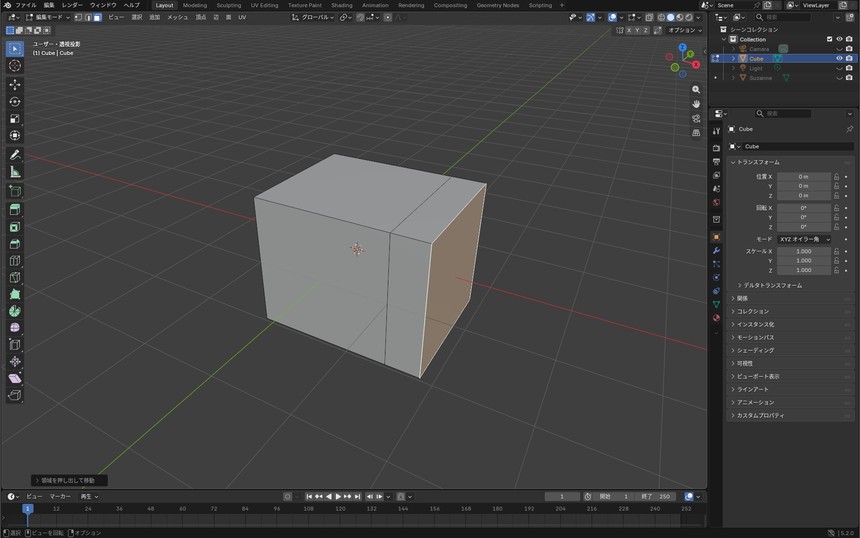
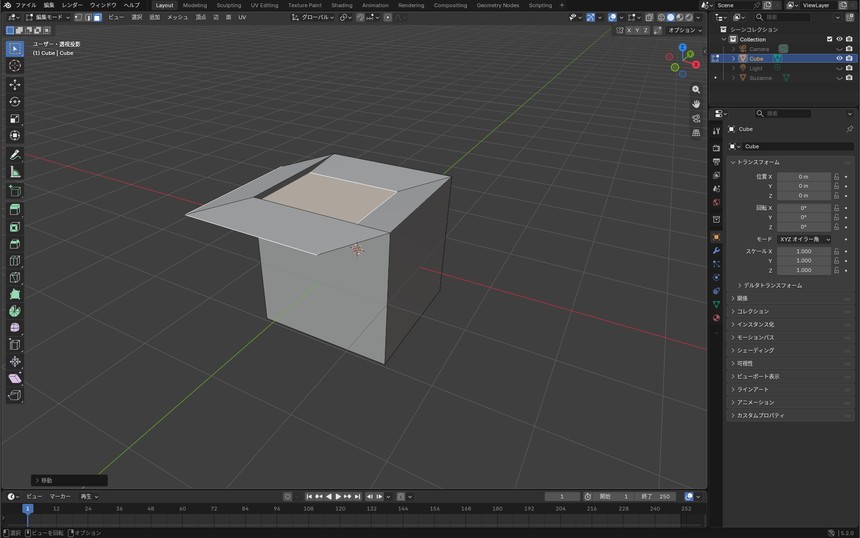
Extrude (E): pull the selected face outward to create new geometry
-
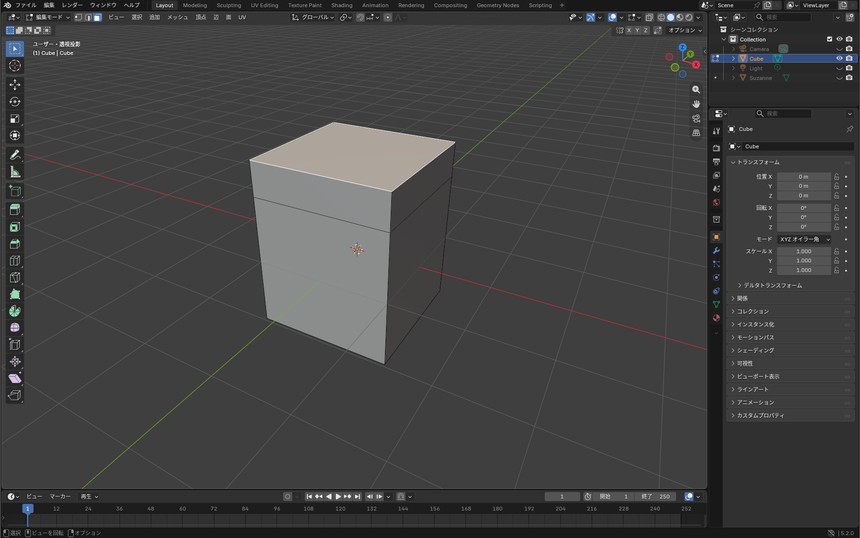
Loop Cut (Ctrl+R): add a cut that runs all the way around the model, adding vertices and edges

-
Bevel (Ctrl+B): round off or chamfer a corner
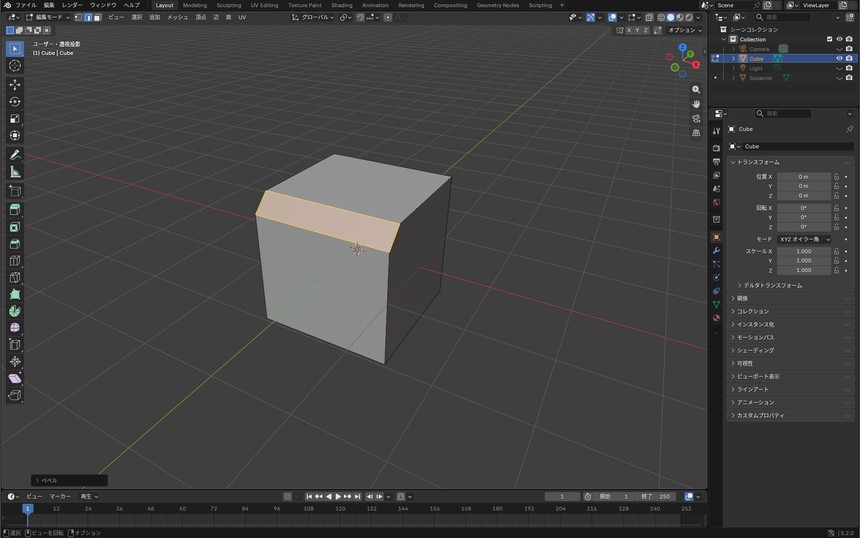
Right after any of these operations, a small panel appears in the bottom-left corner. Open it, and you can fine-tune values such as the number of cuts or the width afterward. If it doesn't come out right the first time, you can adjust it there.
While trying out Extrude (E), it's easy for the shape to shoot off in an unexpected direction as you move the mouse, leaving a tangled mess. If that happens, don't panic, just press Ctrl+Z. Each press steps back one action, so keep pressing until the shape is back to how it was.
Reshaping with modifiers
Modifiers let you reshape an object without destroying the original. You can change the numbers later, or remove a modifier to get the original shape back. Start with these two.
-
Mirror modifier: model one half, and it mirrors that half onto the other side to make the shape symmetrical
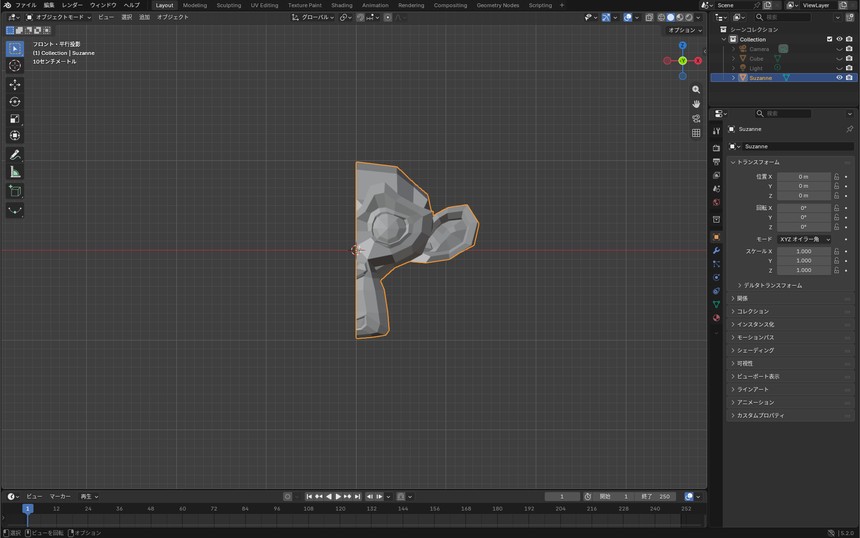
Before 
After -
Subdivision Surface: turns a blocky, faceted surface into a smooth, rounded one

Before 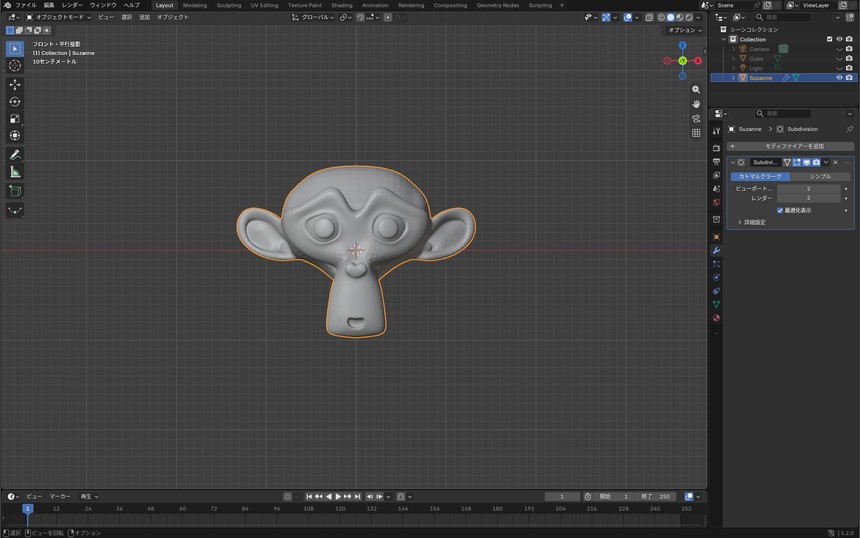
After
You add modifiers from the Properties panel on the right side of the screen, the blue wrench icon (Modifier Properties).
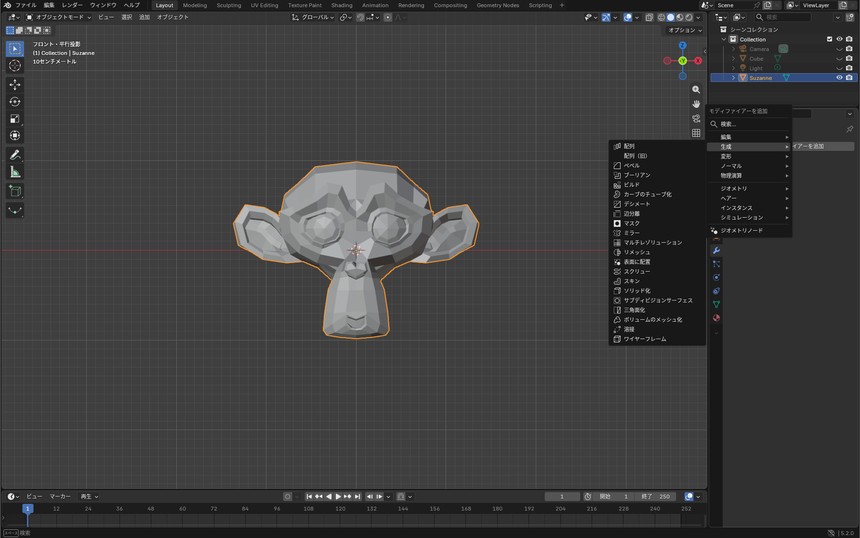
If a modifier gives you an unexpected shape, see the supplementary column "Troubleshooting: a quick-reference guide"
Build a coffee cup
Now let's put everything you've learned to work and build a coffee cup.
Building the cup body
- You won't need the default cube, so select it, press X, and click "Delete" in the confirmation menu that appears. Then use Shift+A → Mesh → Cylinder to add a cylinder
- Enter Edit Mode and select the top face (face select mode, 3)
-
Inset Faces (I) to create a slightly smaller face just inside the top
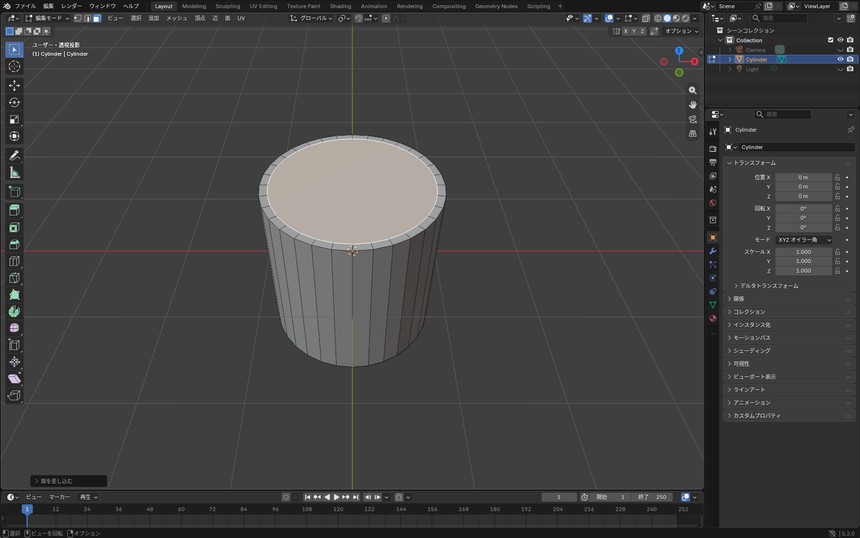
-
With that face still selected, Extrude (E) it down into the cylinder to hollow out the inside of the cup
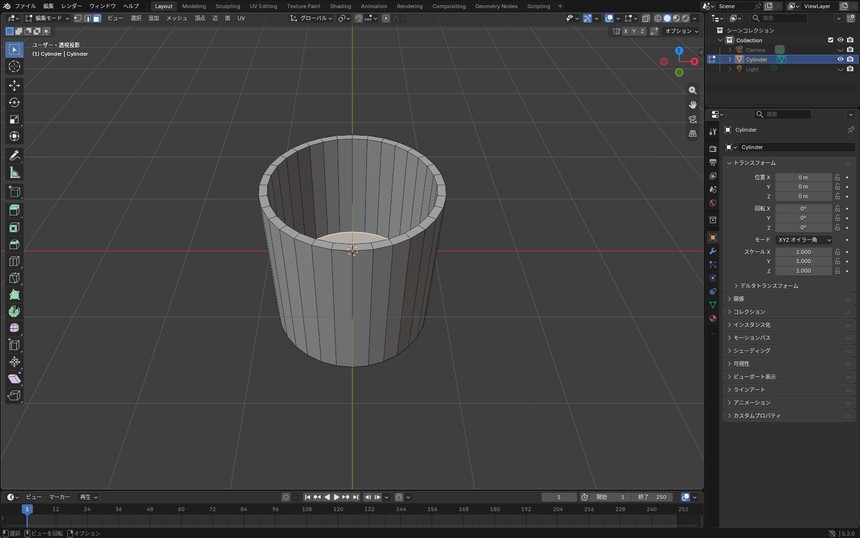
-
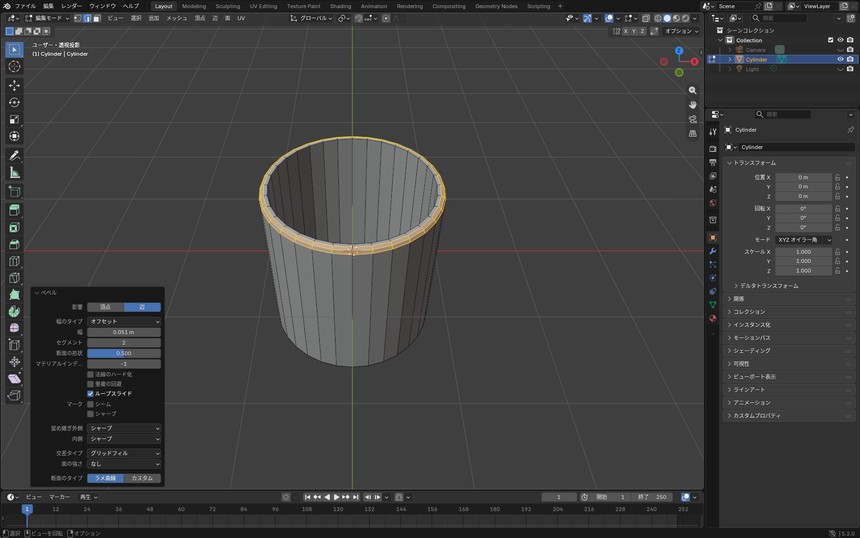
Switch to edge select mode (2), select the cup's rim (the loop of edges where the outside and inside meet) with Alt (option on Mac)+click, and round it off
slightly with Bevel (Ctrl+B)
Building the handle
- Press Tab to return to Object Mode, then use Shift+A → Mesh → Torus to add a torus (donut shape)
- Use S to shrink it down, then type R→X→90 to rotate it so the ring stands upright
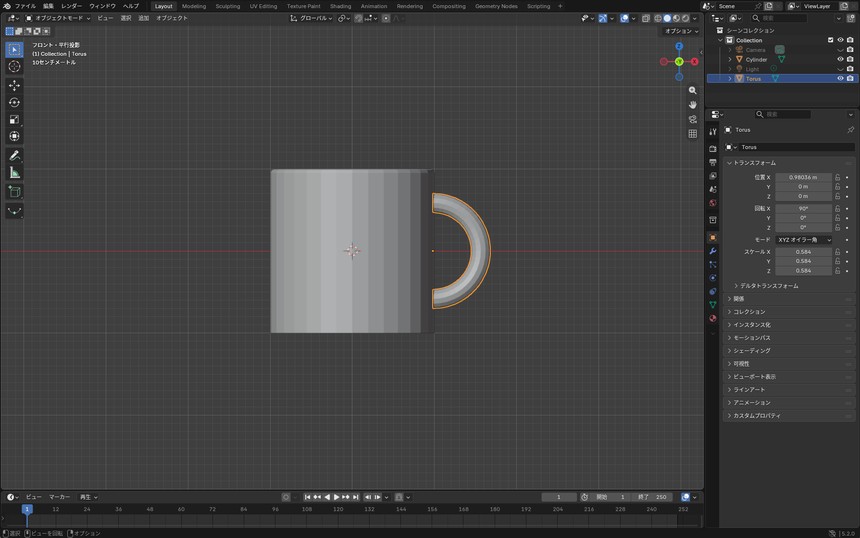
- Enter Edit Mode and press Numpad 1 to view it from the front. Turn on X-ray with Alt+Z, drag a box around the half that will be embedded in the cup (the left half) to select it, and delete it (X → Vertices) so you're left with a half-ring
-
Press Tab to return to Object Mode, then use G (with an axis constraint) to move it flush against the side of the cup
Joining the cup and handle
Select the handle first, then Shift-click to also select the cup body (the key is clicking the cup body last), and press Ctrl+J to join them.
When you join two objects, the origin (the reference point) of the combined object lands wherever the last-selected object's origin was (the "active" object). If things look shifted after joining, check "The origin looks off" in the supplementary column "Troubleshooting: a quick-reference guide".
Building the saucer
- Use Shift+A → Mesh → Cylinder to add another cylinder
- Widen it with S, then flatten it with S→Z so it becomes a thin disc
-
Use G to position it underneath the cup
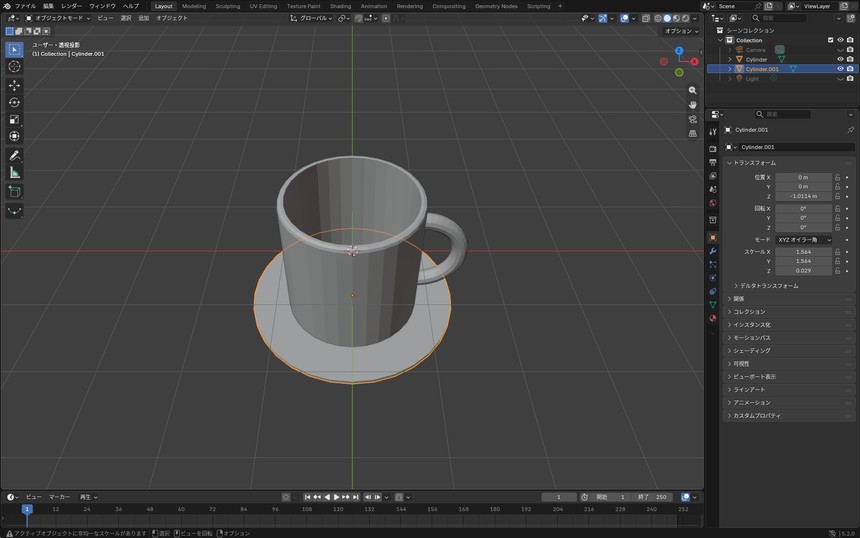
Leave the saucer as a separate object rather than joining it to the cup. That way you can move the cup on its own once it's sitting on a table.
Smoothing it all out
Finally, add a Subdivision Surface modifier to both the cup body and the saucer to smooth everything out. But if you add the modifier with no preparation, the corners round off too much and the shape falls apart.
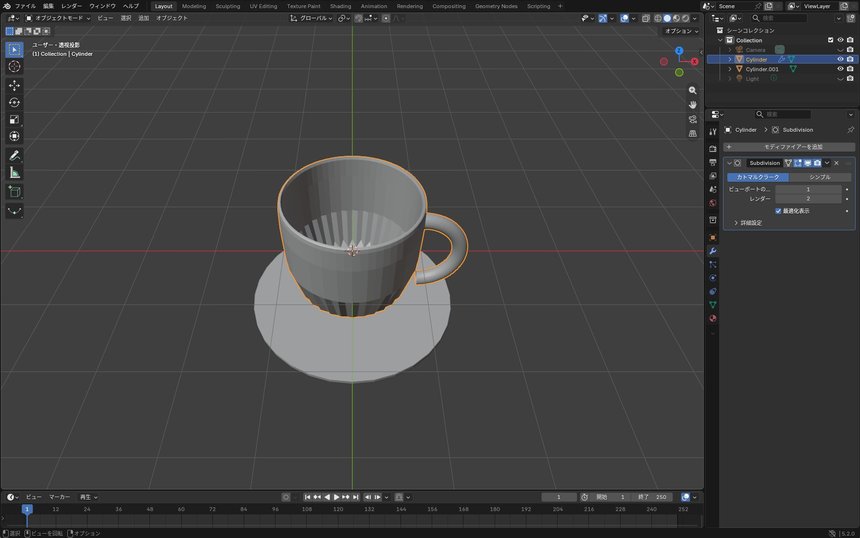
To fix this, add loop cuts near any area you don't want to smooth out. Where edges are dense, the Subdivision Surface effect weakens, so the shape holds its form better.
The top rim of the cup already has a bevel, so it doesn't need a loop cut. Instead, select the cup body, press Tab to enter Edit Mode, and add cuts in these two places:
- Lower part of the cup body: add 2 loop cuts with Ctrl+R
- Inner cylinder (the cup's inner wall): add 2 more loop cuts with Ctrl+R
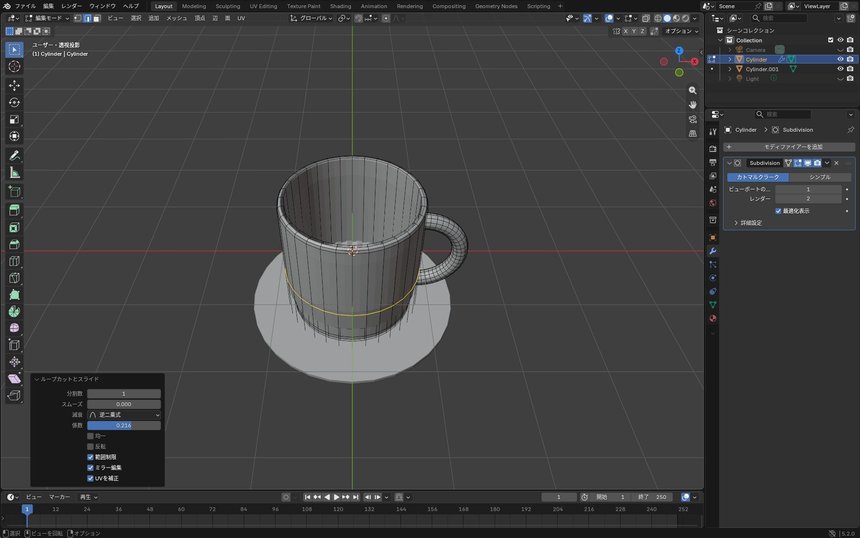
The saucer needs the same kind of preparation, but since the target is its top and bottom faces rather than the sides of a cylinder, use Inset Faces (I) instead. Insetting a slightly smaller face on both the top and bottom keeps the edges from turning jagged once Subdivision Surface is applied.
Once that's done, press Tab to return to Object Mode, then add a Subdivision Surface modifier to both the cup body and the saucer.
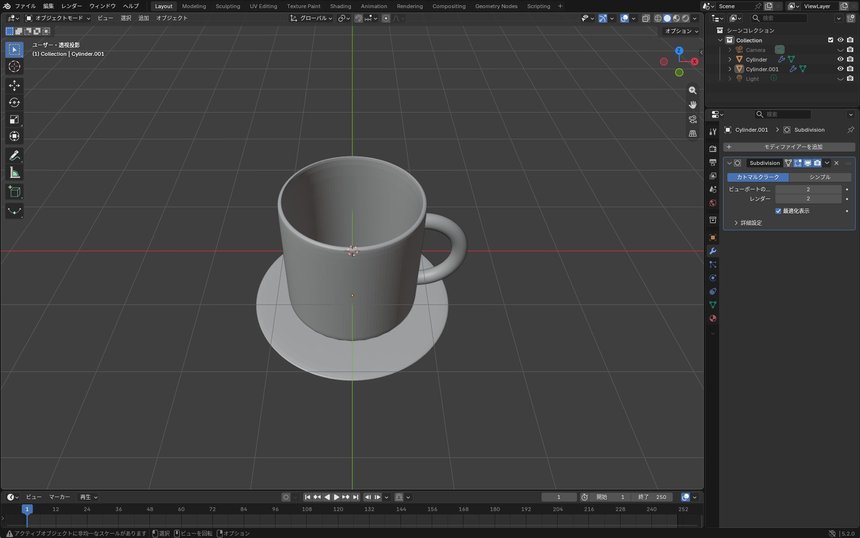
What to do next
With that, you've used Blender's core operations to build a coffee cup from scratch.
If that felt like a lot to take in, these four points are enough to build a shape.
- Viewport navigation (Numpad 1 brings you back to the front view)
- G, R, S (with an axis constraint)
- Switching between Object Mode and Edit Mode (Tab)
- Extrude (E)
Next, let's move on to materials, giving your 3D model color and texture. Using this same cup, we'll give it a ceramic-like look, and also cover how to give just the handle a metallic finish.
Next article: Blender Material Basics: Base Color, Roughness, and MetallicFrequently asked questions
Q. I deleted the default cube. Can I get it back?
A. Yes. Press Ctrl+Z to undo, one step at a time. You can press it as many times as you need, so if something feels wrong, try it first.
Q. An object disappeared. Was it deleted?
A. It's more likely hidden than deleted. Press Alt+H to reveal every object you've hidden (see the supplementary column "Troubleshooting: a quick-reference guide" for details).
Q. My shortcut keys aren't doing anything
A. If an IME (a text input method for languages like Japanese or Chinese) is turned on, single-letter shortcuts such as G, R, S, and E may not register. Try turning it off and see if that fixes it.
Q. Is there a "correct" way to model?
A. There are several approaches, but for the basics, the method in this article, building up from primitives like cubes and cylinders (box modeling), is a good place to start. See the supplementary column "What kinds of modeling approaches are there?" for how it compares to other methods.
Q. Do the controls change between Blender versions?
A. The basics covered here, viewport navigation, G/R/S, and switching modes with Tab, stay largely the same across versions, so you can follow along with confidence.
Q. How do I save my finished model as an image?
A. That's done through a process called rendering. The steps are covered in Blender Rendering Basics: Reducing Noise and Shortening Render Time.
Q. My interface language switched back to English
A. If the interface language reverted, revisit the steps in How to Install Blender and Change the Interface Language.
Supplementary Columns
Troubleshooting: a quick-reference guide
The view won't behave, or zoom/pan moves strangely
Viewport navigation differs slightly depending on whether you're using a mouse or a trackpad. The basic method is "drag while holding the mouse's middle button (scroll wheel)" to rotate, but on a Mac trackpad or Magic Mouse, you can rotate just by swiping with your fingers (on a Magic Mouse, the trackpad-like area is roughly the center front of the body, swipe there to rotate the view). Panning works the same way if you hold Shift while swiping. Zooming can also be done with Ctrl+middle button drag instead of the scroll wheel, worth remembering if a scroll wheel is awkward on your setup.
Numpad 1, 3, and 7 don't work (no physical numpad on a laptop or Mac)
On keyboards without a physical numpad, like most laptops and MacBooks, shortcuts like Numpad 1 won't work as-is. Enabling "Emulate Numpad" under the Input tab in Blender's Preferences lets the number keys along the top of the keyboard stand in for the numpad instead. Note that this takes over the top-row 1 to 3 keys, so you can no longer use them to switch between vertex, edge, and face selection. Use the three icons to the right of "Edit Mode" at the top left of the viewport instead.
Can't select an object (clicking it doesn't turn it orange)
The object you're trying to select may be hidden behind another one. Rotate the view a little so you can see it, then click again.
The screen went completely black or white
This can happen if you accidentally pressed a display-toggle key, or if you've zoomed in so far that you're inside an object. Pressing Numpad 1 to return to the front view usually restores the normal display.
The toolbar or sidebar disappeared
The Toolbar (the strip of icons down the left edge) toggles with T, and the Sidebar (the detail panel on the right edge) toggles with N. If either vanished, just press the same key again.
The origin looks off, or you want to center it on screen
An object's "origin" is the reference point used for its move, rotate, and scale operations. With imported objects in particular, the visual position and the origin's position can end up out of sync.
If you just want to center it on screen without moving the origin itself: to frame only the selected object, select it and press Numpad . (period) — from the menu, this is View → Frame Selected. To take in the whole scene, press Shift+C, which resets the view so every object fits on screen (from the menu, View → Align View → Center View to Origin).
Shift+C moves more than the view: it also snaps the 3D cursor (the crosshair marking where new objects get added) back to the world origin. If you've moved the 3D cursor for your work, keep that in mind. When you only want a better look at things, Numpad . is the safer choice.
If you want to actually move the origin itself to the object's center: from the top menu, choose Object → Set Origin → Origin to Geometry.
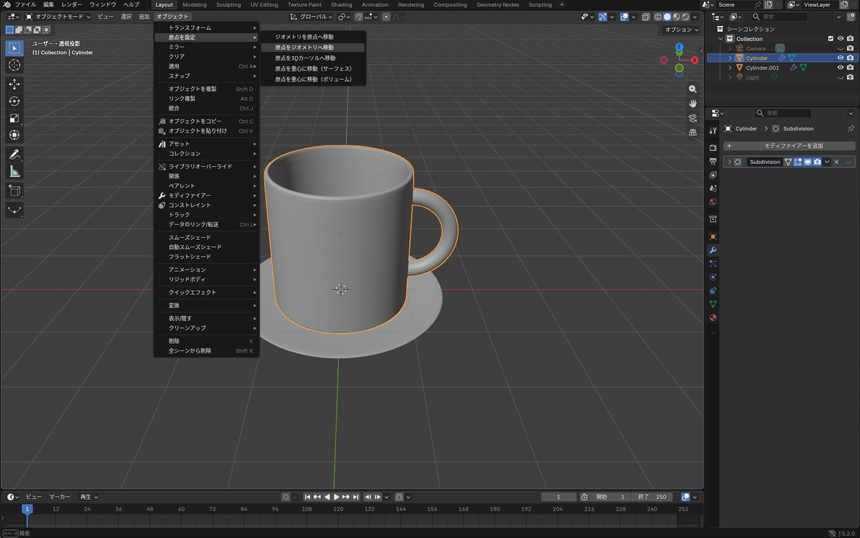
If the origin still isn't cooperating, sometimes it's actually faster to just delete the object and rebuild it.
Undoing a move, rotation, or scale
If you've been trying out move, rotate, and scale so much that you've lost track of where you started, these keys reset each one back to its default (no movement, no rotation, no scaling).
- Alt+G: reset location
- Alt+R: reset rotation
- Alt+S: reset scale
Joining objects together
To combine two or more objects into one, select all of them (whichever you selected last becomes the reference), then press Ctrl+J.
A modifier gives an unexpected shape
If a modifier (Solidify in particular — the modifier that gives a surface thickness) produces an unexpected shape, the object's scale not being set to "1" is a common cause. In Object Mode, press Ctrl+A and choose "Scale" to reset the scale to "1" without changing how the object looks. (Edit Mode opens a different menu, so switch modes first.)
What kinds of modeling approaches are there?
This article covered "building up from primitives like cubes and cylinders" (box modeling), but there are other approaches too.
- Box modeling (used in this article): shaping basic primitives, cubes, cylinders, and the like, using extrude and loop cut. It makes it easy to work toward the shape you have in mind, so it's a good fit for learning the basics first
- Tracing over reference images: placing a reference image in the background and tracing its outline with vertices, then filling in faces. Well suited to complex curved forms like human bodies or characters
- Sculpting: shaping the surface intuitively with brushes, like working with clay. Well suited to organic forms such as creatures or terrain
No single approach is the "right" one, it depends on what you're trying to make. Learning the basics with box modeling first gives you a foundation that carries over even when you move on to other approaches.