

In the previous article, Blender Modeling Basics: Core Operations Explained, we built the shape of a coffee cup. In this article, we'll give that cup color and surface qualities, a material, to finish it as a piece of ceramic.
One thing before we start. The most common stumbling block in material settings is changing the color and seeing nothing happen on screen. It isn't a mistake on your part; Blender's viewport shading mode is what's getting in the way. In this article, we'll clear that up first and then move on.
* This article was verified with Blender 5.2 LTS.
If you built the cup in the previous article, open that file and follow along. If you haven't built it yet, that's fine too. A cube or a sphere works just as well with the same steps.
01Adding a material
Before setting any color or surface quality, we first add a "material."
A material is the system that manages the qualities of an object's surface, its color, gloss, metallicness, and so on, all in one place. If you want to apply patterns or images, you use a separate feature called a "texture," which we'll cover in another article. Here we'll focus on the colors and surface qualities you can create with a material alone.
- Select the cup body
- In the Properties panel on the right side of the screen, open the red sphere icon at the very bottom (Material Properties)
- Click "New" to add a material

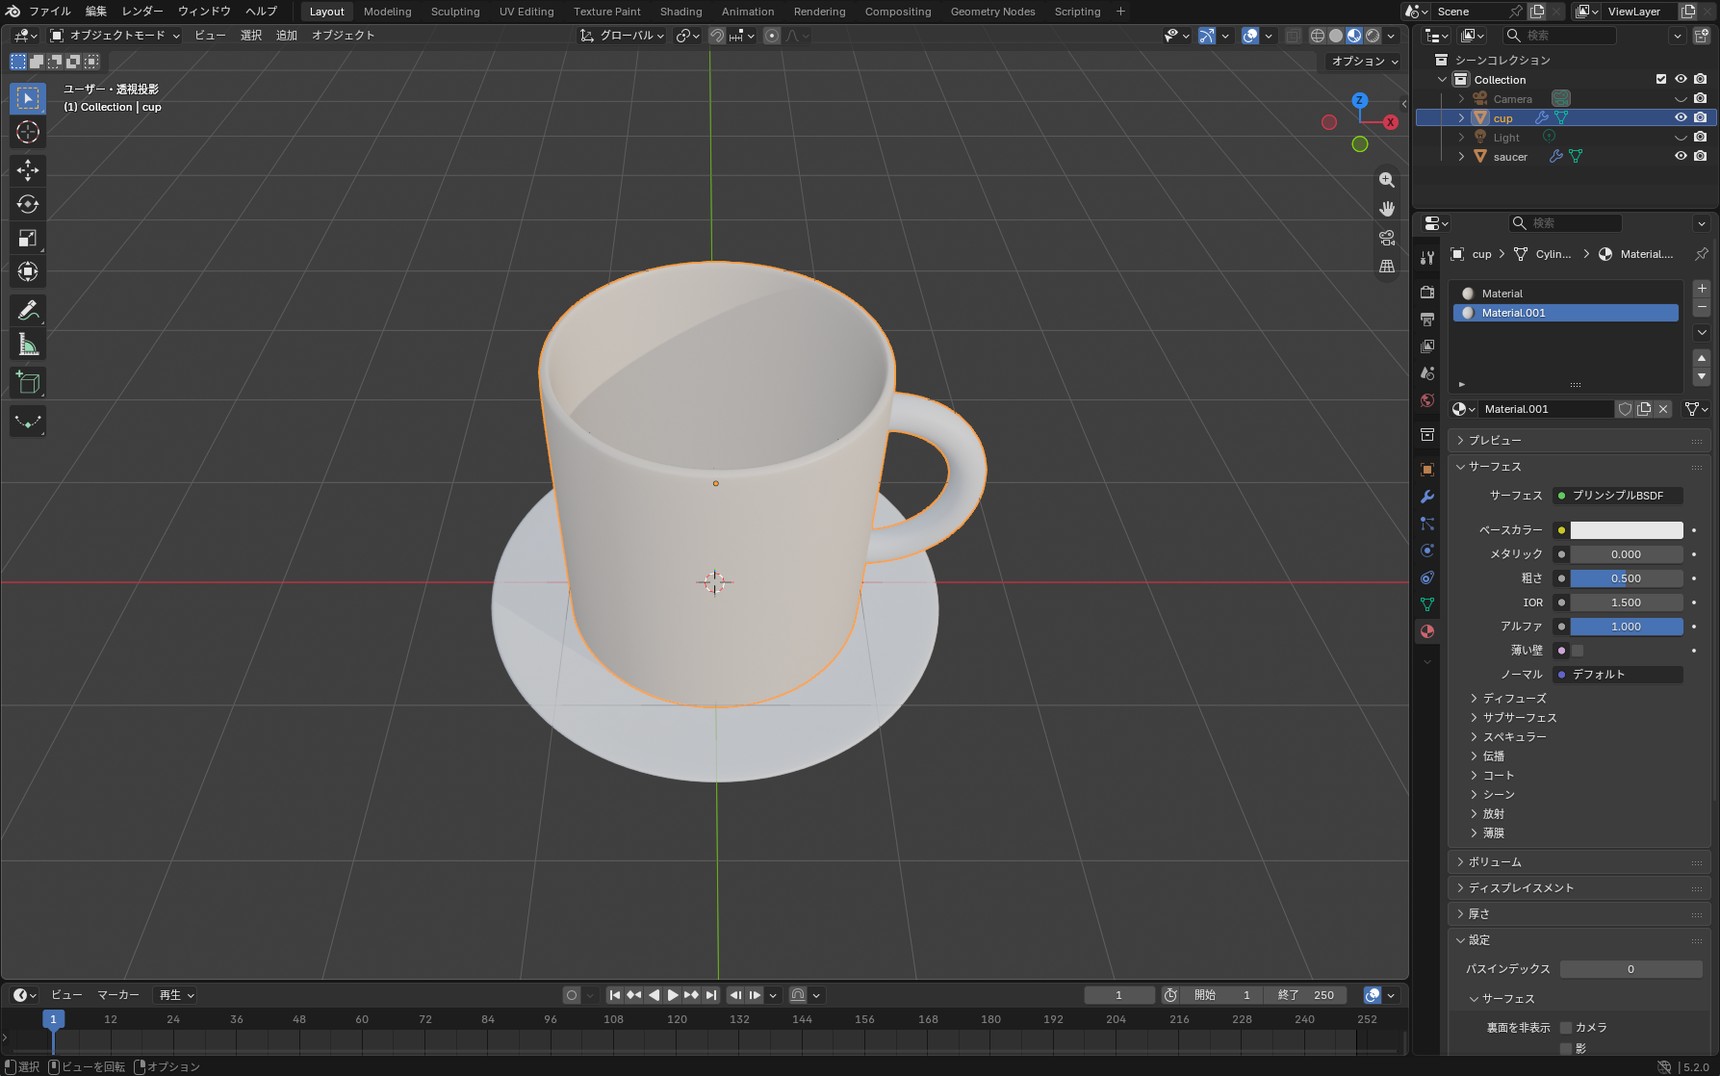
Once you add a material, a group of settings called "Principled BSDF" appears automatically. The long list of options may look daunting, but at first these three are all you need.
- Base Color: the color
- Roughness: how glossy the surface is
- Metallic: whether it's metal
02Adding color and showing it on screen
Choosing a color with Base Color
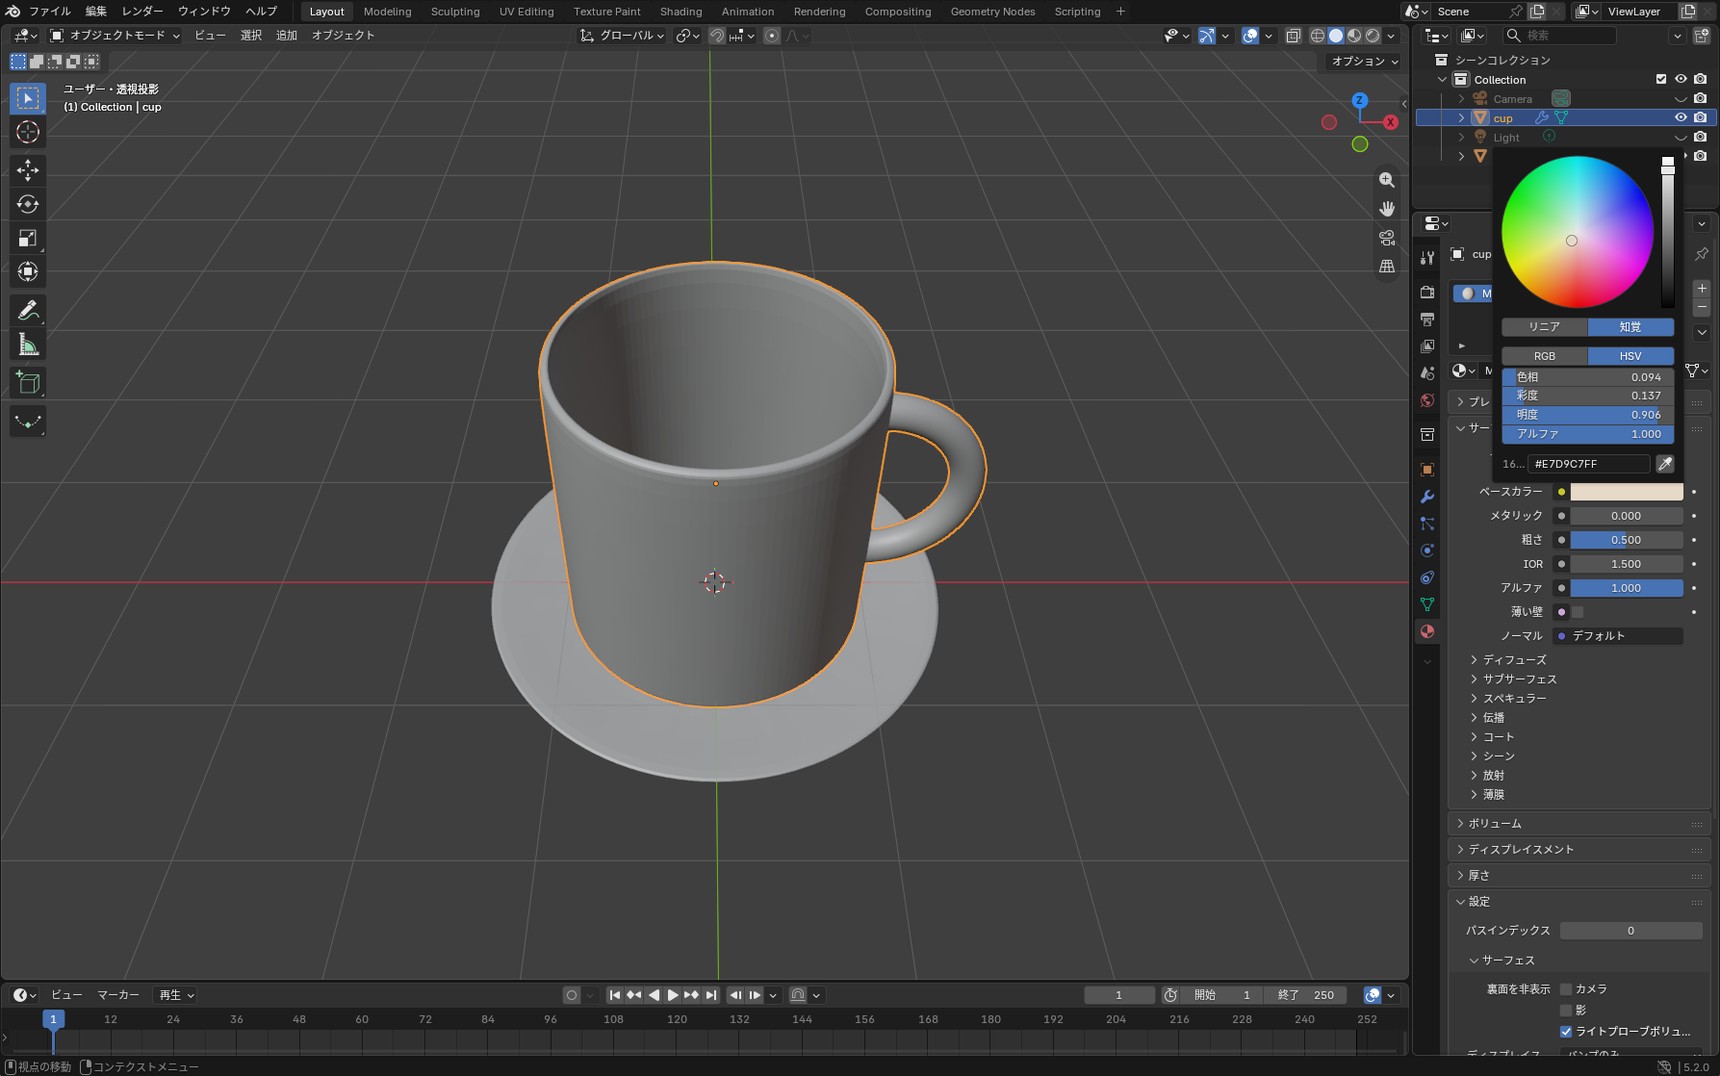
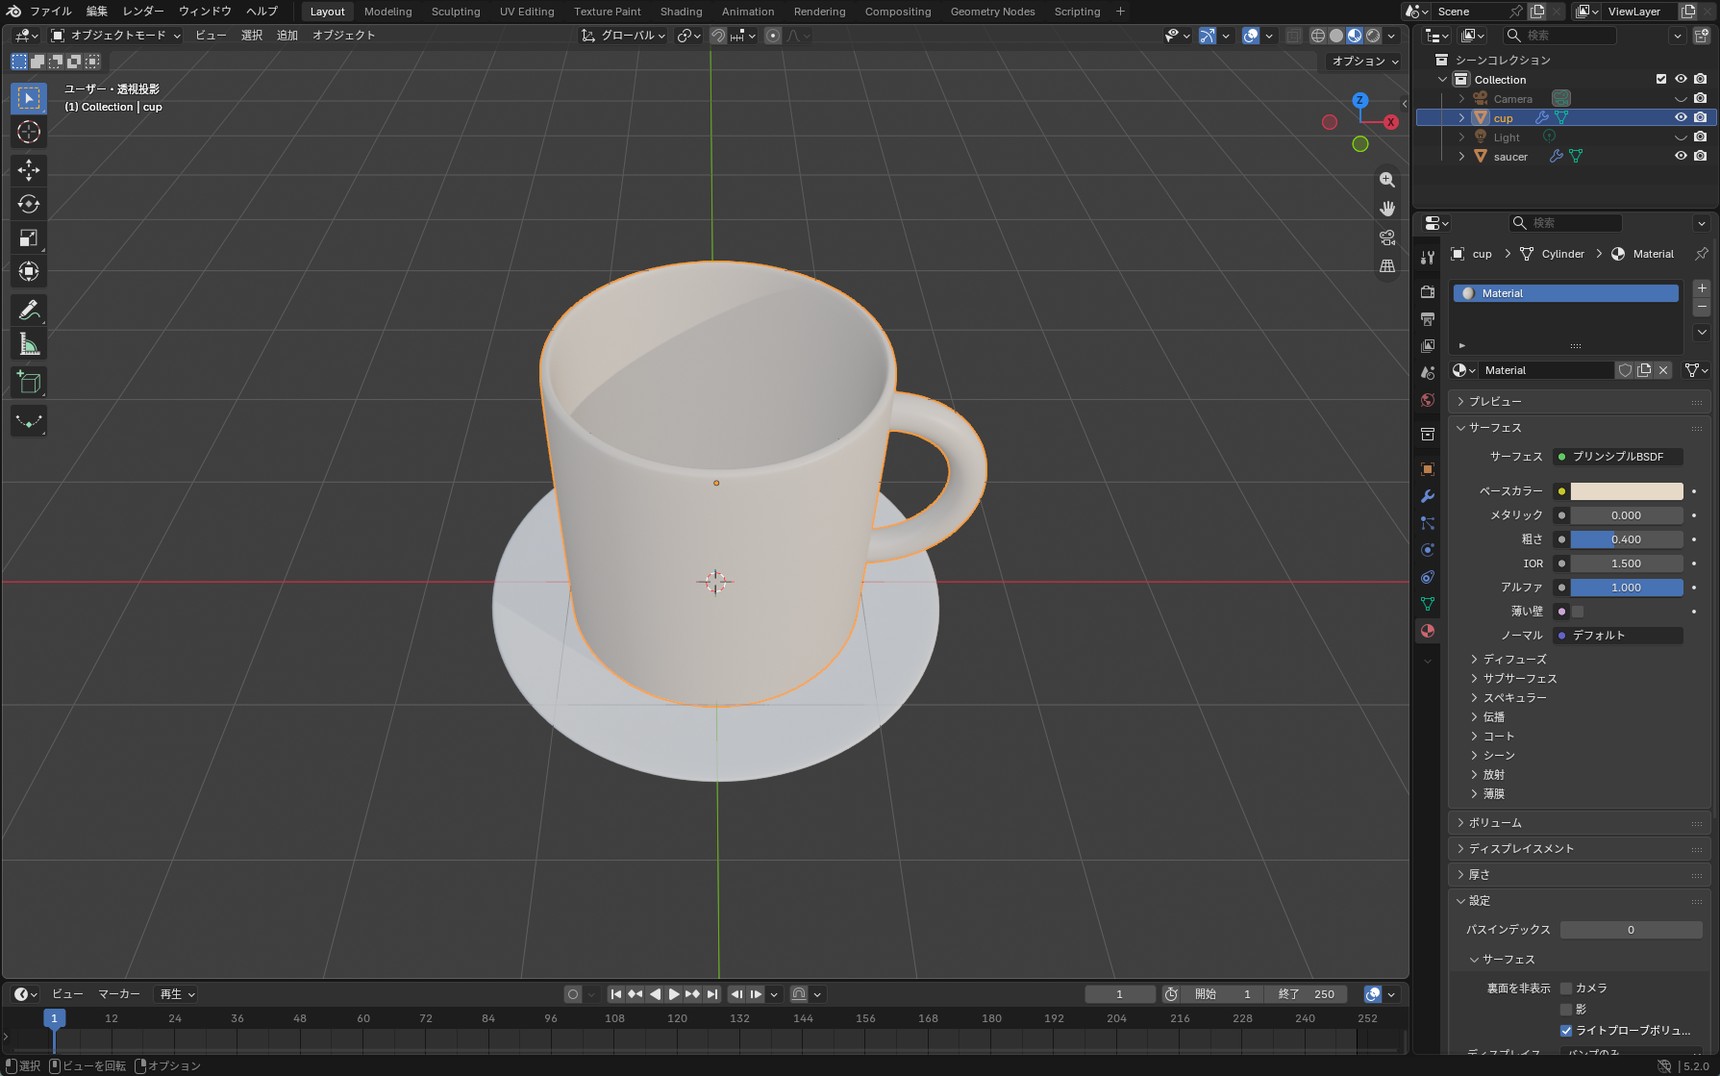
Click "Base Color" on the material and a color picker appears. Choose the color of your cup here. This time, let's go with a cream color that suits ceramic.
If nothing shows on screen, switch the shading mode
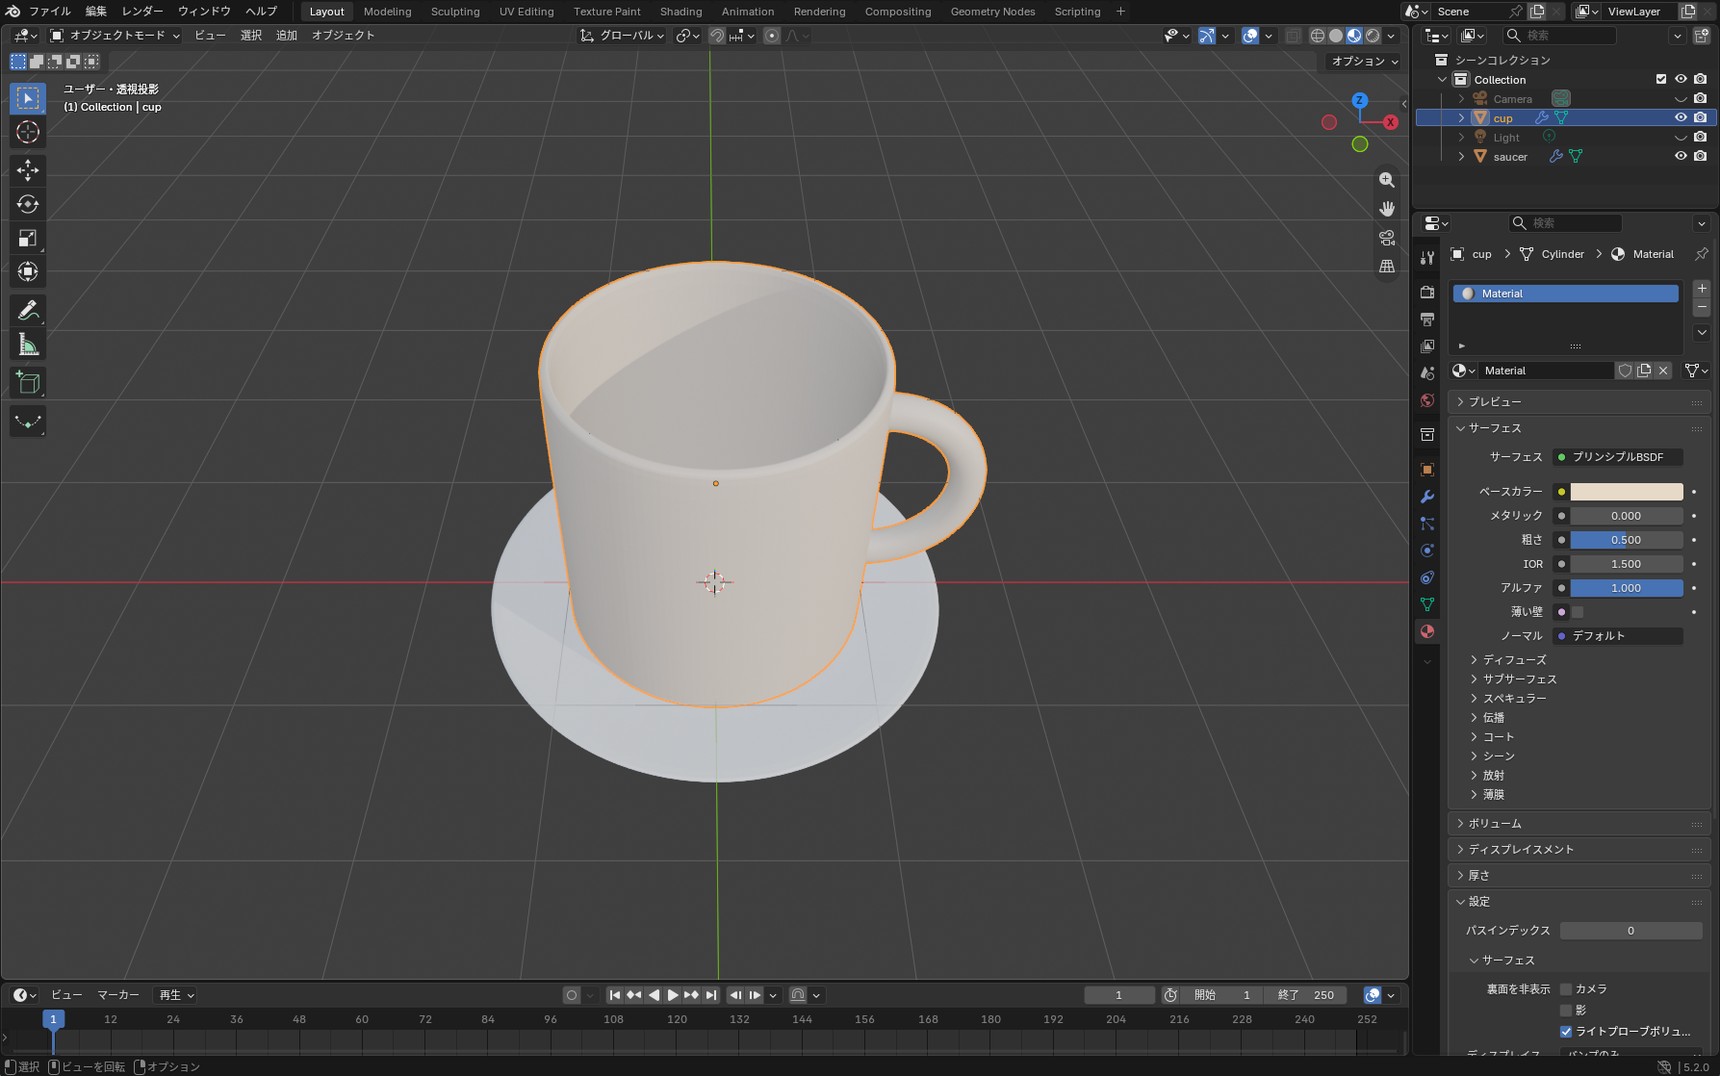
Sometimes you pick a color and the 3D viewport doesn't change at all. That's because Blender's viewport shading is still set to "Solid." Solid shading is a simplified display that makes shapes easy to check, and it works in a fundamentally different way from Material Preview. With the default settings, the colors and surface qualities you set won't appear on screen.
From the four sphere icons at the top right of the viewport, click the third from the left, "Material Preview." You can also switch from the menu that appears when you press Z.

If the sides look faceted, use "Shade Smooth"
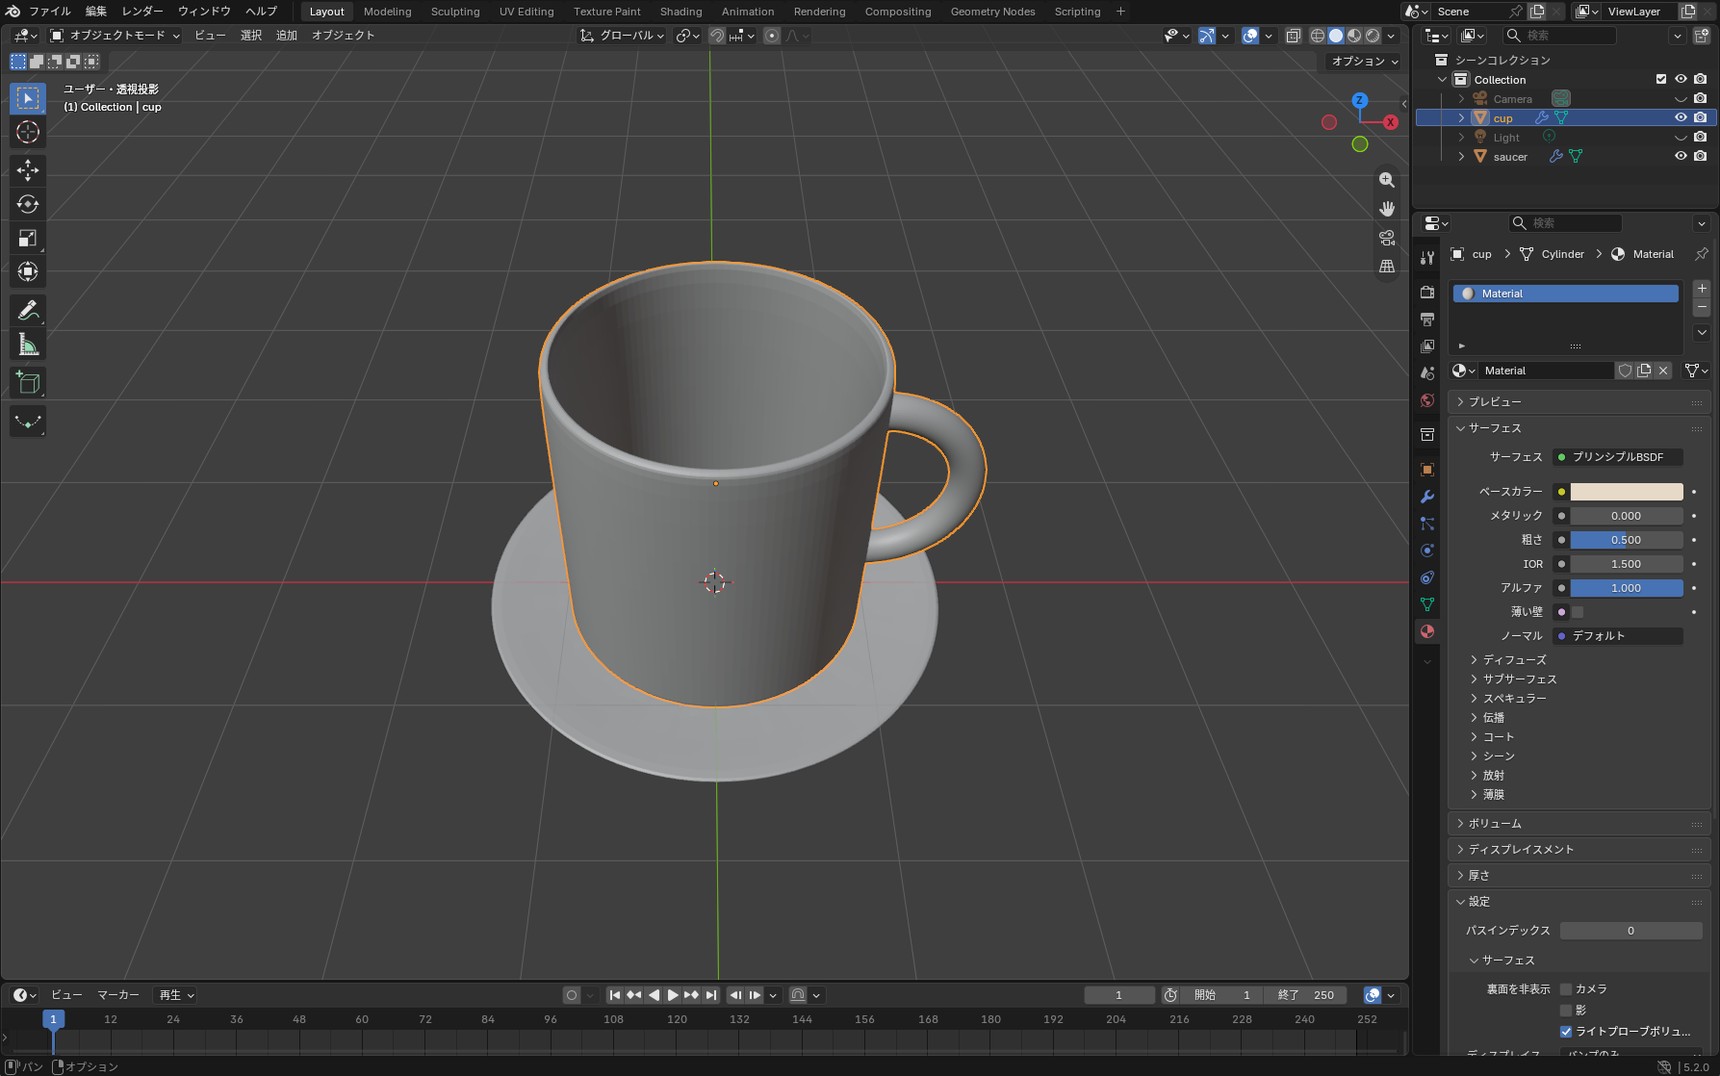
Once the color is visible, you may notice that the side of the cup looks faceted, as in the image above. That's because a rounded shape is made up of a collection of small flat faces.
In Object Mode, right-click the cup and choose "Shade Smooth" to display the surface smoothly. It doesn't change the shape itself, only how the boundaries between faces are displayed, so feel free to try it. You can apply it the same way to other objects, such as the saucer.
The gloss and reflections we'll cover next are easier to tell apart on a smooth surface, so it's worth setting this first.
03"Roughness," which determines gloss
"Roughness" is the setting that adjusts the gloss of a surface. It ranges from 0 to 1: closer to 0 gives a slick, mirror-like finish, and closer to 1 gives a matte one.
- Roughness 0.1: slick as a mirror
- Roughness 0.5: a moderately glossy finish
- Roughness 0.9: a rough, matte finish
In the comparison images below, the Base Color has been set to a dark shade to make the difference easy to see. With a light color such as cream, changing the roughness barely changes the look at all. When you check the effect yourself, try switching to a dark color first.
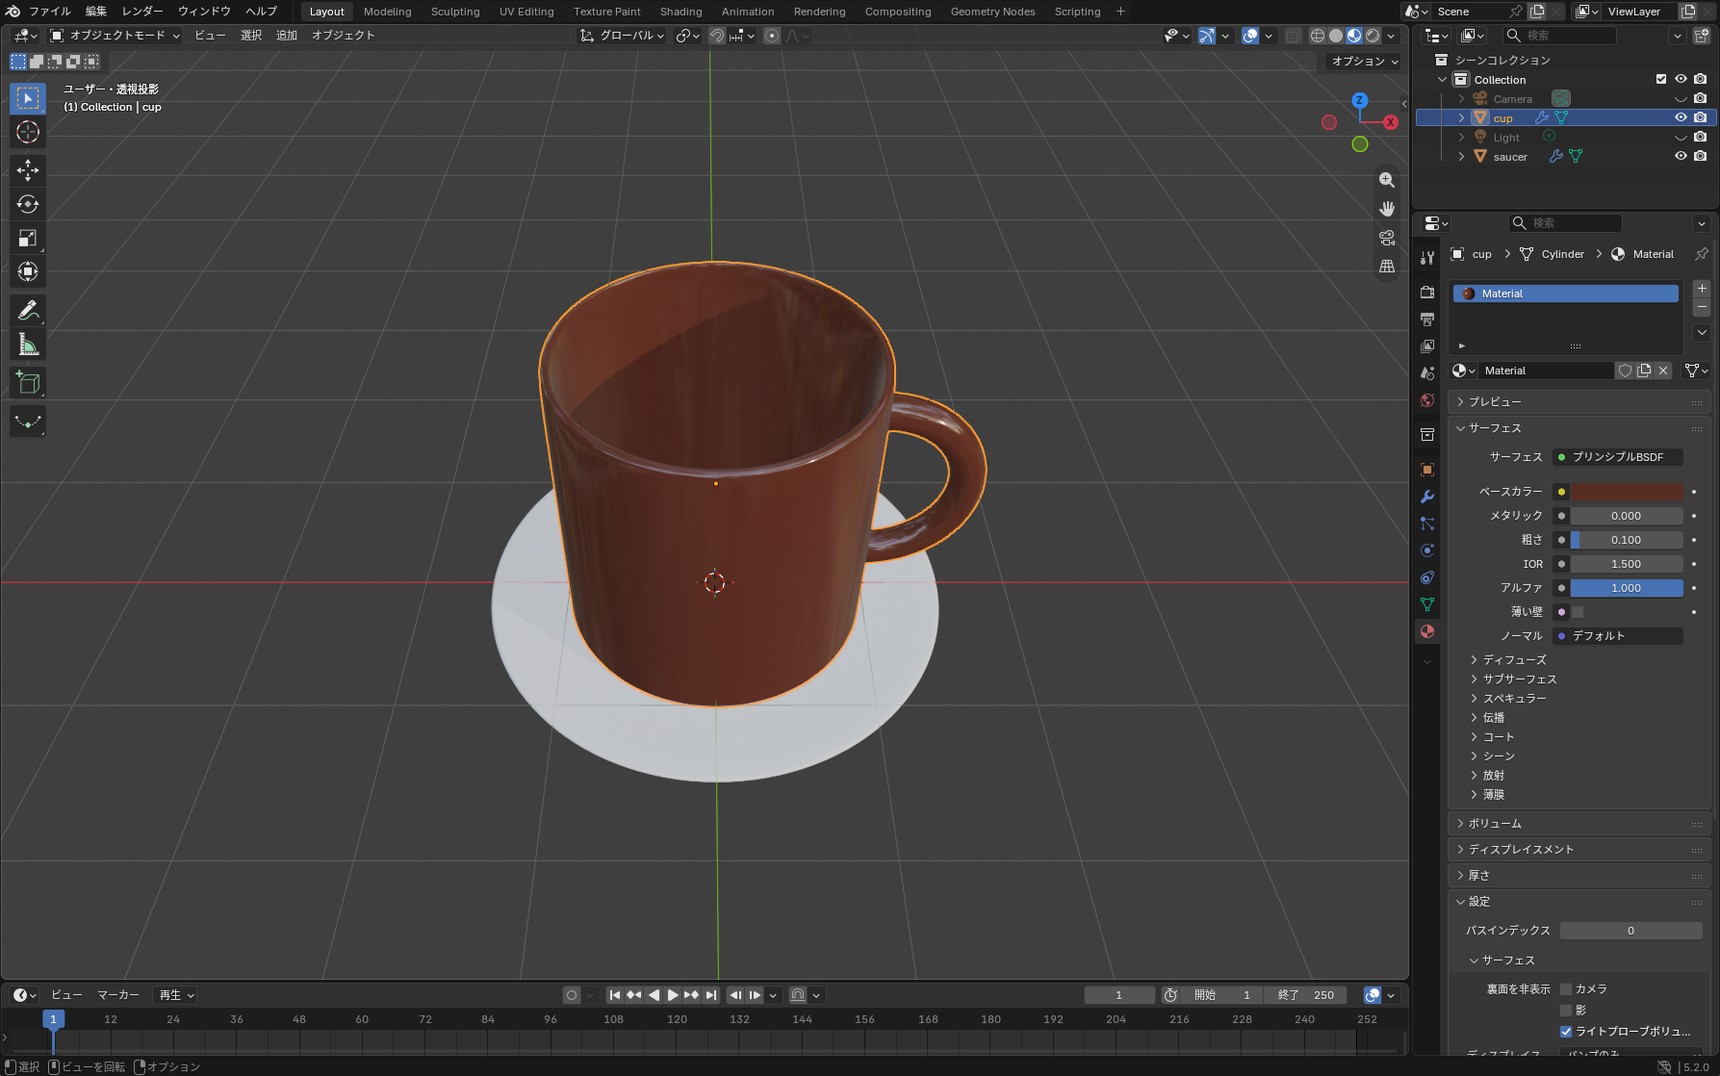

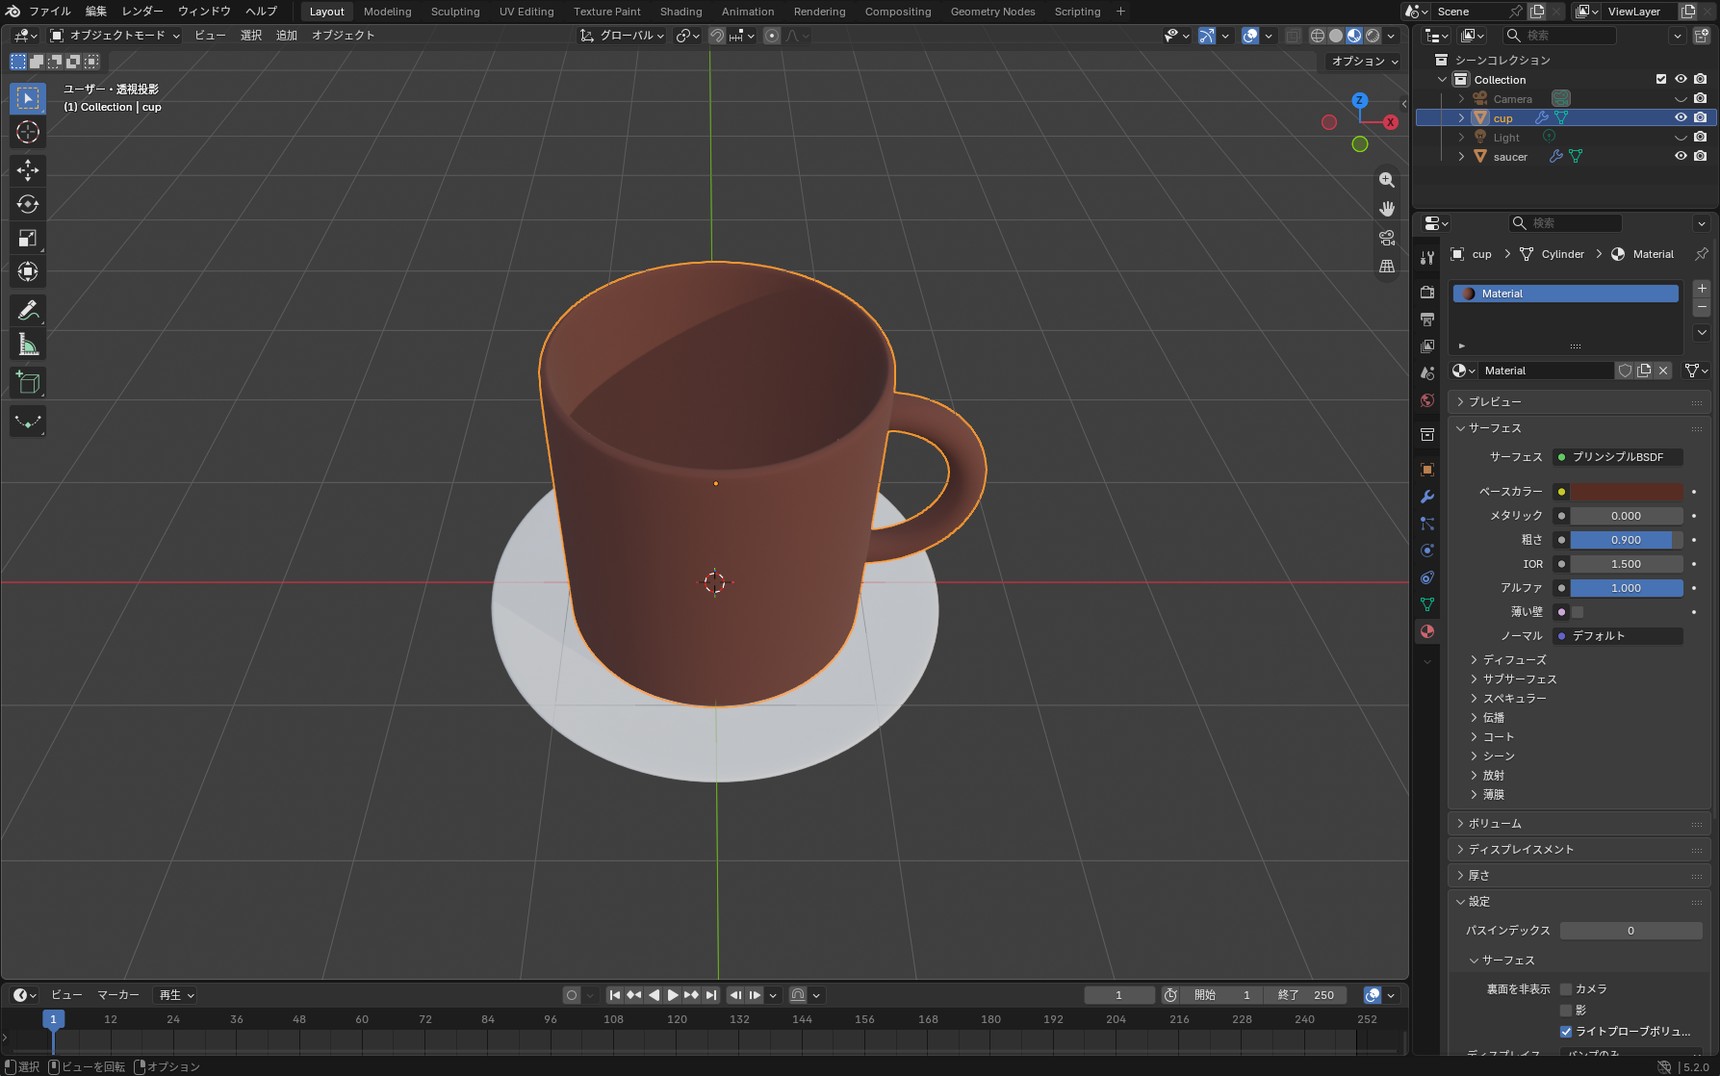
For a ceramic look, setting the roughness to around 0.4 gives a moderate gloss that reads naturally.
04"Metallic," which determines whether it's metal
"Metallic" is the setting that switches between metal and non-metal. 0 is non-metal and 1 is metal. Values in between are rarely used; as a rule, set it to either 0 or 1.
A ceramic cup isn't metal, so we'll leave Metallic at 0. Try setting it to 1 once to see how the surface changes.

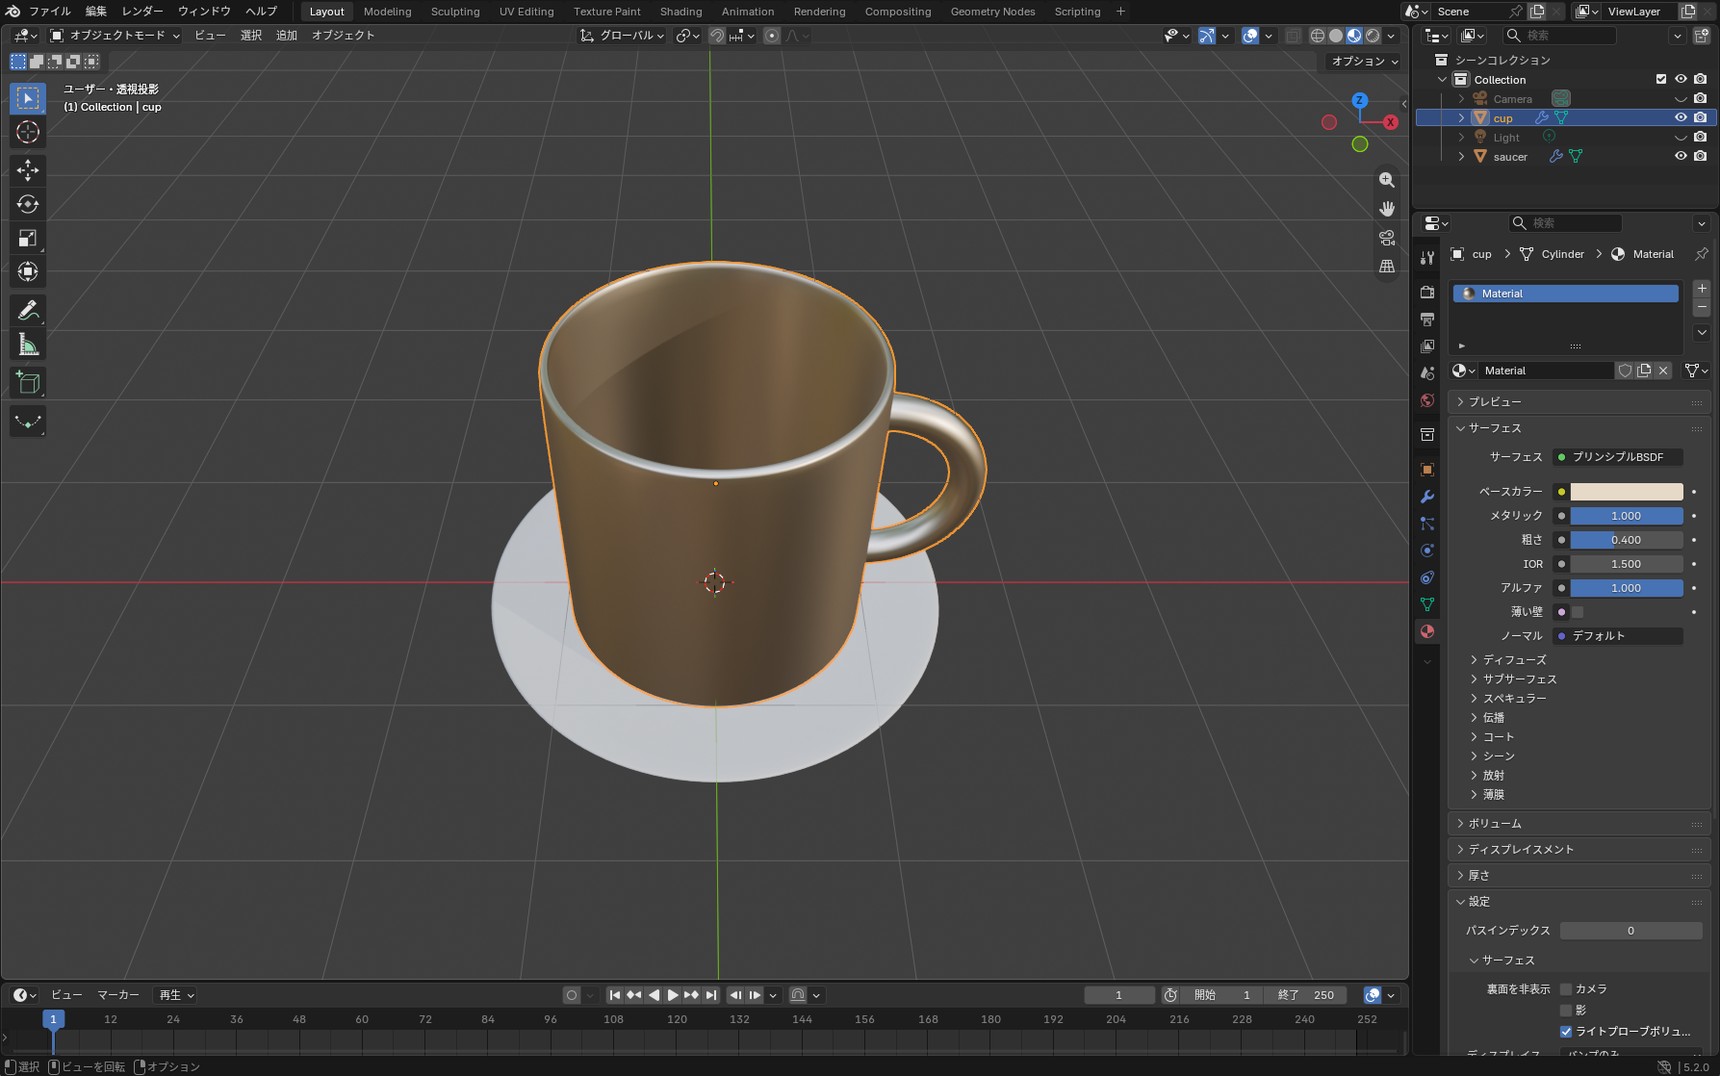
You may find that after switching to metal, the reflections are weak and the result looks cheap. That happens because there is little around the object to reflect. How it actually looks changes a great deal with the brightness of the room and the surrounding environment.
If the metal surface isn't coming out right, see the supplementary column "Troubleshooting: A Quick-Reference Guide"
05Changing the surface of just one part of the cup
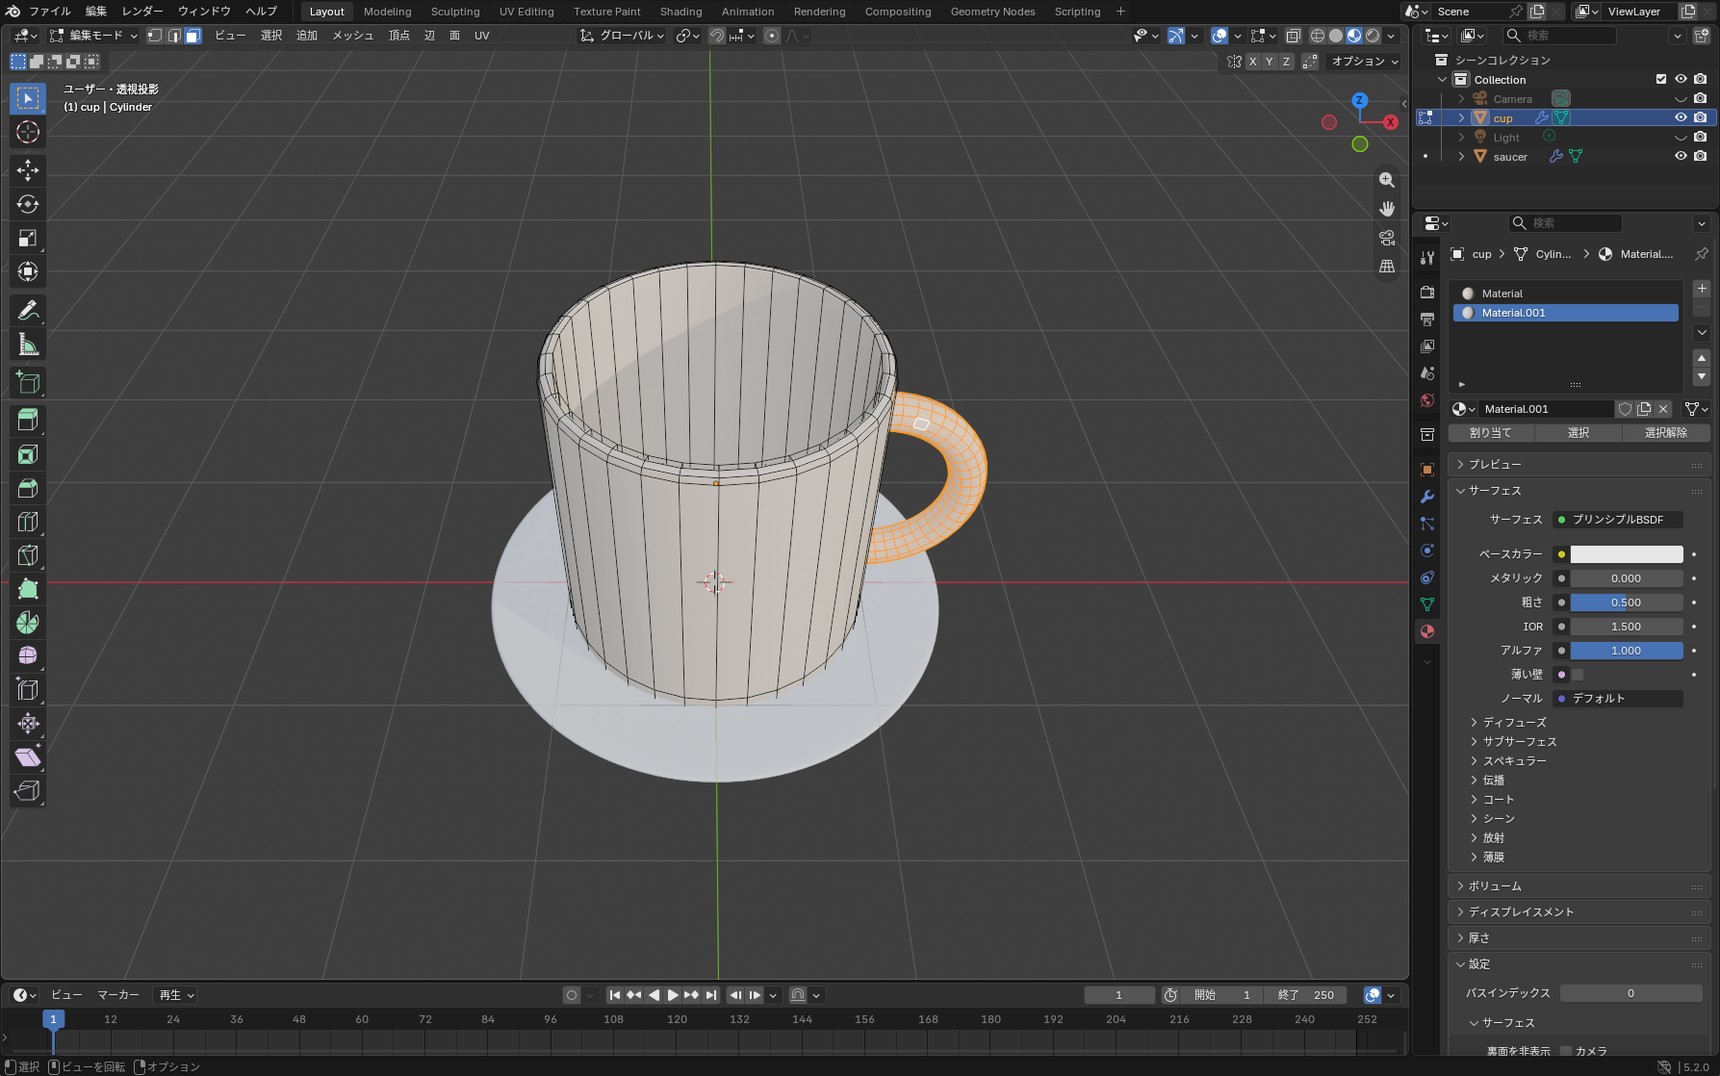
Let's leave the cup body as ceramic and make only the handle metallic. Even within a single object, you can set different materials for different faces.
- Press Tab to enter Edit Mode
- Switch to face select mode (3), hover the mouse cursor over the handle, and press L. The faces of the handle are selected together
L is the shortcut that selects all "connected mesh" at the mouse cursor's position. The handle isn't connected face-to-face with the cup body, so this one press selects the whole handle. There's no need to click the faces one at a time.
- Click "+" in Material Properties to add a material slot
- Click "New" to create a second material, then set Metallic to 1 and Roughness to around 0.2
- Click "Assign" to apply the new material to only the selected faces

06A checklist for when color and surface qualities don't show up
If you've followed the steps this far and the surface still isn't what you expected, check these four things.
- Is the viewport set to Material Preview? In Solid shading, the surface qualities you set won't appear on screen
- Is the Principled BSDF connected to the Material Output? Check in the Shader Editor that the link between the nodes hasn't come loose
- Did you forget to assign? When changing the surface per face, nothing is applied if you forget to press "Assign"
- Check the scene lights and world settings In a scene that's extremely dark or extremely bright, differences in surface quality are hard to make out
You may also notice that Material Preview and Rendered view look slightly different from each other. That's by design, and you can carry on as you are.
07What to do next
You can now give your cup color and surface qualities.
If it felt like a lot to take in, these three points are all you really need to create a surface.
- Choose the color with Base Color
- Set the gloss with Roughness and whether it's metal with Metallic
- When nothing shows up, check the viewport shading first
In the next article, we'll cover how to make the "glass" this article couldn't get to, along with "material nodes," the mechanism behind materials themselves. That's also where the checklist item in this article, whether the Principled BSDF is connected to the Material Output, will start to make sense.
After that, we'll move on to "textures," which handle the finer patterns such as wood grain and the weave of fabric that a material alone can't express.
At make.aimk, we'll keep publishing articles that take you through each stage of Blender, one at a time, with your hands on the keyboard.
08Frequently asked questions
Q. What is the difference between a material and a texture?
A. A material holds the basic surface settings such as color, gloss, and metallicness. A texture is a feature for applying patterns, like wood grain or the weave of fabric, as an image. A material alone can give you a solid-colored surface, but you need a texture for finer patterns (we'll cover this in another article).
Q. Why doesn't the color show up on screen after I change it?
A. Your viewport is probably still set to Solid. Solid shading is a simplified display for checking shape, and with the default settings the color you set won't appear on screen. Switch to Material Preview using the icons at the top right of the viewport to see what you've set.
Q. I want it to look metallic, but it just looks like gray plastic. Why?
A. Even with Metallic set to 1, weak reflections can look cheap when there is little around the object to reflect. It isn't your settings, it's the surrounding environment, such as lighting and background, changing how it looks.
Q. Can I give just one part of a single object a different color or surface quality?
A. Yes. In Edit Mode, select the faces you want to change, add a new material slot, and click Assign. That applies a different material to only the selected faces.
Q. Can I reuse a material I made on another object?
A. Yes. Click the icon next to the New button in the material slot to see a list of the materials you've already created, then pick one to apply the same material to another object.
Q. Why does it look different in Material Preview and Rendered view?
A. Because both the lighting and the drawing method differ. Material Preview uses its own dedicated lighting (an environment light) for quickly checking surface qualities, and always draws with EEVEE (a system that calculates images quickly). Rendered view, on the other hand, uses the lights you placed in the scene and whichever system you selected in the render settings (EEVEE or Cycles). The starting conditions differ, so the same material can vary in brightness and reflection. Both are working as intended. Use Rendered view as your reference for the final look.
Q. How do I create a transparent, glass-like surface?
A. Separately from the three settings covered in this article (Base Color, Roughness, and Metallic), you use a setting called Transmission. Glass, however, often won't turn out as transparent as you expect by raising that value alone; it also requires an understanding of the render settings and of how the material itself is put together. For that reason, we'll cover how to make glass in the next article, alongside an explanation of material nodes.
Supplementary columns
Troubleshooting: A Quick-Reference Guide
Surface qualities look washed out because of scene light and world settings
At the top right of the 3D viewport, click the down arrow to the right of the shading mode icons to open the display settings. If "Scene Lights" and "Scene World" are turned on in there, the result differs from how Material Preview is meant to look, and surfaces can appear washed out or dark. If you want to check the material's surface qualities on their own, try unchecking these.
Too many material slots to keep track of
Repeatedly changing the surface per face can leave you with unused material slots. To remove one you no longer need, select that slot and press the "−" button.
You may also see a number to the right of a material's name. That's a count of how many objects use that material, not a count of faces. Removing a numbered material from this object won't remove the surface from the other objects.
The metal's reflections are weak and it looks cheap
If it doesn't look like metal even with Metallic set to 1, the cause is that there is little in the surroundings to reflect. Changing the background (world) to a brighter environment, or setting an HDRI (an environment image that surrounds the scene), makes metallic reflections easier to achieve.
Going further with surfaces (glass and others)
The main part of this article covered only three settings, Base Color, Roughness, and Metallic, but the Principled BSDF has other settings for creating surface qualities as well. A notable one is "Transmission" — how much light passes through, in other words how transparent glass appears.
Glass, however, often won't turn out as transparent as you expect by raising that value alone; it also requires an understanding of the render settings and of how the material itself is put together. Since that needs a proper explanation of its own, we'll cover how to make glass in the next article, alongside an explanation of material nodes.
Quick reference for surface qualities (approximate)
| Surface | Base Color | Roughness | Metallic |
|---|---|---|---|
| Ceramic | White to cream | Around 0.4 | 0 |
| Metal (matte) | Grays | 0.4–0.6 | 1 |
| Metal (mirror) | Grays | 0.0–0.1 | 1 |
| Plastic | Any color | 0.2–0.3 | 0 |